Vendor Account Synchronization

Contents
This section will outline how to synchronize vendors between entrée and QuickBooks. Typically vendor accounts in entrée are linked into the corresponding vendor accounts in QuickBooks using the Link Vendors utility. However as part of the initial setup of entrée.QB, operators are allowed to export any vendors in entrée into QuickBooks or import QuickBooks vendors into entrée.
For additional information about Vendors see the Vendor File Maintenance in your entrée System Guide.
Linking Vendor Accounts
For most installations entrée and QuickBooks each have a vendor file, which is being maintained separately within each system. The Link Vendors utility will import and store the internal QuickBooks vendor ID directly within the existing entrée vendor file.
Once your vendors have been linked together, for ongoing maintenance of Vendor accounts you have two options:
•Import Vendors utility, which will refresh the entrée vendor file with data from QuickBooks.
•Export Vendors utility which will refresh the Vendor name and address properties within QuickBooks with the export data from entrée.
 Your entrée vendors must be linked or exported into QuickBooks before any purchase order payables can be posted into QuickBooks.
Grid Column |
Description |
Can Edit |
|---|---|---|
entrée ID |
This column will display the vendor ID as defined in entrée. |
|
Company |
This column will display the vendor's company name as defined in entree. |
|
External Company |
This column will display the vendor's company name as defined in QuickBooks. |
|
External ID |
The internal ID assigned to the vendor by QuickBooks. entrée.QB requires this code to link the entrée vendor to the QuickBooks vendor |
þ |
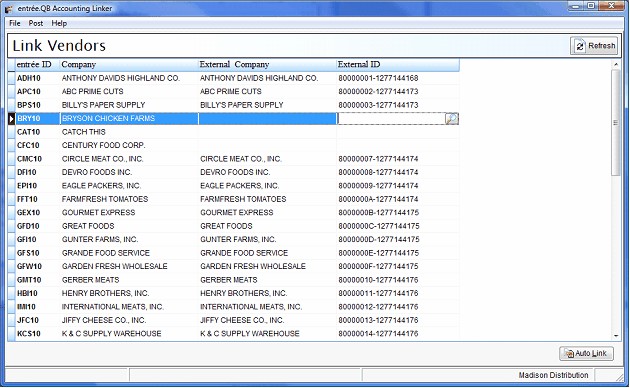
Using the Link Vendors Utility
To run the Link Vendors Utility in entrée.QB use menu path: File > Vendors > Link
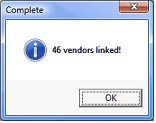
It is recommended the first time that you use the Link Vendors utility that you take advantage of the Auto Link feature, by clicking the Auto Link button in the lower right corner of the Link Vendors utility. Auto Link works by attempting to match the entrée and QuickBooks vendor company names. If a successful match is found, the vendors will be linked automatically.
Once this process finishes, the Complete dialog box will display how many vendors were able to be linked automatically. |
|
Manually Linking Vendor Accounts
Manual linking can be used to link a vendor that was not able to be linked with the Auto Link feature. If the External Company & ID field already contains a value then the vendor is already linked.
| 1. | Select the entrée vendor that you wish to link to a QuickBooks vendor and press the Enter key. This will place the cursor in the External ID field for the selected vendor. |
| 2. | Click the Search button to the right of the External ID field or press the F5 key to open the Vendor Search screen. This screen will contain all of the vendors that currently exist in QuickBooks. |
The Vendor Search screen allows you to search for a QuickBooks vendor by any of the columns in the search grid except for "Active". To change the field to search on you can click the column heading or select the column from the drop down list on the left of the search header.
3. Once the desired vendor is selected, press the OK to return to the Link Vendors utility. The vendor will now be linked and the External Company and External ID fields will contain the correct values from QuickBooks based on the selected vendor.
Vendor Accounts Maintenance
•Removing an Existing Vendor Account
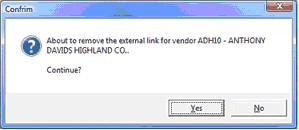
You may run into an issue where the wrong QuickBooks vendor got linked to an entrée vendor. Removing the link between the two vendors is a simple process.
| 1. | Select the entrée vendor that you wish to remove the link to and press the Enter key. |
| 2. | Clear the current value from the External ID field. |
| 3. | You will then be prompted for confirmation. |
| 4. | Click Yes to disassociate the entrée vendor for the QuickBooks vendor. |
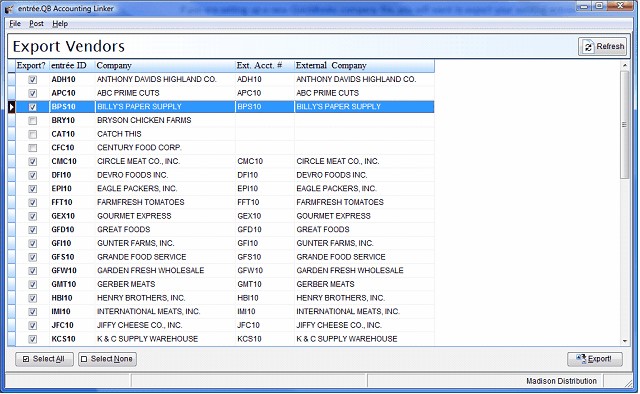
Exporting Vendor Accounts
If you are setting up a new QuickBooks company file, you will want to export your existing entrée vendors into QuickBooks. This will allow for the creation of payables from an entrée purchase order.
You may occasionally want to refresh the vendor name and address data in QuickBooks from the data contained in the entrée vendor file. Both of these operations are performed with the Export Vendors utility.
Grid Column |
Description |
|---|---|
Export? |
Place a check in this field if the entrée vendor should be exported into QuickBooks. |
entrée ID |
This column will display the vendor ID as defined in entrée. |
Company |
This column will display the vendor's company name as defined in entree. |
External Acct # |
This column will display the vendor ID as defined in QuickBooks. Typically this is the same as the entrée vendor ID |
External Company |
This column will display the vendor's company name as defined in QuickBooks. Typically this is the same as the entrée vendor company name. |
•Using the Export Vendors Utility
| 1. | To run the Export Vendors Utility in entrée.QB use menu path: File > Vendors > Export |
| 2. | Select the vendors that you wish to export into QuickBooks, (all valid vendors are selected by default). |
•Vendors that should be exported will need to be checked in the "Export?" column.
•The checked state of a vendor can be toggled by…
▪Double clicking the line with the vendor to export in the grid.
▪Pressing the "Enter" or "Space" key will toggle the selected row.
▪All vendors will be checked by clicking the "Select All" button.
▪All vendors will be unchecked by clicking the "Select None" button.
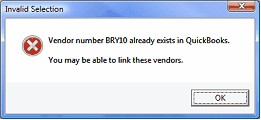
| 3. | If you are creating a new vendor, a vendor with the same company name as the entrée vendor cannot already exist in QuickBooks. If entrée.QB detects that a vendor exists in QuickBooks with the same company name as the vendor you are trying to create, you will be presented with the Invalid Selection error dialog indicating that these vendors should be linked. |
| 4. | Once the vendors to export have been selected, click Export. |
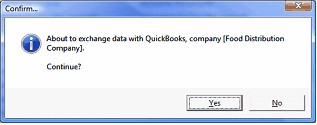
| 5. | A Confirm dialog box will display a message indicating the QuickBooks company file that you are about to exchange data with. |
| 6. | Click Yes to continue with the export. |
|
|
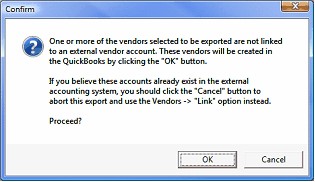
| 8. | Click OK to continue. |
9. During the export process, the vendor grid will be hidden and replaced with a message stating “Exporting data…Please wait”.
•You will also notice a progress indicator in the lower left corner of the entrée.QB application window.

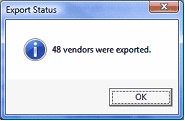
10. Upon completion, the Export Status dialog box will display the number of vendors that were exported. |
|
Importing Vendor Accounts
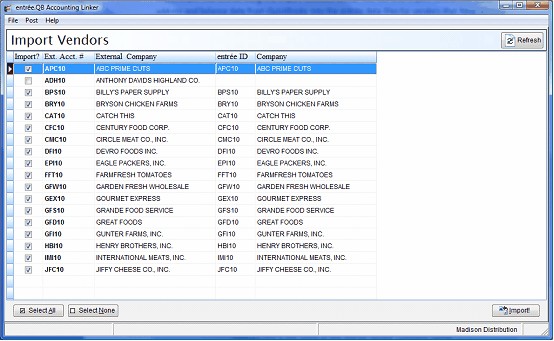
If you have vendors that are setup in QuickBooks that do not exist in entrée, and you want to use to generate payables or bills for those vendors from an entrée purchase order, you will need to first import them into entrée using the Import Vendors utility.
You can also import vendor company address and balance data from QuickBooks into the entrée data files for vendors that have already been exported or linked using entrée.QB.
Grid Column |
Description |
|---|---|
Import? |
Place a check in this field if the QuickBooks vendor should be exported into entrée. |
External Acct # |
This column will display the vendor ID as defined in QuickBooks. Typically this is the same as the entrée vendor ID. |
External Company |
This column will display the vendor's company name as defined in QuickBooks. Typically this is the same as the entrée vendor company name. |
entrée ID |
This column will display the vendor ID as defined in entrée. |
Company |
This column will display the vendor's company name as defined in entree. |
•Using the Import Vendors Utility
| 1. | To run the Import Vendors Utility in entrée.QB use menu path: File > Vendors > Import |
| 2. | Select the vendors that you wish to import into QuickBooks, (all valid vendors are selected by default). |
•Vendors that should be imported will need to be checked in the "Import?" column.
•The checked state of a vendor can be toggled by…
▪Double clicking the line with the vendor to import in the grid.
▪Pressing the "Enter" or "Space" key will toggle the selected row.
▪All vendors will be checked by clicking the "Select All" button.
▪All vendors will be unchecked by clicking the "Select None" button.
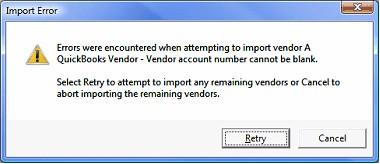
| 3. | If you are creating new vendors in entrée, the vendor in QuickBooks, must have an account number defined. |
•If a vendor does not have an account number when attempting to create the vendor in entrée, the Import Error dialog box will display. Click the Retry button to complete the import of any remaining vendors.
•Then, go back into QuickBooks and assign account numbers to the vendor(s) that produced the error message.
•Once account number assignment is completed, you will be able to import them into entrée.
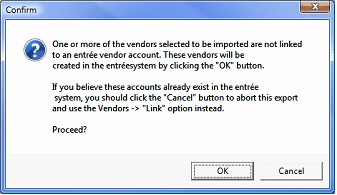
| 4. | Once the vendors to export have been selected, click Import. |
A warning will say new vendors will be created in entrée. This is just an informational message. |
|
| 6. | Click OK to continue. |
| 7. | During the import process, the vendor grid will be hidden and replaced with a message stating “Importing data…Please wait”. You will also notice a progress indicator in the lower left corner of the entrée.QB application window. |
|
|
