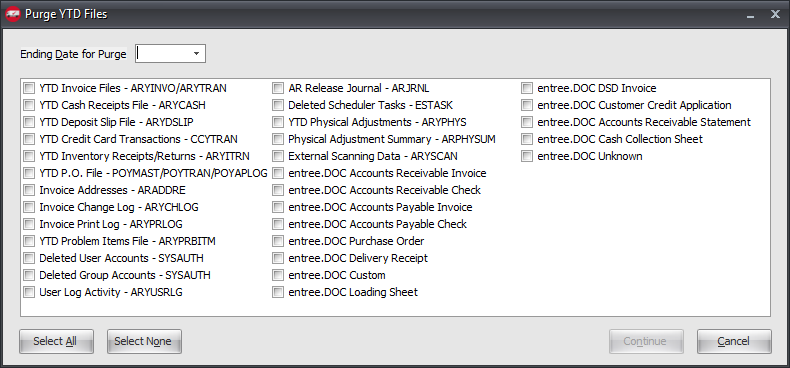
Overview Purge Year-to-date Files
| 1. | Enter a date or use the arrow to access the calendar and set the Ending Date for Purge value. All entries with a transaction date up to and including the date entered in the field will be removed from the entrée system. |

| 2. | Select the data files to be purged. |
▪Use Select All to choose all the files.
▪Use Select None and click Cancel to abort the purge.
 See the File Selection List topic for more detailed information about these files before making your selections.
| 3. | Once your files selections have been made click Continue. |
4. When the purge year-to-date files utility completes the Purging Completed dialog will be displayed, click OK to close.
