Mod #368 Costco EDI

Contents
The Costco EDI Import process is accessed from the entree Import utility using the “Costco EDI” option. This utility imports an EDI 850 Purchase Order from Costco locations and converts it into an entrée invoice. Once the associated invoice has been printed, it should be exported using the entrée Export utility with the Costco EDI option selected. This will transmit an 810 Invoice. Once the invoice has been exported no further edits to that invoice will be allowed.
An EDI 824 file will be sent by Costco if they receive an 810 invoice that contains errors. When the 824 is imported an e-mail will be sent to the designated contact assigned in the Export Configuration screen. The referenced invoice number along with error details will included in the email. The invoice's mod flag in ARINVOI will be automatically cleared so it can be re-exported.
The utility will have the ability to receive and process an “850-R” replacement purchase order. An 850R is similar to the 850, using the same PO number but may have changes to the dates, items, quantities and pricing. When a replacement purchase order is received the original invoice will be canceled in entrée and a new invoice will be created utilizing the same PO number.
Imports/Exports can be manually executed as well as automated through the TEA Scheduling utility.
entrée Folders
•The import staging: necs_shared\01\Costco\Import\
•The import archive: necs_shared\01\Costco\Import\Archive\
•The export staging: necs_shared\01\Costco\Export\
•The export archive: necs_shared\01\Costco\Export\Archive\
•
•xx in the above paths is a place holder for the entrée company number
entrée Configuration and Settings
Utility |
Section |
Field |
Value |
Customer File Maintenance
|
Miscellaneous Tab, in the Export Options section
|
Costco EDI
|
Checked for Costco accounts |
Customer File Maintenance
|
Miscellaneous Tab, in the DEX Setup group
|
DUNS Code |
DUNS + 4 (Identifies the ShipTo customer) |
Files Exchanged
Document |
Import/Export |
Naming convention |
Send/Receive Frequency
|
Format (edi/flat/csv) |
850 Purchase Order |
Import |
850_mmddyyhhmmsszzzz.edi |
Configurable via Scheduling Utility entrée Import Task |
EDI |
824 Application Advice |
Import |
TBD
|
Configurable via Scheduling Utility entrée Import Task |
EDI |
810 Invoice
|
Export |
810_mmddyyhhmmsszzzz.edi
|
Configurable via Scheduling Utility entrée Export Task |
EDI
|
EDI Configuration and Setup
Property |
Import/Export Both |
Value |
Notes |
Sender ID
|
Export
|
Provided during implementation
|
Populates ISA06 and GS02 with a 12 qualifier in ISA05 |
Receiver ID
|
Export
|
Provided during implementation |
Populates ISA08 and GS03 with a 01 qualifier in ISA07 |
824 Contact |
N/A |
Email Address |
The receiver will be emailed when an 824 is imported |
Transfer Type
FTP
Import Configuration
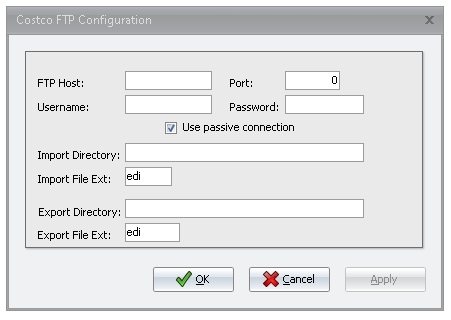
1. Go to the Add-Ons ribbon menu click Import/Export icon. 2. Select Import Data and the entrée Import dialog will open. 3. Select Costco in the drop down menu. 4.Click Configure to enter in your FTP connection settings. |
|
5.Enter the FTP credentials supplied by Costco when setting up your account. 6.Import Directory: Enter the name of the directory on the FTP site where the purchase orders will be imported from. 7.Export Directory: The name of the directory on the FTP site where the invoices will be exported to. 8.Click Apply |
|
Import
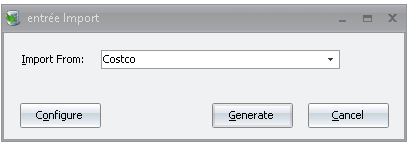
1. Go to the Add-Ons ribbon menu click Import/Export icon.
2. Select Import Data and the entrée Import dialog will open.
3. Select Costco from the drop down menu.
4. Click Generate.
Export
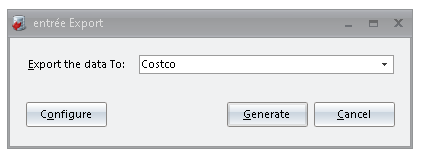
1. Go to the Add-Ons ribbon menu click Import/Export icon. 2. Select Export Data and the entrée Export dialog will open. 3. Select Costco Export from the drop down menu.
|
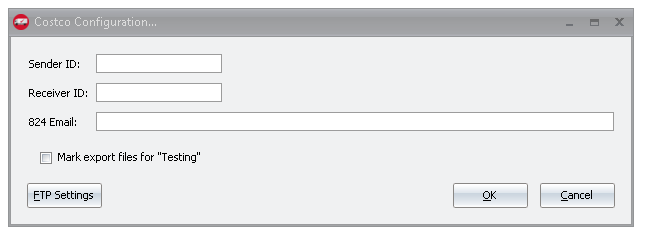
|
4. You can access the Sender ID, Receiver ID, and the 824 Email setting by clicking on Configure. 5. Once set click "OK"
Note: The FTP Settings seen is the same as the Import option.
|
|
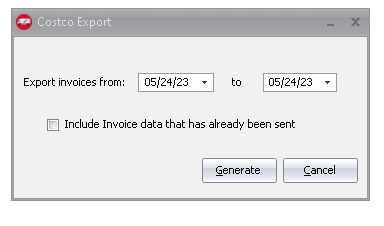
6. Select your invoice date range and what files you are exporting. There is also a Include data that has already been sent option. 7. Click Generate.
|
|