Mod #1310 Portillo Data Exchange

Contents
For Portillo's Restaurant Group transfers Invoices, Credit Memos and POs.
Updates
V4.7 Added an Exclude Credit Memos from being sent checkbox option to the Portillo’s invoice export screen.
V4.5.0
•Updated the Import so that Route can be applied.
•Added support to process a new Vendor ID element in the order file. This identifies the purchasing account and gets returned to Portillo's on the created invoice.
V4.2.1 Updated the Import to prevent creation of invoices for duplicate orders.
V4.2.0 Updated the Portillo's invoice export to exclude unprinted invoices.
V4.0.42
•Updated the import process to avoid duplicate orders when an invalid or blank file was received from Portillo.
•Customer File Maintenance has been updated to add the new six character long Portillos Dist ID field on the Miscellaneous Tab. This provides a per customer override of the default Distributor ID value.
•The export process has been modified to check for the new Portillos Dist ID field in the Customer File and if not blank it will be use that ID for the export. If the field is blank it will use the default Dist ID entered in the Portillo Export Configuration dialog.
V4.0.40
•Revised the FTP upload process for Portillo Export and fixed an issue that was causing FTP errors not to be reported back to the end user correctly.
•Added code to prevent empty files from being processed by the xml parser for Portillo Import.
V4.0.37 Added PO numbers to the EDI files exported.
V4.0.39
•Updated to eliminate multi-threading feature and implement an import utility to integrate with the centralized Import form.
•Updated to add support for scheduling the Import and Export using the entrée Task Execution Application (TEA).
Access: entrée Add-Ons ribbon menu > Import/Export > Import Data or Export Data > opens the import or export utility > select Portillo Import or Portillo Export from the menu.
•entrée V4 SQL will create a data folder Portillo that will be stored in your necs_shared\01 folder for exports.
•Imports and Exports can be done manually or can be scheduled using the entrée Task Execution Application (TEA).
entrée Folder
•necs_shared\01\Import\Portillo
•necs_shared\01\Export\Portillo
Where "01" is the entrée company number.
entrée Settings
You must add Portillo stores to the customer file. When adding Portillo stores to the Customer File the export requires you to use a different entrée customer account number for each Portillo store. The last two digits of the customer number must be the store number for this export to work correctly.
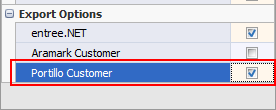
The Portillo Export process requires that Portillo stores have the “Portillo Customer” option box checked in the Miscellaneous tab of Customer File Maintenance. This is how the export process will select the correct invoices to export to Portillo's FTP server.
•Customer: Mark Your Portillo Stores in the Customer File 1.Go to the Customer ribbon click Customer. 2.Find a Portillo Store and go to the Miscellaneous Tab. 3.Check the Portillo Customer option in the Export Options list. 4.Click Apply. |
|
Configure the Import
1.Go to the Add-Ons ribbon menu click Import/Export icon. 2.Select Import Data and the entrée Import dialog will open. 3.In Import From select Portillo Import. |
|

4.Click the Configure button.
Portillo will provide you with the FTP server information you need to enter here, FTP Host, your assigned Username and Password.
5. Enter the Import Directory and Export Directory locations. These location are in your necs_shared\01 folder. Where "01" is the entrée company number.
•Here you see we are using the necs_shared folder for directory locations.
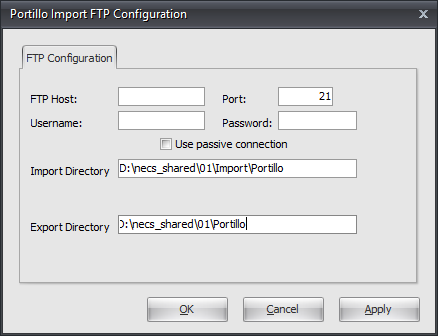
7. Click Apply to save your configuration then click OK.
Export
1.Go to the Add-Ons ribbon menu click the Import/Export icon.
2.Select Export Data and the entrée Export dialog will open.
3.In Export the data To select Portillo Export.
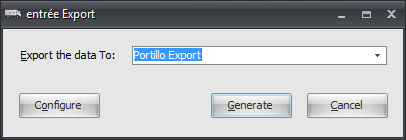
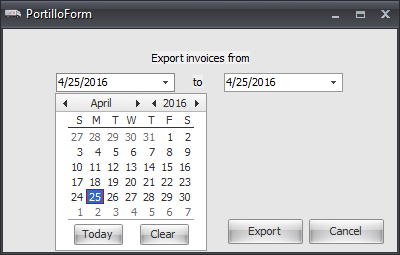
5. Click the Generate button. 6. Use the drop down calendar to select your date range.
7. Click the Export button. |
|
8. An export progress dialog box will display showing the invoices being written.
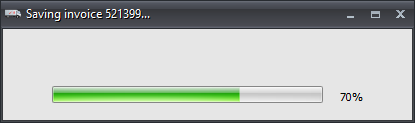
•The export data will be written to your necs_shared\01\Portillo folder.

Import
The Portillo Import takes purchase orders from the Portillo FTP server and creates invoices in entrée based on the imported data.
•You should have already configured the data exchange and tested it with Portillo.
1.Go to the Add-Ons ribbon menu click Import/Export icon. 2.Select Import Data and the entrée Import dialog will open. 3.In Import From select Portillo Import. |
|
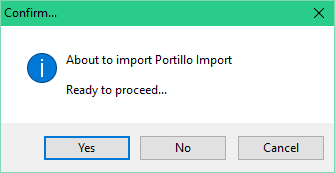
4. Click the Generate button. 5. The Confirm... dialog box will display. Click Yes to proceed with the import. 6. Your imported data will be written to the location you designated in the Import Directory field when you configured the exchange. |
|