Mod #1381 US Foods EDI

Contents
US Foods EDI import and export.
Access: entrée Add-Ons ribbon menu > Import/Export > Import Data or Export Data > opens the import or export utility > select US Foods EDI.
•The system will receive an EDI 850 Purchase Order from US Foods and import creating an invoice. After recieving the invoice an EDI 997 document will be sent back to US Foods confirming receipt of the EDI 850.
•The system will send a required EDI 855 Purchase Order Confirmation file back to US Foods. This document will confirm the expected ship quantities and pricing from the actual invoice.
•The system will meet the requirements of importing and tracking the EDI 997 functional acknowledgment that US Foods received the EDI 855.
•Prior to an invoice shipping US Foods may submit an EDI 860 Change PO Request, which the system will process changes tied to the original invoice.
•Upon completing the EDI 860 transaction the system will send a new EDI 997 document stating the change request was received and send another EDI 855 Purchase Order Confirmation back to US Foods with the new invoice data.
•The system will then receive an EDI 997 from US Foods stating confirmation of the changes.
•Once the invoice has been printed (shipped), the system will submit an EDI 810 Supplier Invoice to US Foods for payment. The system will pick up the corresponding EDI 997 for the EDI 810.
entrée Settings
•Customer File: Mark all your US Foods Customers.
1.Go to the Customer ribbon menu click Customer.
2.File find the US Foods customer.
3.Click the Miscellaneous Tab.
4.Go to the Export Options on the right and check the US Foods Customer option.
5.Go to the DEX Setup section and enter the DUNS code for the US Foods ship to location.
6.Click Apply to save.
entrée Folders
•Import staging: necs_shared\01\US Foods EDI\Import\
•Import archive: necs_shared\01\US Foods EDI\Import\Archive
•Export staging: necs_shared\01\US Foods EDI\Export\
•Export archive: necs_shared\01\US Foods EDI\Export\Archive
Where "01" is the entrée company number.
FTP Settings
Values are supplied by US Foods when setting up your account.
Files Exchanged
Document |
Import/Export |
Naming convention |
Send/Receive Frequency |
Format (edi/flat/csv) |
|---|---|---|---|---|
EDI 850 Purchase Order |
Import |
PO_mmddyyhhnnsszzz.edi |
15 minutes |
EDI |
EDI 997 Functional Ack. |
Both |
FA_mmddyyhhnnsszzz.edi |
As imported |
EDI |
EDI 855 Purchase Order Ack. |
Export |
POA_mmddyyhhnnsszzz.edi |
As imported |
EDI |
EDI 810 Invoice |
Export |
INV_mmddyyhhnnsszzz.edi |
Daily |
EDI |
Configure the Export
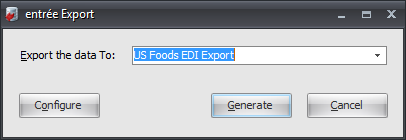
1. Go to the Add-Ons ribbon menu click Import/Export icon. 2. Select Export Data and the entrée Export dialog will open. 3. Select US Foods EDI. 4. Click Configure. |
|
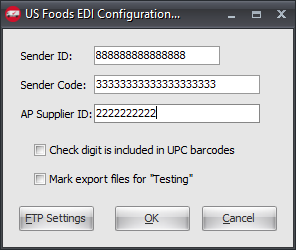
5. Enter the following information provided by US Foods.
▪Sender ID ▪Sender Code ▪AP Supplier ID
6. Make selections as it applies:
▪Check digit is included in UPC barcodes ▪Mark export files for for testing
7. Click FTP Settings. |
|
8. Enter FTP Configuration information provided by US Foods.
•Import Directory: Enter the location of your necs_shared\01 folder. Where "01" is the entrée company number.
•Import File Ext
•Export Directory: Enter the location of your necs_shared\01 folder. Where "01" is the entrée company number.
•Export File Ext
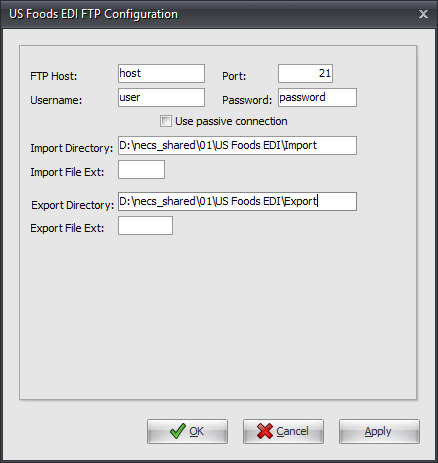
9. Click Apply to save then OK.
Export
1. Go to the Add-Ons ribbon menu click Import/Export icon.
2. Select Export Data and the entrée Export dialog will open.
3. Select US Foods EDI.
4. Click Generate.
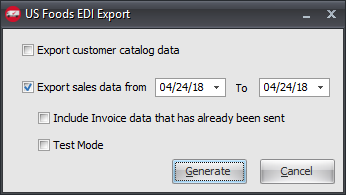
5. Set your Export sales data from To dates. This is the default for the export.
6. Check as it applies:
▪Export customer catalog data ▪Include Invoice data that has already been sent ▪Test Mode
7. Click Generate. |
|
Configure the Import
1. Go to the Add-Ons ribbon menu click Import/Export icon. 2. Select Import Data and the entrée Import dialog will open. 3. Select US Foods EDI. 4. Click Configure. |
|
5. Enter FTP Configuration information provided by US Foods. (See Export FTP above)
•Import Directory: Enter the location of your necs_shared\01 folder. Where "01" is the entrée company number.
•Import File Ext
•Export Directory: Enter the location of your necs_shared\01 folder. Where "01" is the entrée company number.
•Export File Ext
6. Click Apply to save then OK.
Import
1. Go to the Add-Ons ribbon menu click Import/Export icon.
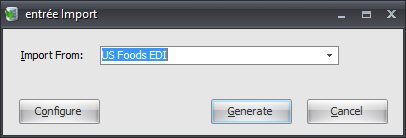
2. Select Import Data and the entrée Import dialog will open.
3. Select US Foods EDI.
4. Click Generate.
Updates
V4.2.5 Updated to suppress the Issue Log when an invoice export is run as a scheduled task. Messages will instead be added to the task Notification e-mail.