Mod #1399 FMC EDI

Contents
Food Marketing Concepts (FMC) EDI to export and import warehouse orders received via entrée.NET.
Access: entrée Add-Ons ribbon menu > Import/Export > Import Data or Export Data > opens the import or export utility > select FMC EDI from the menu.
•Import/Export files use CSV file format.
•Imports and Exports can be done manually or can be scheduled using the entrée Task Execution Application (TEA).
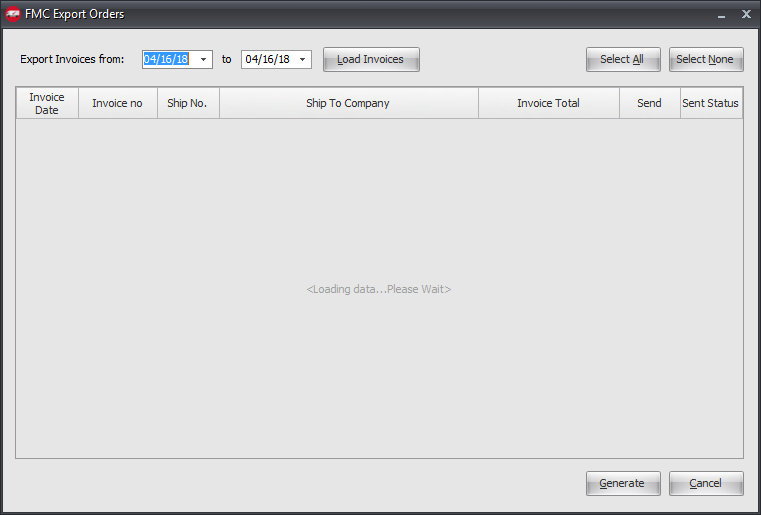
•All the invoices will be loaded in the grid for the date range entered in the export dialog. You can select the invoices in the grid that you want to send.
•When manually importing orders using the FMC Import, the system will automatically print these orders to a PDF file. The imported files will be saved to a sub-folder in the necs_shared folder.
•Once the invoices are exported, users in entrée will no longer be allowed to make changes to that invoice.
•When the invoice has been imported back into entrée from the warehouse, the lock down on the invoice changes is removed and users will be able to edit the invoice again to make any corrections needed.
 If invoice changes are made, the users must remember to reprint the invoice to set it back to a "printed" status.
entrée Folders
•Import: necs_shared\01\FMC\Import\
•Export: necs_shared\01\FMC\Exported\
•Archive: necs_shared\01\FMC\Archive\
Where "01" is the entrée company number.
Files Exchanged
Document |
Import/Export |
Naming convention |
Send/Receive Frequency |
Format (edi/flat/csv) |
|---|---|---|---|---|
Invoices |
Both |
Exportyyyymmdd.csv |
|
csv |
Configure FTP & Import
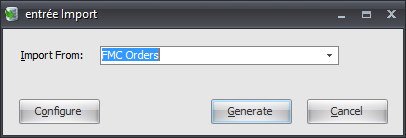
1. Go to the Add-Ons ribbon > Import/Export > entrée Import utility.
2. In Import From select FMC Orders.
3. Click the Configure button to setup FTP.
|
|
4. Enter the FTP values supplied by FMC when setting up your account.
•Import Directory: Enter the location of your necs_shared\01 folder. Where "01" is the entrée company number.
•Import File Ext is csv.
•Export Directory: Enter the location of your necs_shared\01 folder. Where "01" is the entrée company number.
•Export File Ext is csv.

5. Click Apply to save then OK.
Export
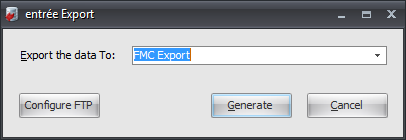
1. Go to the Add-Ons ribbon > Import/Export > entrée Export utility.
2. Select Export Data and the entrée Export dialog will open. 3. In Export the data To select FMC Export.
4. Click Generate. |
|
5. Select your Export Invoices from and to dates. Then click Load Invoices.
6. Use Select All and Select None to choose the invoices to export.
7. Click Generate to run the export.
Updates
V4.7 Updated the FMC EDI so that it supports entrée.MW.