Mod #1426 Bar-S / Sigma EDI

Contents
The Bar-S / Sigma EDI provides import and export.
Access: entrée Add-Ons ribbon menu > Import/Export > Import Data or Export Data > opens the import or export utility > select Bar-S EDI.
•This utility imports purchase orders from Bar-S locations and converts it into an entrée invoice.
•The entrée scheduling utility /TEA should be setup to check for Bar-S orders every 15-30 minutes.
•At end of day, the Fill Rate Report should be exported using the Export utility with the “Bar-S EDI” option selected. This file will be posted to the specified folder on the SFTP and contain the sales for the day. Once an invoice has been exported in the Fill Rate Report, no further changes can be made to it.
Fill Rate Export Requirements
Requirements for Invoices to be included in the fill rate export:
▪Have not been previously been exported.
▪Have a non-blank Sigma customer number
▪Are printed
▪Are not Canceled
▪Are not Credit Memos
entrée Folders
•The import staging: necs_shared\01\Bar-S EDI\Import\
•The import archive: necs_shared\01\Bar-S EDI\Import\Archive\
•Error file: necs_shared\01\Bar-S-EDI\Errors
•The export staging: necs_shared\01\Bar-S EDI\Export\
•The export archive: necs_shared\01\Bar-S EDI\Export\Archive\
Where "01" is the entrée company number.
entrée Settings
•Customer: Mark your Sigma Bar-S customers.
1.Go to the Customer ribbon menu click Customer.
2.Find the Sigma Bar-S customer.
3.Go to the Miscellaneous Tab EDI Options section.
4.Enter your Sigma Customer Number assigned by Sigma.
5.Click Apply to save.
•Inventory: Mark all your Sigma Bar-S items.
1.In the Inventory File find the item.
2.Click the Misc1 Tab.
3.Enter the Sigma Item Number assigned by Sigma.
4.Click Apply to save.
SFTP Settings
Values are supplied by the Sigma/Bar-S when setting up your account.
Files Exchanged
Document |
Import/Export |
Naming convention |
Send/Receive Frequency |
Format (edi/flat/csv) |
|---|---|---|---|---|
Distributor Fill Rate Report |
Export |
XXXFillrateYYMMDD.csv |
End of day |
CSV |
High Jump Order Header |
Import |
XXX_SIGMA_HEADER_##########_YYYY.csv |
Every 15 Minutes |
CSV |
High Jump Order Detail |
Import |
XXX_SIGMA_DETAIL_##########_YYYY.csv |
Every 15 Minutes |
CSV |
XXX in the above naming conventions is a place holder for the Distributor ID.
When importing High Jump orders, the _ ##########_YYYY values of the header and detail files will match for corresponding files.
Files will be imported to a staging directory and then matched up. If a header does not have a matching detail, it will be left behind for the next import pass.
Configure the Import
1. Go to the Add-Ons ribbon click for the Import/Export icon. 2. Select Import Data and the entrée Import dialog will open. 3. In Import From select Bar-S EDI. 4. Click Configure. |
|
5. Enter the FTP Configuration information provided by Sigma Bar-S.
•Import Directory: Enter the location of your necs_shared folder. Where "01" is the entrée company number.
•File Ext
•Confirmation Dir: Enter the location of your necs_shared folder. Where "01" is the entrée company number.
•Conf File Ext
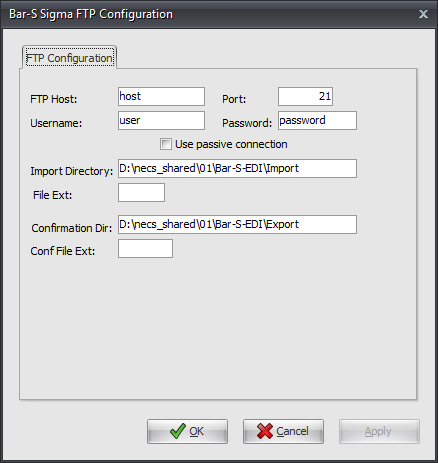
6. Click Apply to save then OK.
Import
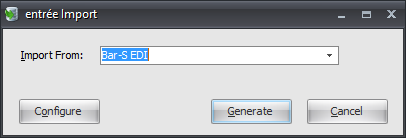
1. Go to the Add-Ons ribbon click for the Import/Export icon.
2. Select Import Data and the entrée Import dialog will open.
3. In Import From select Bar-S EDI.
4. Click Generate.
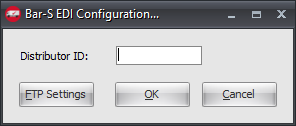
Configure the Export
1. Go to the Add-Ons ribbon click for the Import/Export icon. 2. Select Export Data and the entrée Export dialog will open. 3. In Export the data to select Bar-S EDI. 4. Click Configure. |
|
5. Enter your assigned Distributor ID.
6. Click FTP Settings. |
|
5. Enter the FTP Configuration information provided by Sigma Bar-S.
•Export Directory: Enter the location of your necs_shared folder. Where "01" is the entrée company number.
•Export File Ext

6. Click Apply to save then OK.
Export
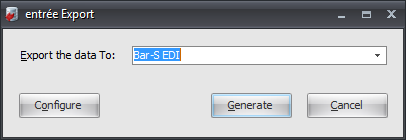
1. Go to the Add-Ons ribbon click for the Import/Export icon.
2. Select Export Data and the entrée Export dialog will open.
3. In Export the data to select Bar-S EDI.
4. Click Generate.
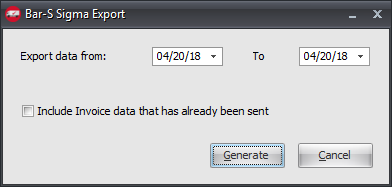
5. In Export data from and to select your dates.
6. Check the Include Invoice data that has already been sent option box if needed for this export run.
7. Click Generate to run the export. |
|