Mod #1428 L&C EDI

Contents
The L&C EDI import and export
•This utility imports XML Order files and converts them into entrée invoices.
•Once the associated invoice has been printed, it should be exported using the Export utility with the “L&C EDI” option selected. This will generate a XML Invoice or Credit Memo file.
•Once the invoice/credit memo has been exported no further edits to that document will be allowed.
•The Export utility will also have an option to generate an Invoice Order Report in CSV format.
entrée Folders
•The import staging: necs_shared\01\L&C EDI\Import\
•The import archive: necs_shared\01\L&C EDI\Import\Archive\
•The export staging: necs_shared\01\L&C EDI\Export\
•The export archive: necs_shared\01\L&C EDI\Export\Archive\
Where "01" is the entrée company number.
entrée Settings
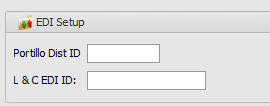
•Customer File: Mark all your L&C customers with the L&C EDI ID.
1.In the Customer File find the customer. 2.Click the Miscellaneous Tab. 3.Go to the EDI Setup section. 4.Enter the L&C EDI ID assigned. 5.Click Apply to save. |
|
•Inventory File: Enter the L&C Item Code and L&C Item GL Code for items.
1.In the Inventory File find the item.
2.Click the Misc1 Tab.
3.Enter the L&C Item Code and the L&C Item GL Code.
4.Click Apply to save.
Files Exchanged
Document |
Import/Export |
Naming convention |
Send/Receive Frequency |
Format (edi/flat/csv) |
|---|---|---|---|---|
Orders File |
Import |
ORDER_XXXXXX.mmddyyhhnnss.xml |
15 minutes |
XML |
Invoice File |
Export |
INVOICE_DistID.mmddyyhhnnss.xml |
Daily |
XML |
Credit File |
Export |
CREDIT_DistID.mmddyyhhnnss.xml |
Daily |
XML |
Invoice Report |
Export |
DistIDReport.mmddyyhhnnss.csv |
Daily |
CSV |
Where XXXXXX in the Orders File represents the entrée customer number.
Where DistID is a place holder for the Distributor ID defined in the EDI Setup dialog.
Configure & Import
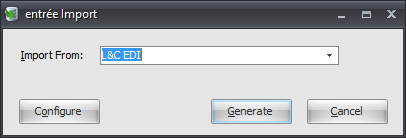
1. Go to the Add-Ons ribbon > Import/Export > entrée Import utility.
2. In Import From select L&C EDI. 3. Click the Configure button to setup FTP.
•If FTP settings are already done, click Generate to run the import. |
|
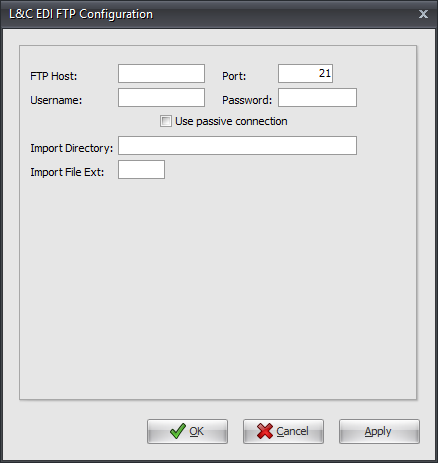
4. Enter FTP Configuration information supplied by L&C when setting up your account.
•Import Directory: Enter the location of your necs_shared\01 folder. Where "01" is the entrée company number.
•Import File Ext is xml.
5. Click Apply to save your settings then OK.
6. Now you are back in the entrée Import dialog where you can click Generate to run the import. |
|
Configure & Export
1. Go to the Add-Ons ribbon menu click Import/Export icon.
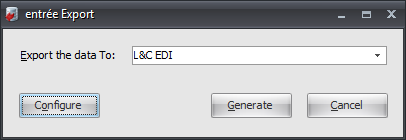
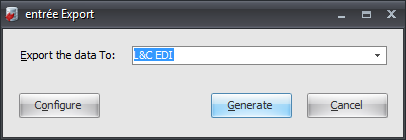
2. Select Export Data and the entrée Export dialog will open.
3. In Export the data To select L&C EDI.
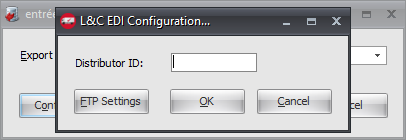
4. Click the Configure button.
5. Enter the Distributor ID (distributor site identification number) from L&C.
6a. If FTP settings are already done, click OK once the ID is entered.
•You will return to the entrée Export dialog where you can run the export.
•Click the Generate button to run the export. |
|
6b. Click the FTP Settings button if you need to setup or edit FTP information.
7. Enter FTP Configuration information provided by L&C.
•Export Directory: Enter the location of your necs_shared\01 folder. Where "01" is the entrée company number.
•Export File Ext is xml.
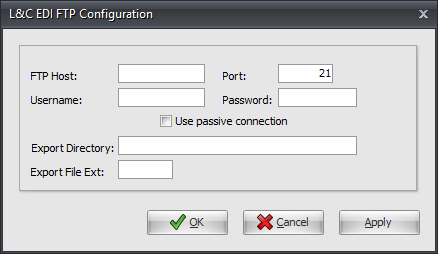
8. Click Apply to save your settings then OK.
9. In the L&C Configuration click OK.
10. Now you are back in the entrée Export dialog where you can click Generate to run the export.