Mod #1451 Data-Central EDI

Contents
Data Central Interface
Updates
V4.5.3 Updated the Data Central export to send a negative Quantity Shipped and a blank PO Number for Credit Memos.
V4.5.0.1
•Updated the Data-Central EDI invoice to send Shipped Weight instead of Extended Gross Weight, and send Tax Amount blank since it is already included in the items extended amount.
•Added the ability to configure the Distributor ID within the invoice and catalog file names.
Import: This utility will import a CSV 850 Purchase Order and convert it into an entree invoice.
Export: Once the invoice has been printed, a CSV 810 invoice can be exported using the export utility.
The export utility will export a catalog file in CSV format containing order guides for Data-Central locations.
entrée Folders
•Import: necs_shared\01\DataCentral\Import
•Export: necs_shared\01\DataCentral\Export
entrée Settings
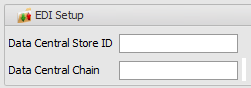
•Customers: Mark your Data Central customers for export.
1.Go to the Customer ribbon menu click Customer. 2.Find the Data Central customer. 3.Go to the Miscellaneous tab EDI Setup section. 4.Enter Data Central Store ID and Data Central Chain. 5.Click Apply to save. |
|
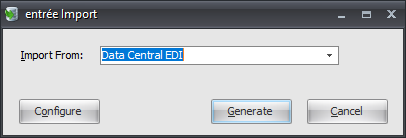
Configure the Import
1.Go to the Add-Ons ribbon click Import/Export. 2.Select Import Data and the entrée Import will open. 3.In Import From select Data Central EDI. 4.Click Configure. |
|
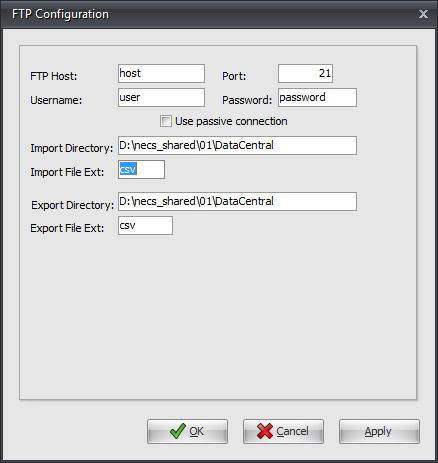
5. Enter FTP Configuration information provided by Data Central. •Import Directory: Enter the location of your necs_shared\01 folder. Where "01" is the entrée company number. •Import File Ext is csv.
•Export Directory: Enter the location of your necs_shared folder. Where "01" is the entrée company number. •Export File Ext is csv.
6. Click Apply to save then OK |
|
Import
1.Go to the Add-Ons ribbon and click Import/Export.
2.Select Import Data and the entrée Import will open.
3.In Import From select Data Central EDI.
4.Click Generate and the import runs.
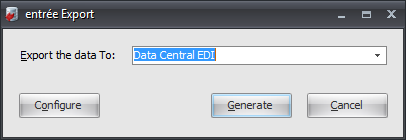
Configure the Export
1.Go to the Add-Ons ribbon click Import/Export icon. 2.Select Export Data and the entrée Export dialog will open. 3.In Export the data To select Data Central EDI. 4.Click Configure. |
|
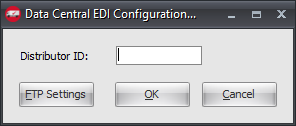
5. Enter your assigned Distributor ID.
6. Click FTP Settings. |
|
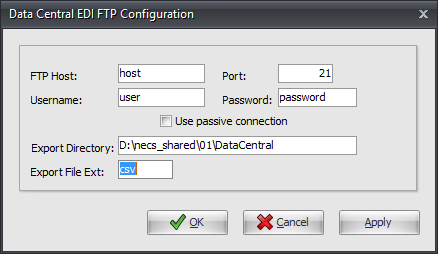
7. Enter FTP Configuration information provided by Data Central.
•Export Directory: Enter the location of your necs_shared\01 folder. Where "01" is the entrée company number.
•Export File Ext is csv.
8. Click Apply to save then OK. |
|
Export
1.Go to the Add-Ons ribbon click Import/Export icon.
2.Select Export Data and the entrée Export dialog will open.
3.In Export the data To select Data Central EDI.
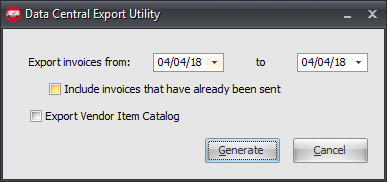
4.Click Generate.
5. Set your export options.
•Set the Export invoices from and to dates. •Check Include invoices that have already been sent if needed. •Check Export Vendor Item Catalog if needed.
6. Click Generate to export. |
|