Mod #1522 Vito's Pizza EDI

Contents
The Vito’s Pizza EDI imports purchase orders and exports invoices per specs provided by Posnet point of sale system. File transfer is via FTP.
The Import process is accessed from the entree Import utility using the “Vito’s Pizza EDI” option. This utility imports a consolidated Purchase Order file from Vito’s Pizza locations and converts it into entrée invoices. An Invoice file containing all items from printed invoices should be sent daily by 5:00am for the previous day’s invoices.
The export process is accessed from the entree Export utility using the “Vito’s Pizza EDI” option. Once the consolidated invoice file has been exported no further edits to those invoices will be allowed.
entrée Folders
•The import staging: necs_shared\01\Vito's Pizza EDI\Import\
•The import archive: necs_shared\01\Vito's Pizza EDI\Import\Archive\
•The export staging: necs_shared\01\Vito's Pizza EDI\Export\
•The export archive: necs_shared\01\Vito's Pizza EDI\Export\Archive\
Where "01" is the entrée company number.
entrée Settings
Customer: Mark all the Vito's Pizza customers.
1.Go to the Customer ribbon menu click Customer. 2.Find the Vito's Pizza customer. 3.Go to the Miscellaneous Tab. 4.Enter in Type Code = VT. 5.Click Apply to save. |
|

Files Exchanged
Document |
Import/Export |
Naming convention |
Send/Receive Frequency |
Format (edi/flat/csv) |
Purchase Order |
Import |
Purchase_Order_Export_All__MM-DD-YY |
Daily |
Tab del. TXT |
Invoice |
Export |
Vito-MM-DD |
By 5:00am for previous days invoices |
Tab del. TXT |
Import/Export Configuration
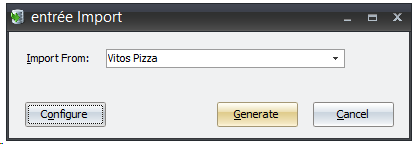
1. Go to the Add-Ons ribbon menu click Import/Export icon. 2. Select Import Data and the entrée Import dialog will open. 3. Select Vito's Pizza in the drop down menu. 4.Click Configure to enter in your FTP connection settings. |
|
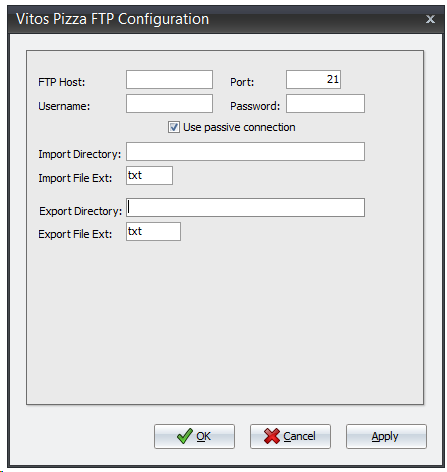
5.Enter the FTP credentials supplied by Posnet when setting up your account. 6.Import Directory: Enter the name of the directory on the FTP site where the purchase orders will be imported from. 7.Import File Ext: txt 8.Export Directory: The name of the directory on the FTP site where the invoices will be exported to. 9.Export File Ext: txt 10.Click Apply |
|
Import
1. Go to the Add-Ons ribbon menu click Import/Export icon.
2. Select Import Data and the entrée Import dialog will open.
3. Select Vito's Pizza from the drop down menu.
4. Click Generate.
Export
1.Go to the Add-Ons ribbon menu click Import/Export icon.
2.Select Export Data and the entrée Export dialog will open.
3.Select Vito's Pizza from the drop down menu.
4.Click Generate.
5.Select your invoice date range.
6.Click Generate.
Updates
V4.6.0.1 Updated the Vito's Pizza import process to prevent inactive items from being added to the invoice, and to note those items on the Import Errors log.