Mod #510 Frosty Acres EARS Export

Contents
Frosty Acres E.A.R.S. Export.
This export will export all P.O. Detail information that is linked by Purchase Order Number to the Accounts Payable module.
These invoices may be filtered about by the Accounts Payable Invoice Date. Once a given Accounts Payable invoice has been exported, it will be flagged so that it is not sent more than once.
Although the data path to save the archive export file can be changed, it is recommended to use the default path provided by the entrée system.
Originally this export did require Accounts Payables in order to function but it has since been updated to be able to work using Purchase Order information only. The check for the presence of Accounts Payable and its associated error message have been removed.
entrée Settings
•Mark POs to be included in the export.
Manually Marking Purchase Orders for Export
1.Go to the Vendor ribbon menu.
2.In the Purchase menu select Change Purchase Order.
3.Find and open the desired Purchase Order.
4.Click the Miscellaneous button.
5.In the Edit P.O. Miscellaneous dialog enter the Invoice No and Invoice Date.
6.Click OK.
7.Check to make sure the PO totals match the Vendor invoice totals.
8.Click OK in Change Purchase Order.
 You can use the PO Checkoff utility in the Vendor ribbon menu to see all of the POs that have Invoice #s and Dates entered.
Configure the Export
1. Go to the Add-Ons ribbon menu click Import/Export icon.
2. Select entree Export.
3. In Export the data To select Frosty Acres E.A.R.S.
|
|
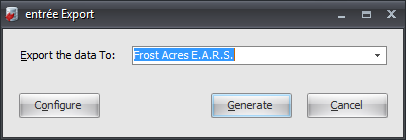
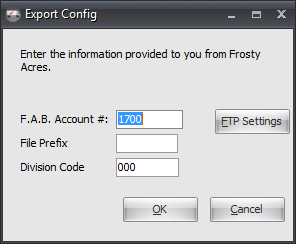
4. Click Configure.
▪F.A.B. Account - Provided by Frosty Acres.
▪File Prefix - Is a 3 character reference code. Provided by Frosty Acres.
▪Division Code - Provided by Frosty Acres.
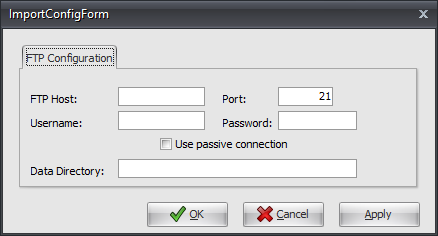
5. Click the FTP Settings button. |
|
6. Enter the FTP Configuration information provided by Frosty Acres.
Data Directory: Enter the location of your necs_shared\01 folder. Where "01" is the entrée company number.
7. Click Apply then OK.
8. Click OK in the Export Config dialog. |
|
Export
1. Go to the Add-Ons ribbon menu click Import/Export icon.
2. Select entree Export.
3. In Export the data To select Frosty Acres E.A.R.S.
4. Click the Generate button.
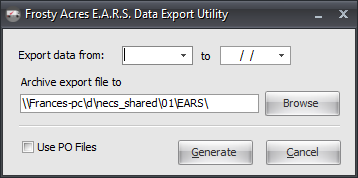
5. In the Frosty Acres E.A.R.S. Data Export Utility dialog enter the following.
•Export data from / to dates
•Archive export file to - Defaults to the entrée system necs_shared\01 folder. It is recommended to use the default folder.
•Use PO Files - Check to use PO files and not Accounts Payable.
4. Click the Generate button to run the export. |
|