Mod #795 Trackmax Export

Contents
An export utility for the Trackmax profit analytic and management software.
Related mods that require this mod:
▪Mod #946 Modify Trackmax Export to use PO
▪Mod #1026 Trackmax Export W/FOB & Delivered Cost.
▪Mod #1548 Modify the Trackmax Export
▪Mod #1696 Modifies the Trackmax Export
▪Mod #1722 Update Section J to send Market Cost in FOB & DEL
▪Mod #1726 Reassigned activation of the Trackmax EDI from modification #795 to 1726
•This mod has the following rules established: The "Buyer Code" in Vendor File Maintenance is mapped to the "Order Taker" code of an entrée user.
•Updated to work with the Task Execution Application scheduler (TEA) in entrée V4.
entrée Folder
Export Staging: necs_shared\01\Trackmax
Where "01" is the entrée company number.
entrée Settings
1.Security: Update User Accounts with Buyer Code.
2.Vendor: Perform Vendor File Updates.
3.Inventory: Mark Your Items in the Inventory file.
4.Export: Test the export and check your files.
Security Management User Account Update
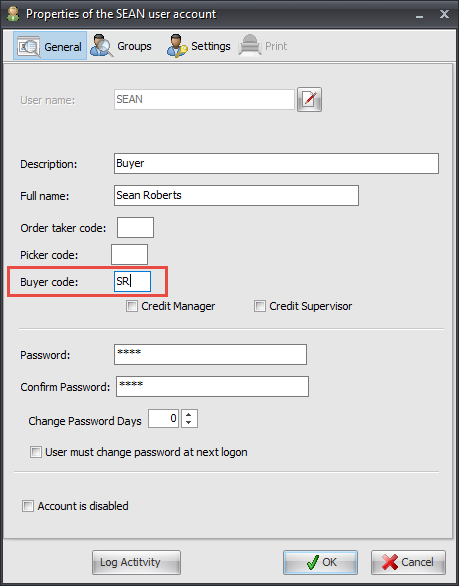
The "Order Taker" code must be assigned to your buyer's entrée User Accounts in the Security Manager before performing the updates that follow for the Vendor File. Typically the person's initials are used for these codes.
1.Go to the System ribbon menu System File section. 2.Click the Security Management... option. 3.Click the Users button, located on the toolbar of the Security Manager utility. 4.Find the user account that you want to edit in the account listing area. 5.Click the Edit button and the Properties of dialog for the user account will open. 6.Enter an Order Taker Code and Buyer Code for the User Account. 7.Click OK to save the changes.
•Perform these updates for all buyer's User Accounts to use with Trackmax. |
|
Vendor File Updates
1. Go to the Vendor ribbon menu and click the Vendors option. For each Vendor perform the following updates.
2. In Vendor File Maintenance in the Buyer field select the "Buyer Code" for the buyer for that vendor. This code is mapped to the "Order Taker" or "Buyer Code" assigned to an entrée User Account in the Security Manager.
|
|
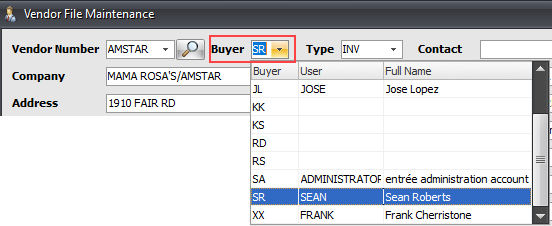
•By default the Trackmax export maps the Buyer field buyer code from the vendor file to an "Order Taker" code assigned in the entrée Security Manager to a User Account. It uses this linking to establish the “full name” of the buyer to pass along to Trackmax.
 Modification #990 disables the Buyer Code functionality.
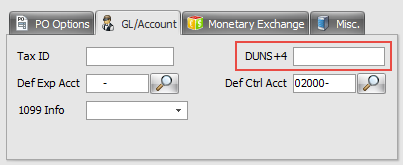
3. In Vendor File Maintenance on the Vendor Tab GL/Account sub tab enter the DUNS+4 number. The Trackmax export includes the vendor's DUNS+4 number.
The field is 13 characters long and is provided by the vendor. The first 9 characters are the DUNS number followed by a 4 character suffix.
Data Universal Numbering System +4 (DUNS+4) - This is “the DUNS number assigned by Dun and Bradstreet, Inc. (D&B) plus a 4-character suffix that may be assigned by a business concern. (D&B has no affiliation with the 4-character suffix.) This 4-character suffix may be assigned at the discretion of the business concern to establish additional CCR records for identifying alternative Electronic Funds Transfer (EFT) accounts. D&B assigns DUNS numbers for each physical location of a business.
Source: USLegal.com Data Universal Numbering System +4 Law & Legal Definition
4. Click Apply to save the changes to the vendor file. Perform these updates for all the Vendors you want sent to Trackmax during the set up process.
Inventory File - Mark Trackmax Items
In this process you will only mark items that you either do not want exported or want exported without the cost.
1.Go to the Inventory ribbon menu and click the Inventory option.
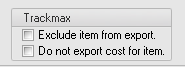
2.Find your Trackmax items and go to the Misc 2 Tab.
1.In the Trackmax options area check the options that relate to the item. ▪Exclude item from export ▪Do not export cost of item |
|
4. Click Apply to save the change. Perform this update for all your Trackmax items during the set up process.
Configure the Export
1. Go to the Add-Ons ribbon menu click Import/Export icon.
2. Select Export Data and the entrée Export dialog will open.
3. In Export the data To select Trackmax.
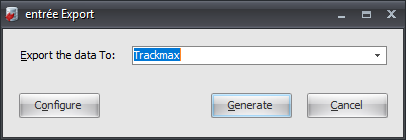
4. Click Configure.
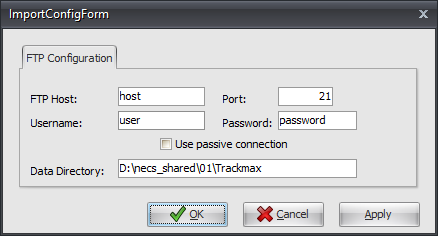
5. Enter the information provided to you by Trackmax for your FTP Configuration.
•Data Directory: Enter the location of your necs_shared\01 folder. Where "01" is the entrée company number.
6. Click OK to save.
|
|
Export
1. Go to the Add-Ons ribbon menu click Import/Export icon.
2. Select Export Data and the entrée Export dialog will open.
3. In Export the data To select Trackmax.
4. Click Generate.
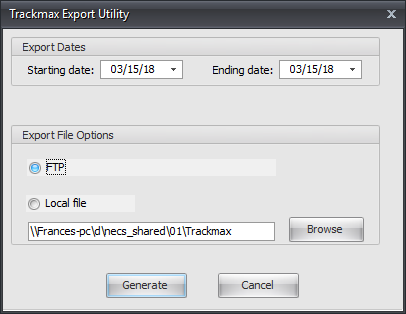
5. In the Export Dates area select the Starting date and Ending date.
6. Export File Options:
a. If you have FTP already configured the FTP option will be selected by default.
b. If Local file is selected instead use Browse to find and select the folder.
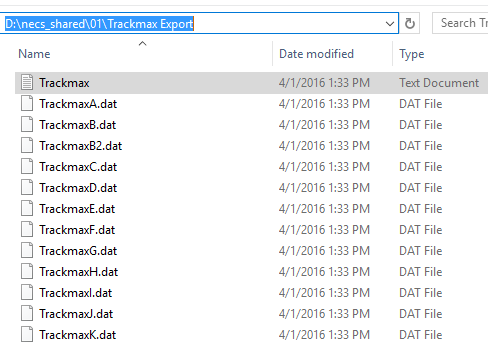
entrée V4 SQL will create a data folder Trackmax Export that will be stored in your necs_shared\01 folder. All the files generated for export are stored here. |
|
Local File: The first file in the list below will contain your export errors. Open the file with any text reader/editor program like Notepad. Here you will find the errors you need to fix so the data can export.
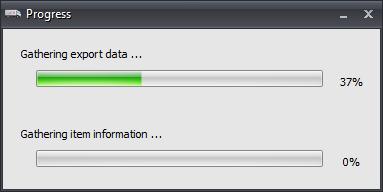
7a. Local files: Click Generate and the Progress dialog box will display showing the that are being created.
7b. FTP: Click Generate to export your data via FTP. |
|
Updates
V4.7.1 Reassigned activation of the Trackmax EDI from modification #795 to 1726 and added a new sales record type, Type "O".
V4.7 Updated the Trackmax export to filter out any Tab characters that might be contained within the data which would then corrupt the format of the export file.
V4.3.0.4
•Adjusted the C records to have Class in field 10 and Master Category in field 11.
•Added AR Balance in field 22 and Customer Terms in field 27 of the I-records. Also added On Hand Qty in field 33 of the C-records.
V4.2.5.3 Updated the export to send Due Days in the I records, and Delivery Flag in the J records.
V4.2.0
•Updated to enable selection of FTP or Local file within the TEA configuration.
•Updated the inventory item export to include the GTIN value assigned to the item in Column U / Field 21.
V4.1.3 Updated so files can be submitted by Task Execution Application scheduler automatically to the FTP/FTPS server.
V4.0.40 Updated so that it checks that an item's primary vendor still exists. If not, it will instead send the vendor that the item was most recently purchased from.
V3.6.37 The data entry feature in the Purchase Order Checkoff utility has been extended to provide the ability to enter "Vendor Invoice Number" and "Vendor Invoice Date" when both Modifications #795 and #900 are enabled in entrée.