Mod #856 UniPro MIT Data Export Utility

Contents
UniPro MIT Data Export Utility
Related: Mod #370 UniPro Harness the Volume Export
entrée Folders
The export staging: necs_shared\01\UniPro MIT\
Where "01" is the entrée company number.
entrée Settings
•Inventory: All items that will be exported are required to have their UPC Code.
•Vendor: Suppliers to be exported are required to have their 13 character D-U-N-S+4 number in the Vendor Tab > GL/Account sub-tab.
•Purchase Order requirements for export:
▪Must have an Invoice number assigned.
▪Must be closed.
▪Vendor must have a 13 character D-U-N-S+4 number.
Manually Marking Purchase Orders for Export
1.Go to the Vendor ribbon menu.
2.In the Purchase menu select Change Purchase Order.
3.Find and open the desired Purchase Order.
4.Click the Miscellaneous button.
5.In the Edit P.O. Miscellaneous dialog enter the Invoice No and Invoice Date.
6.Click OK.
7.Check to make sure the PO totals match the Vendor invoice totals.
8.Click OK in Change Purchase Order.
Files Exchanged
PCPF200.txt: New Vendor records
PCPF201.txt: New Item records.
PCPF202.txt: Purchase Order detail items.
M00xxx.zip: This file is transmitted to UniPro. Zipped file that contains all three files above.
Configure the Export
1. Go to the Add-Ons ribbon menu click Import/Export icon. 2. Select Export Data and the entrée Export dialog will open. 3. In Export the data To select UniPro MIT. 4. Click Configure. |
|

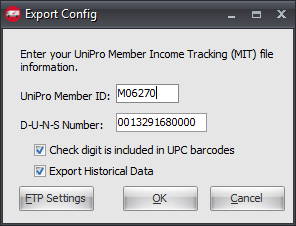
5. In Export Config enter the numbers from your assigned UniPro Member ID.
6. Enter your company's D-U-N-S+4. Must be 13 digits in length. If the distributor only has a 9 digit number, the last 4 digits should be 0000.
7. Check the options as needed. ▪Check Digit is included in UPC barcodes - Only enabled this option if check digits are entered in the Inventory File. The Check Digit must be consistent throughout the system. ▪Export Historical Data
8. Click FTP Settings. |
|
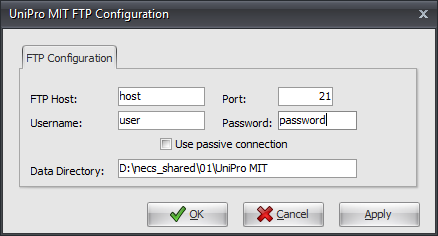
9. Enter the FTP information you received from UniPro when creating your account.
Data Directory: Enter the location of your necs_shared\01 folder. Where "01" is the entrée company number.
10. Click Apply to save then OK.
Export
1. Go to the Add-Ons ribbon menu click Import/Export icon.
2. Select Export Data and the entrée Export dialog will open.
3. In Export the data To select UniPro MIT.
4. Click Generate. When Export Historical Data is not enabled this Generate button will run the export and steps 5 - 7 will not be performed..
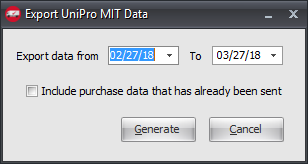
5. Since Export Historical Data was checked the Export data from and to dates must be set.
6. Check Include purchase data that has already been sent if needed.
7. Click Generate. |
|
Archives
1. Go to the Add-Ons ribbon menu click Import/Export icon.
2. Select Export Data and the entrée Export dialog will open.
3. In Export the data To select UniPro MIT.
4. Click Archives.
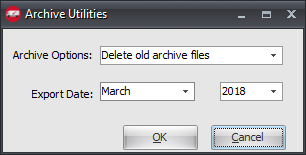
5. The Archive Utilities dialog opens.
6. Make a selection from the Archive Options menu. ▪Delete old archive files
▪Re-copy data files to floppy disk |
|
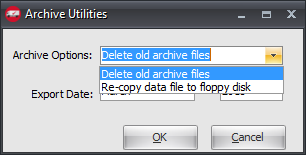
7. For Export Date select a month and year from the drop down menus.
8. Click OK to run the archive option selected. |
|
Updates
V4.2.5 Added an option to link invoices from entrée.AP in order to populate the Invoice Date field in the export file.
V4.2.4.3 Updated to remove Member ID format restrictions in the Export Configuration screen.
V4.2.2.3 Updated so that files will be transmitted via SFTP instead of FTP.
V4.2.1 Added Manufacturer ID to the end of the Item and PO files.
V4.2.0.2 Updated the UniPro MIT Export Utility purchase data file to include additional fields.
V4.0.19
1.The "Starting Date" and "Ending Date" edit controls are hidden unless the "Export historical data" option has been enabled. (These input values only apply when the "historical data" option is on.)
2.When used, the "Ending Date" will be initialized to the current entrée System Date and the "Starting Date" will be set one month prior to "Ending Date".