Mod #936 Produce Alliance Export

Contents
Produce Alliance data export utility. This mod works with the Task Execution Application (TEA) scheduler in entrée.
Related: Mod #1293 Add Sodexo Price Export to Mod #936 Produce Alliance Export.
Updates
V4.5.3
•Added an Include in Produce Alliance Export checkbox option in the Misc 1 tab of Inventory Maintenance.
•Added an Exclude inactive items from the Product Catalog checkbox option.
•Added Bottle Deposit charges to column 26 (Item tax) in the invoice file.
•Added Small Order Fee and other available Misc. invoice level charges as separate lines in the file.
V4.5
•Added Headers to the Customer, Product, and Invoice files.
•Customer file - Send blank Price Code and send Warehouse Code if Multi-Warehouse or blank.
•Invoice file - Changed file name format to InvoiceCCYYMMDDHHmmsslll, send Doc type I = Invoice or C = Credit , send Reason Code and Description for Credit Memos, send Unit Tax amount as blank, send Route, send Stop, and send Ordered Quantity.
V4.0.42 Updated to include support for sending the Fuel Surcharge that was levied on invoices when present.
entrée Folders
The export staging: necs_shared\01\Produce Alliance\
Where "01" is the entrée company number.
entrée Settings
•Customer: Mark Customers to be exported.
1.Go to the Customer ribbon menu click Customer.
2.Find the desired customer and go to the Miscellaneous Tab.
3.In the Matrix Code enter PA.
4.Click Apply to save.
Files Exchanged
•The customer information is exported in the customers.txt file.
•The inventory is exported in the products.txt file.
•Invoices
Configure the Export
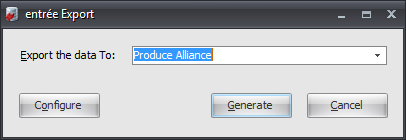
1. Go to the Add-Ons ribbon menu click for the Import/Export icon. 2. Select Export Data and the entrée Export dialog will open. 3. In Export the data To select Produce Alliance. |
|
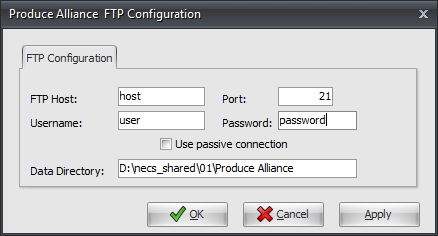
4. Click Configure and the FTP Configuration dialog opens.
5. Now set up the FTP connection with the information you received from Produce Alliance when creating your account.
Data Directory: Enter the location of your necs_shared\01 folder. Where "01" is the entrée company number.
6. Click Apply to save then OK.
|
|
Export
1. Go to the Add-Ons ribbon menu click Import/Export icon.
2. Select Export Data and the entrée Export dialog will open.
3. In Export the data To select Produce Alliance.
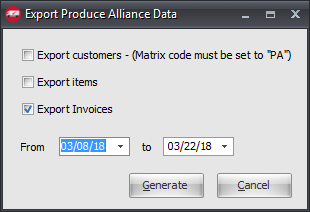
4. Click Generate and the Export Produce Alliance Data dialog opens. 5. Set your From and to dates. 6. Make your selections from the export options. ▪Export Customers ▪Export Items ▪Export Invoices 7. Click Generate to run the export. |
|