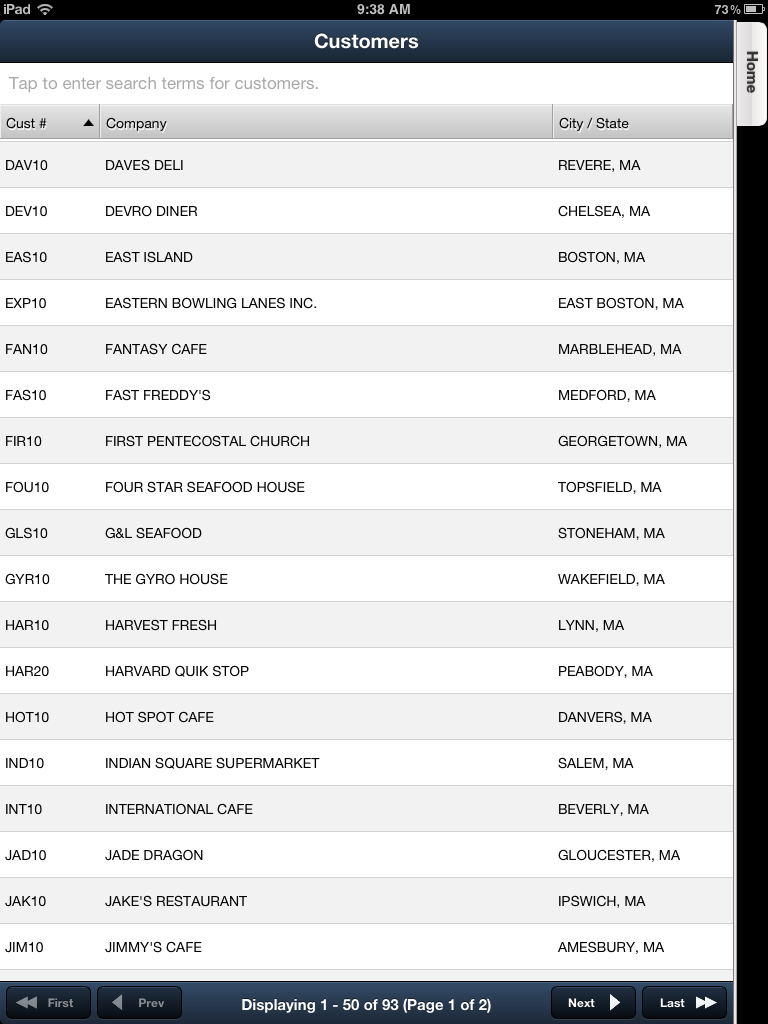
Contacts

Contacts Screen Columns
•Cust # - The entrée customer number.
•Company - The name of the contact's company.
•City / State - The city and state where the contact’s company is located.
Searching for Contacts 1. To search for a Contact tap in the "Tap to enter search terms for customers." text box at the top of the screen.
2. Enter your search text using the keyboard.
3. Then tap the Search key in the keyboard to trigger the search.
|
|
 If your customer is not in the Customers list displayed in the Contacts menu option, it means you must add these contacts to the main entrée system using Contact File Maintenance. The entrée Contact file is where you will define the contact's name and address, and other information about them. Consult the entrée.NET Knowledgebase for more detailed information.
After adding any missing contacts to entrée you must run the export to entrée.NET in the Invoicing menu to get the customer information updated in Electronic Order Pad.
Viewing Contact Information
When the Allow Salesperson to View Contact Manager Contact Information option is “Yes” (default setting) in entrée.NET it will allow access to the information about the contact person for each customer. The customer name will appear at the top center of the Contact Information screen.

Tap the Information icon  to view the information from the Customer File in the main entrée system.
 If the Allow Salesperson to View Contact Manager Contact Information option is set to "No" the Contacts option will be removed from the main menu in the Electronic Order Pad. This means the Contact Manager’s information can not be accessed.


