Customer Falloff

The Customer Falloff feature allows you to easily view customers that have stopped purchasing a specific item or all items by Class, Brand, Item # or Item Tag.
EOP Settings
First you should adjust the Settings for Customer Falloff for the way you do business.
1.In the main menu tap Settings.
2.Now adjust these Customer Falloff settings.
a.Range selection mode
b.Display falloff when not purchased in the last
c.Require purchase in the last
3.Tap Save to save your settings in your user account profile.
Customer Falloff Overview
•Search Title Bar: The first time you open the screen you will see this set of options and buttons. It will default to "Customer Falloff" with the Class button activated.
•Back button: Tap the Back button to return to the previous screen.

•Search Description: Once a search has been performed the search title bar will contain a description of the search just performed. Here you see "Customer Falloff for brand HOT MAMA".

•Search Option Bar: Tap an option to search by Class, Brand, Tag or Item #.

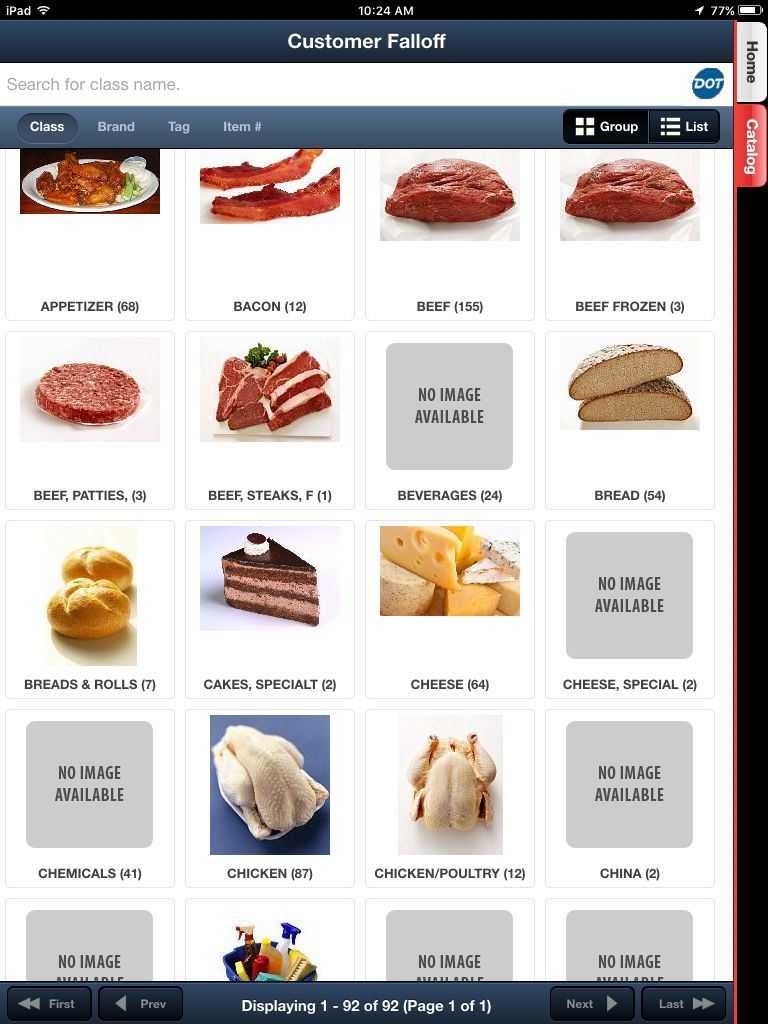
Group - Shows an icon to represent each grouping within the search option selected. See Class example that follows.
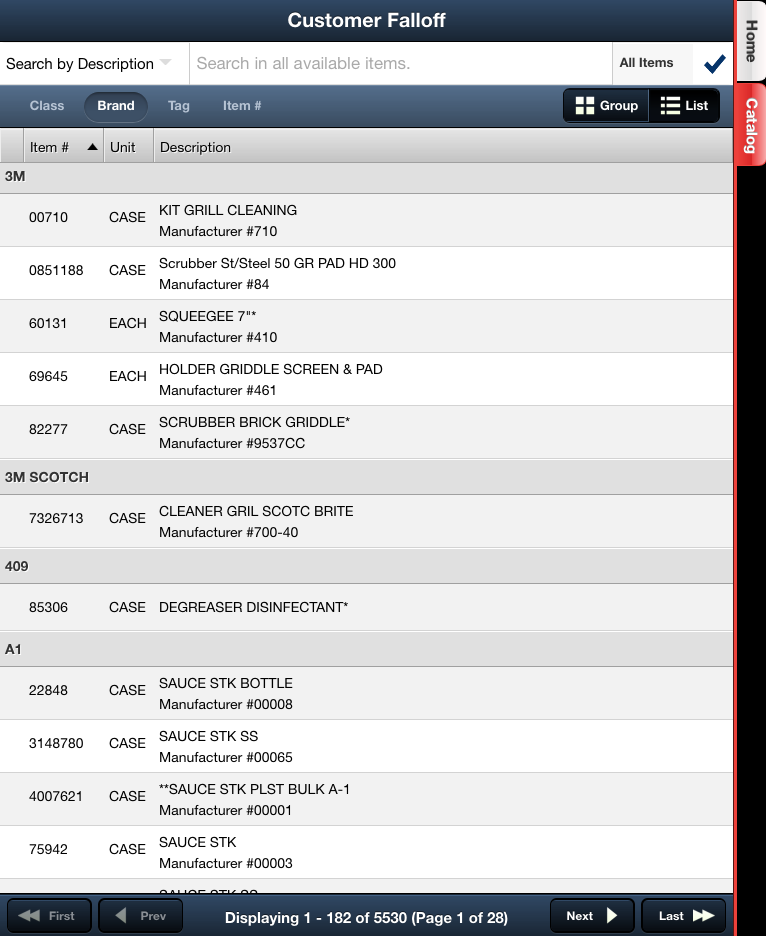
List - Shows all items by in a list broken down by the search option selected. See Brand example that follows.
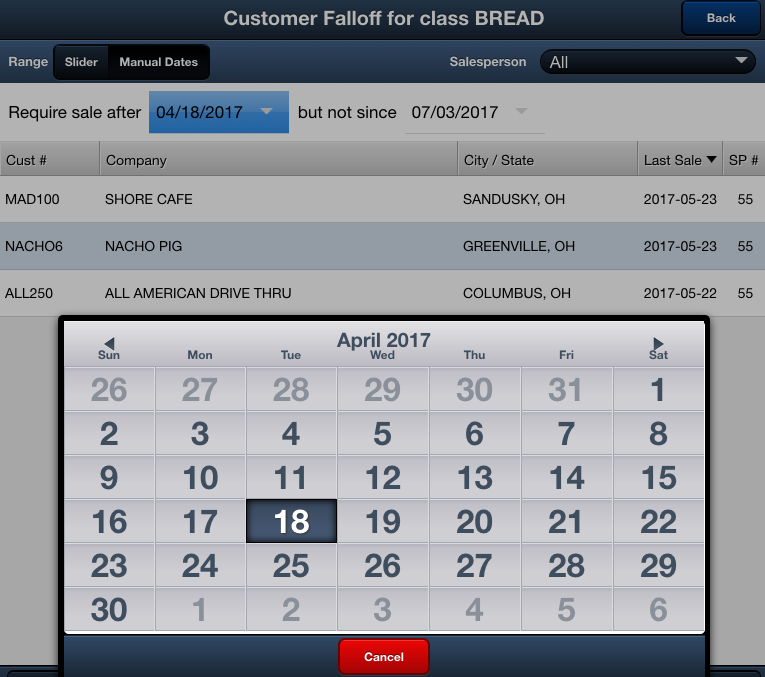
Range - Once you have tapped a search option the range options will display. Use either the Slider tool or Manual Dates tool to define the length of the falloff period you want to review.

•Slider: Drag the button along the slider to change the number of weeks of falloff you would like to see or use the arrow buttons on the left to increase or decrease the length of time.
•Manual Dates: Use the calendar tool or manually enter the desired dates you want to review.
▪Require sale after: Set the start date for the period to examine.
▪but not since: Set the end date for the period to examine.

▪Tap the desired date field to open the calendar tool and set your dates. |
|
Falloff Grid Data Overview
•Customer Falloff Data
▪Cust # - entrée system Customer number.
▪Company - Company name from the entrée system.
▪City/State - customer city and state location from the entrée system.
▪Last Sale - Date of the last sale of the item to the customer.
▪SP # - Salesperson number from the entrée system.

•Item Falloff Data
▪Item # - entrée system Item number.
▪Unit - entrée system Unit assigned to the item.
▪Description - entrée system item description and Manufacturer item number if assigned to the item.

Item Detail Area
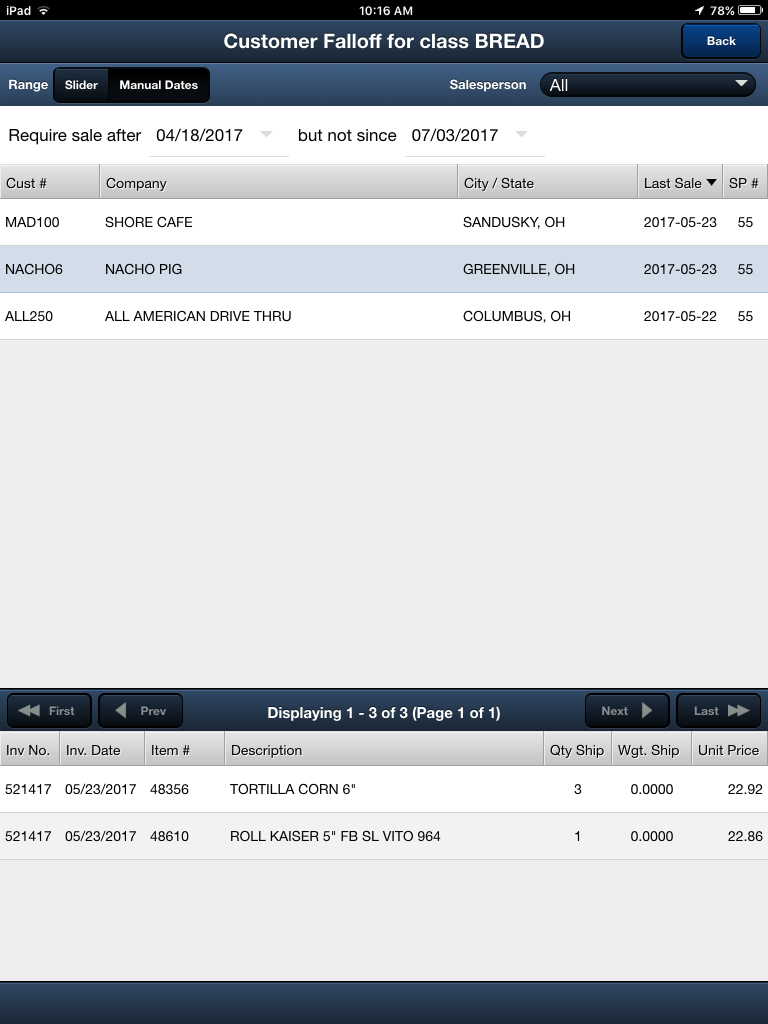
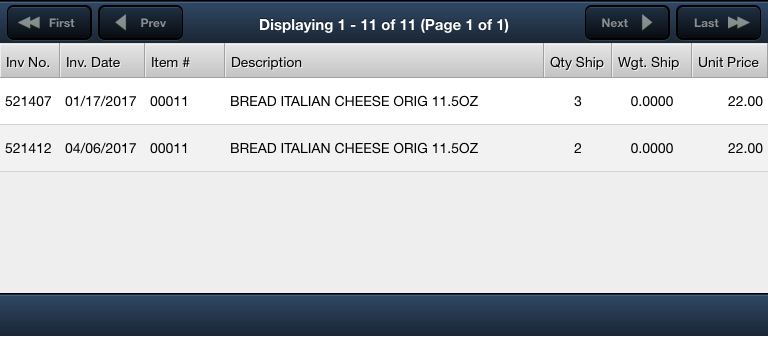
Tap a customer in the search results grid and at the bottom of the screen this section will display information about the items that are falloff based on your search options.
Using Customer Falloff Search Options
Class Tap the Class option and make a selection from the classes displayed.
(Group view shown)
▪Or you can tap in the Search in all available items text area and enter the Class name using the keypad. ▪Then tap the Search button in the keypad to get your results.
|
|
Brand Tap the Brand option and make a selection from the brand list.
(List view shown)
▪Or you can tap in the Search in all available items text area and enter the Brand name using the keypad.
▪Then tap the Search button in the keypad to get your results. |
|
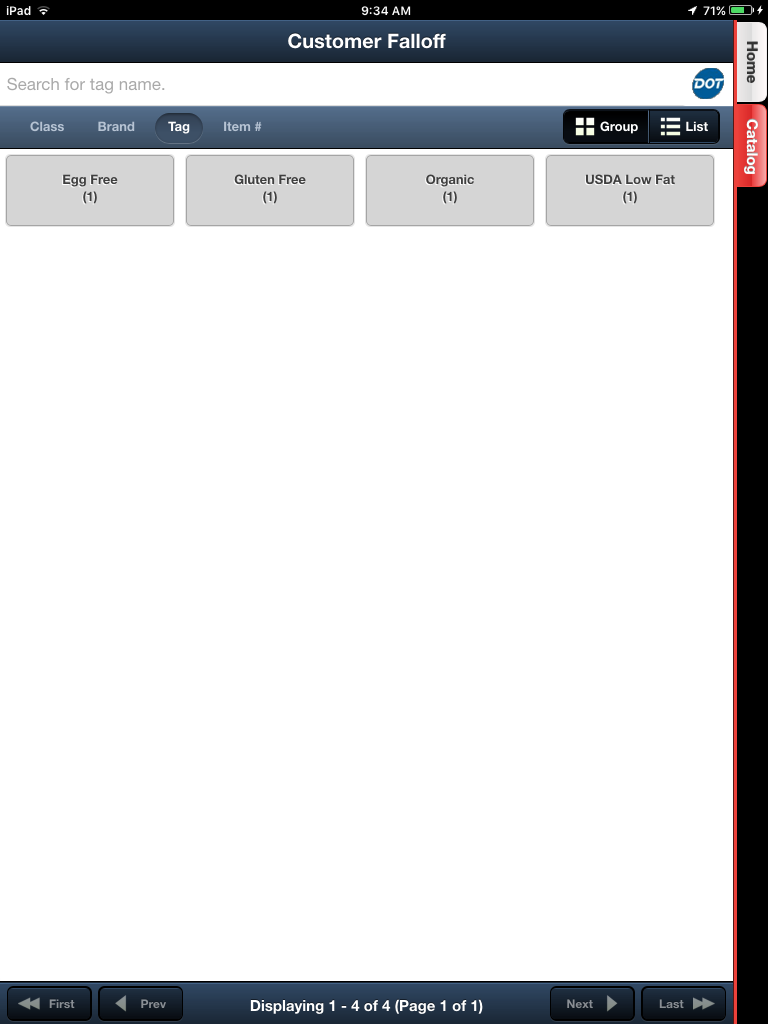
Tag Tap the Tag option and make a selection.
▪Or you can tap in the Search in all available items text area and enter the Tag name using the keypad.
▪Then tap the Search button in the keypad to get your results.
|
|
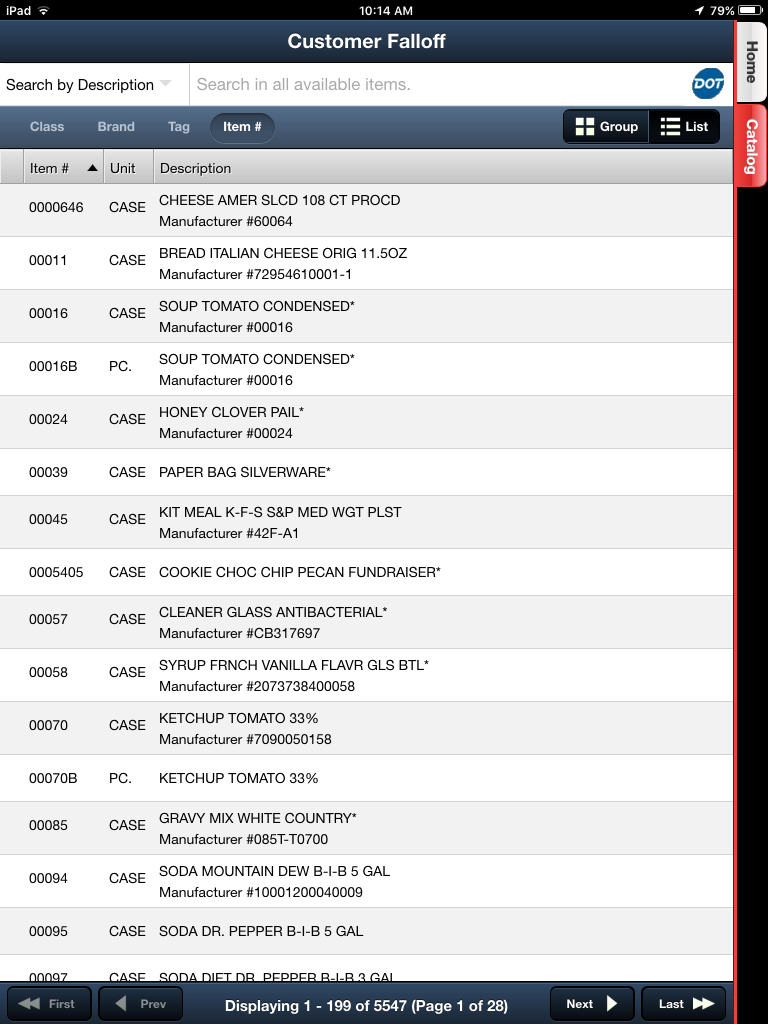
Item # Tap the Item # option and make a selection.
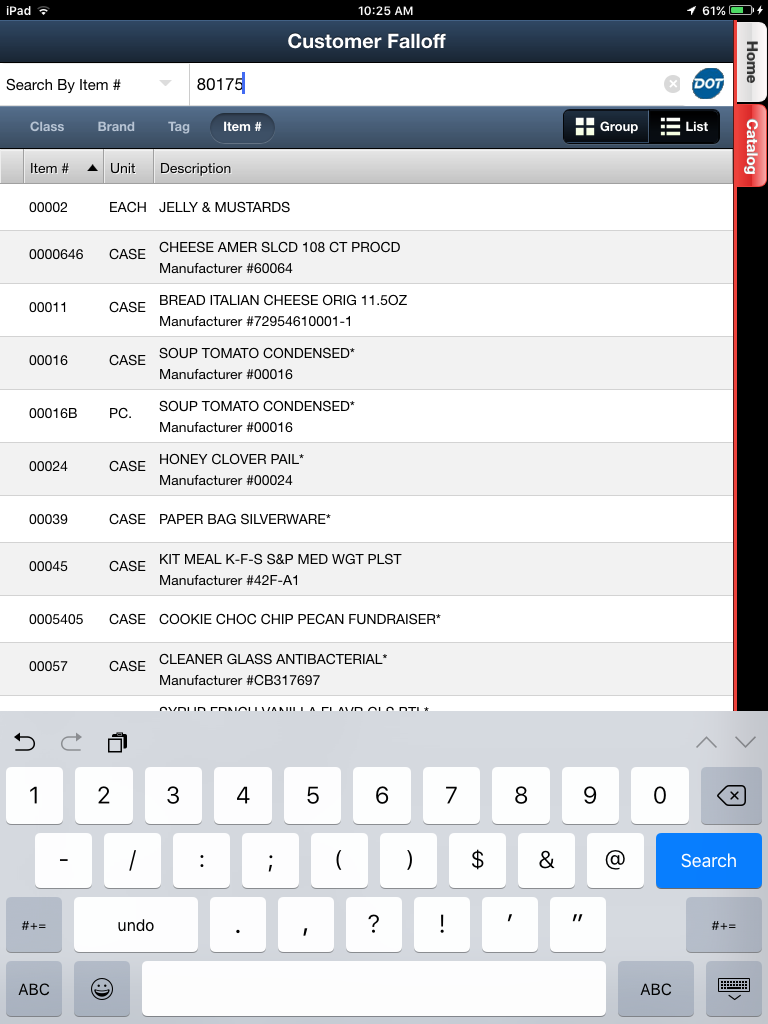
▪Or you can tap in the Search in all available items text area and enter the item number name using the keypad.
▪Then tap the Search button in the keypad to get your results.
|
|
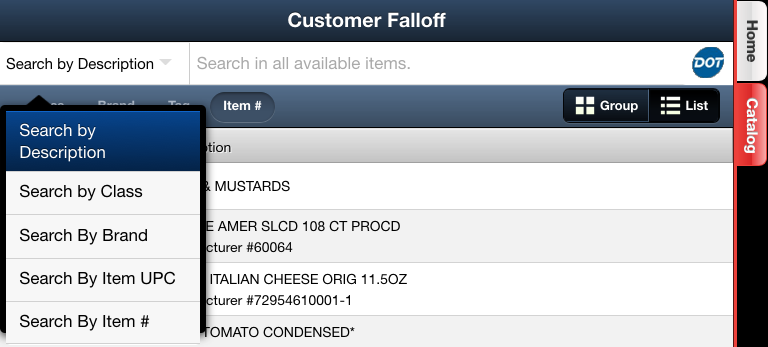
Search By Menu
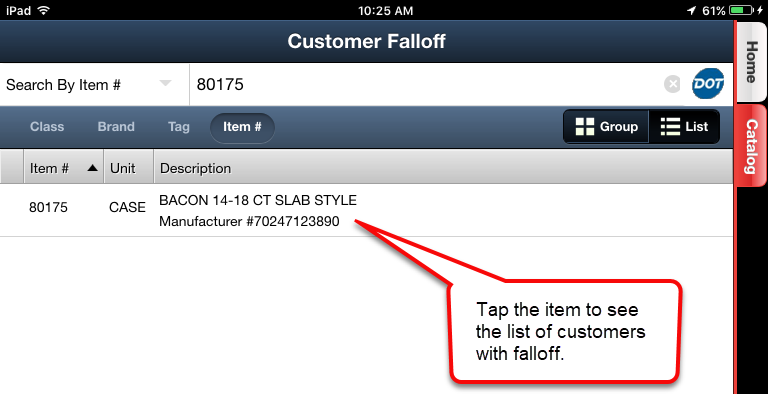
•For Item # you have the Search by drop down menu options: Description, Class, Brand, Item UPC and Item # that can be used to find the specific item. |
|
•Or you can tap in the Search in all available items text area and enter the item number using the keypad. Then tap the Search button in the keypad. |
|
•Once the item is found tap it to view the customers with falloff for the item. |
|
Salesperson Menu
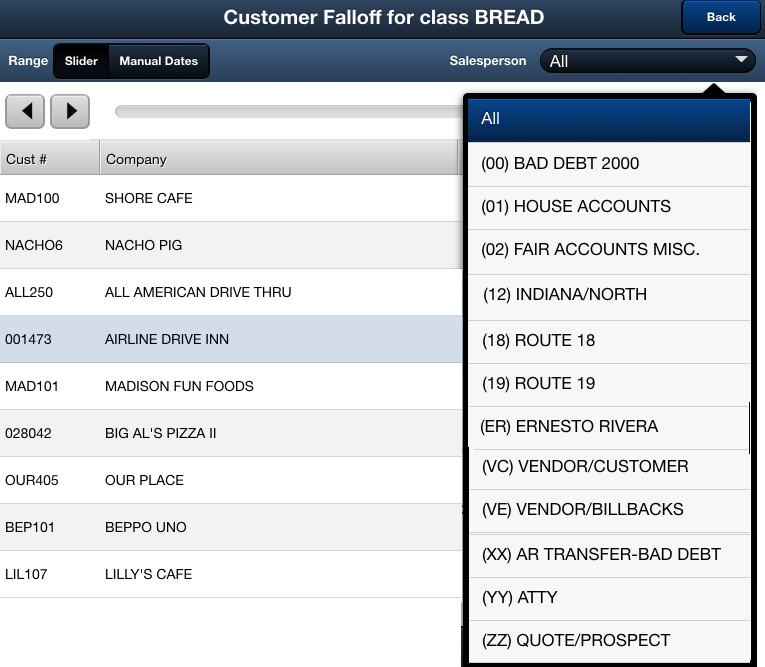
Use this drop down menu to select an individual salesperson or select All to see every salesperson's falloff data in the search results. |
|
DOT Menu
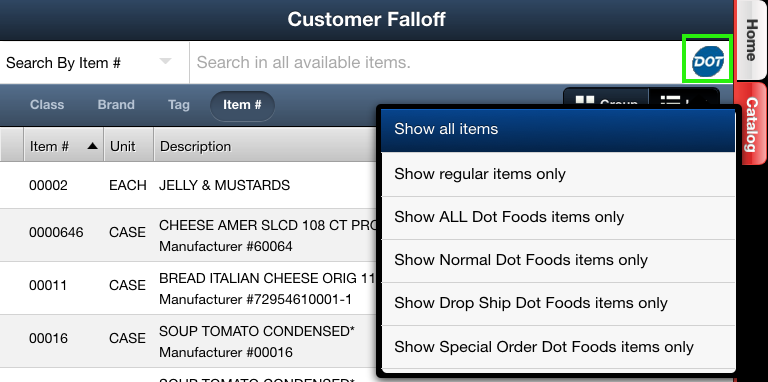
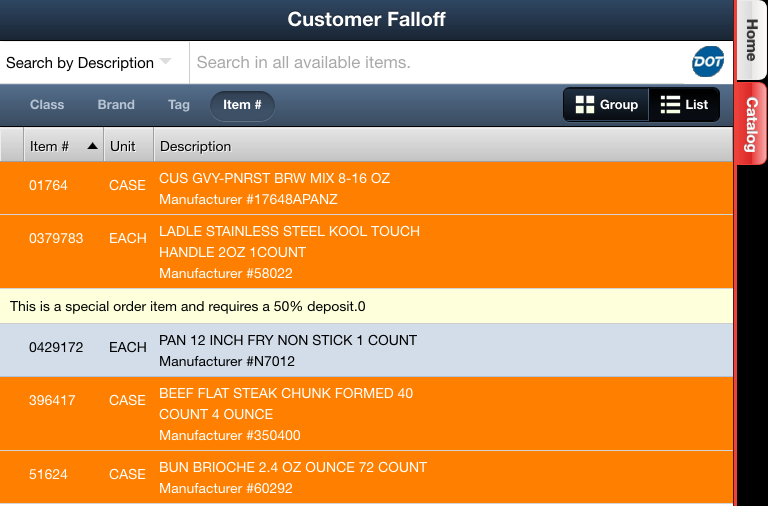
If you have mod #995 entrée.DOT, the DOT Foods Interface, you will see the DOT button for the drop down menu in the Search Title bar. Use this menu to select what items you would like to show in your search results. This is a handy tool for checking falloff for items that you strictly buy from DOT Foods. •Here the DOT button is in color because only DOT items are being shown in the screen. |
|
•The DOT button will turn gray when you select "Show all items" or "Show regular items only" from the menu to tell you that the items list is not just DOT items but a mix or no DOT items at all.

 Show Special Order DOT Foods Items Only
The same color coding for DOT Foods items will be used in Customer Falloff as in entrée system.
Search results for Bread class using manual dates to set the range. Here we tapped a customer in the list to see the items in their falloff for the class BREAD. |
|
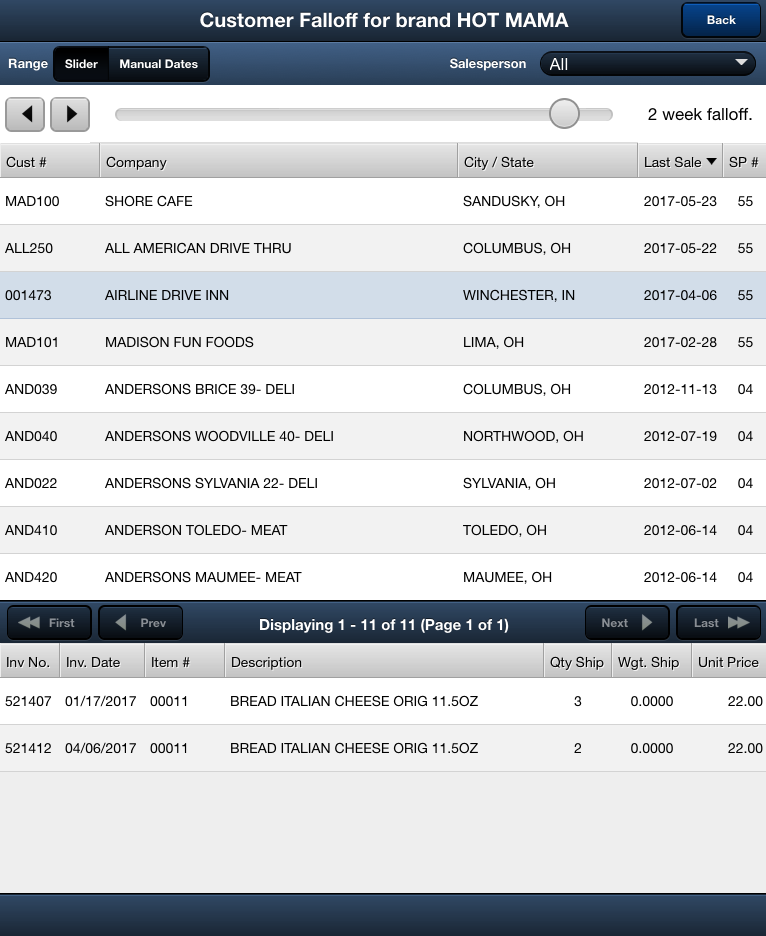
Search by Brand for Hot Mama. The search results in the grid are sorted by Last Sale date value with the default 2 week falloff range value on the slider. Here we tapped a customer in the list to see the items in their falloff for the brand HOT MAMA. |
|
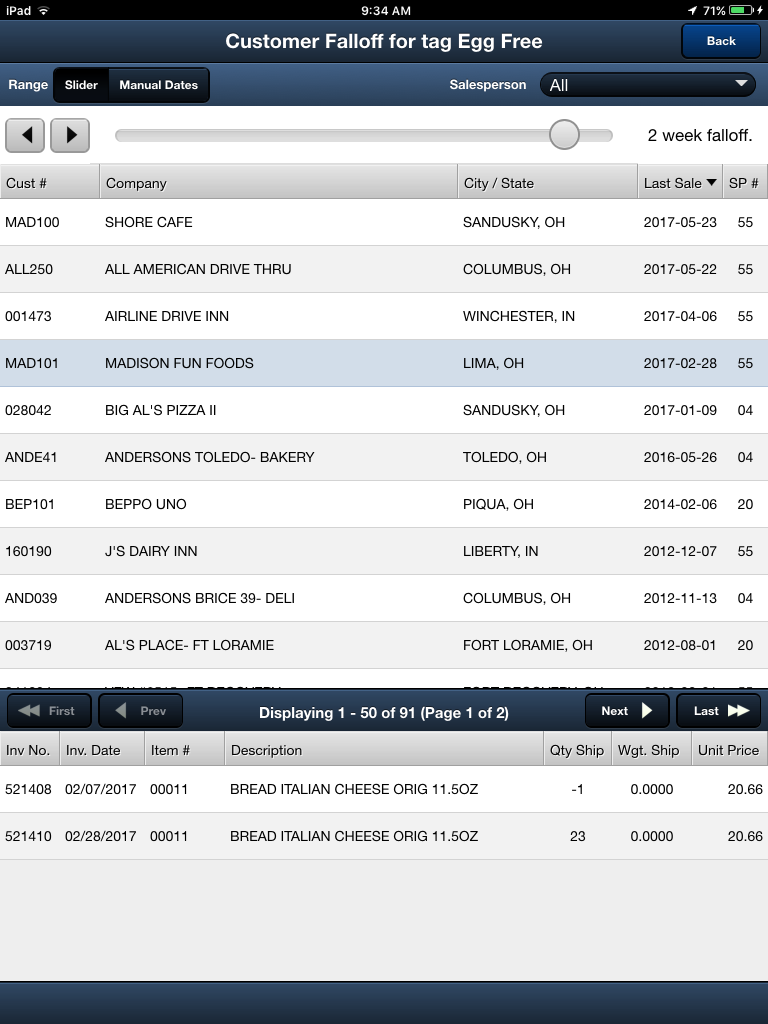
Here we tapped a customer in the list to see the items in their falloff for the Egg Free item tag.
|
|
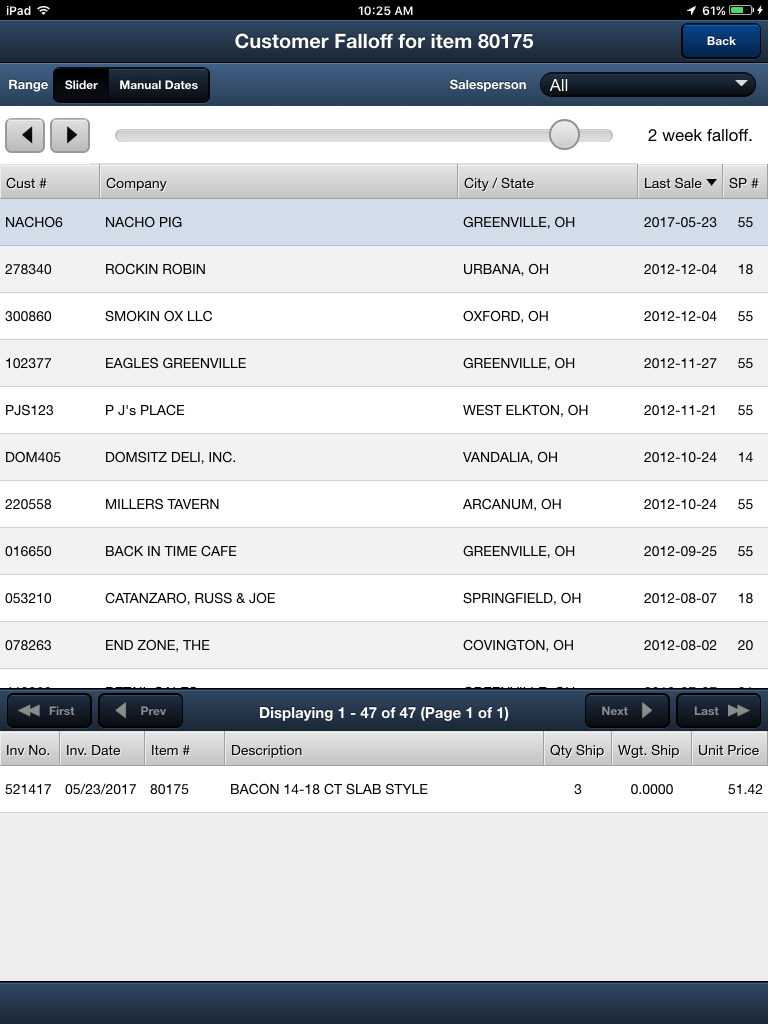
Here you see the customers with falloff for the item #80175. The item details have been moved to display in the bottom section of the screen.
|
|

 Item Tags are assigned to items in the