Production Labels

Contents
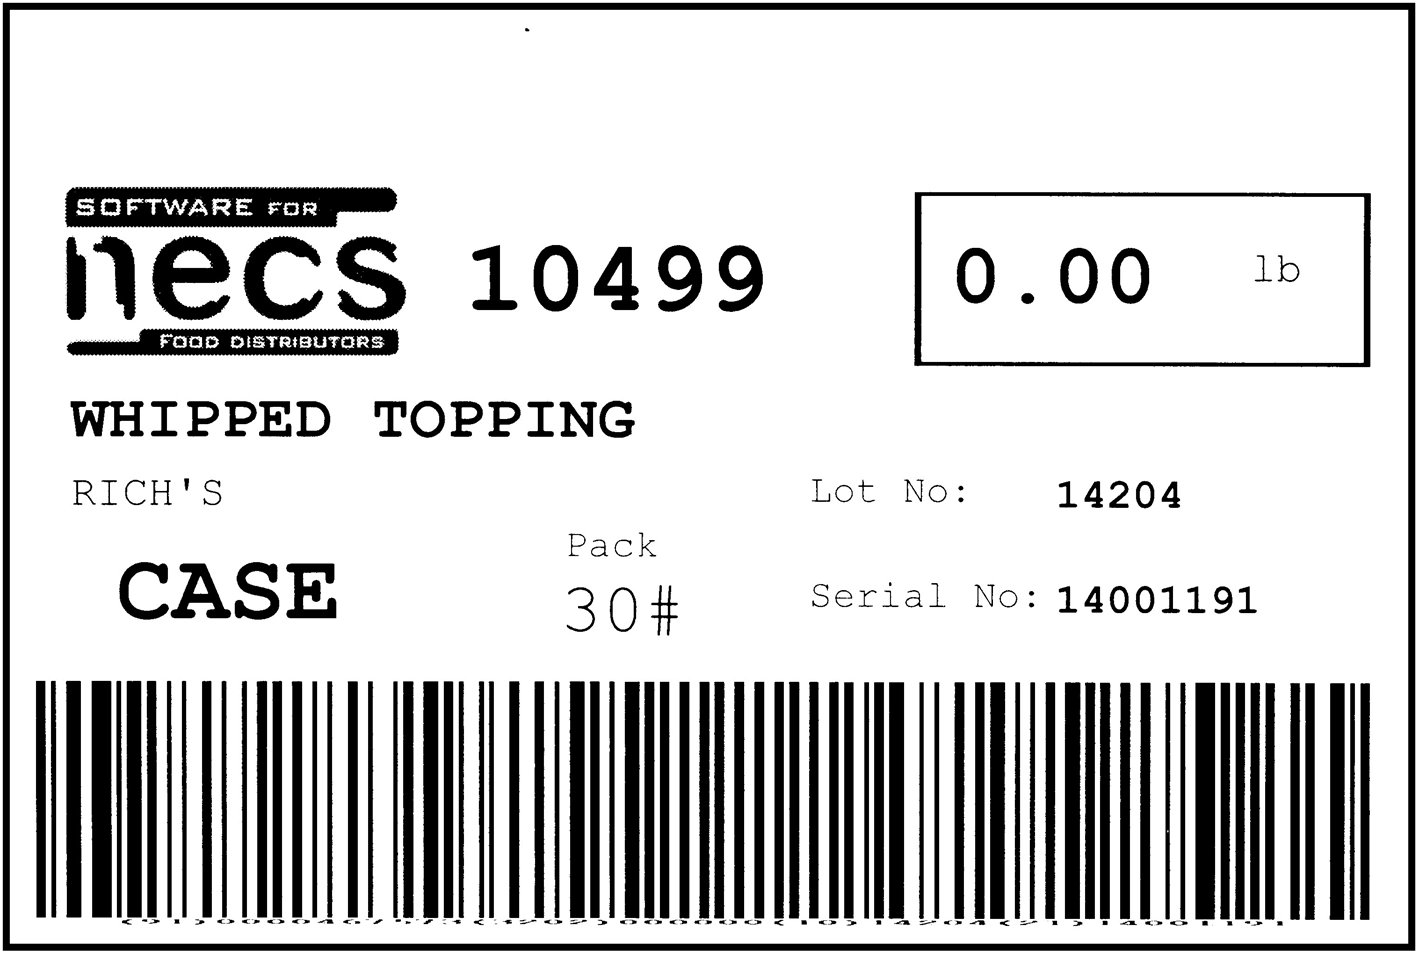
Food distributors who further process or manufacture items can take advantage of the Production Label feature of the Electronic Warehouse Manager (EWM). You can both design your own label format with entrée's barcode label designer and print these labels in your production room. You can mount a tablet running the Electronic Warehouse Manager near a Bluetooth enabled scale and a thermal barcode printer and generate labels on demand as inventory is processed.
Before you can print production labels in EWM you must first design and assign the label configurations to the items in the main entrée system. An overview of the label creation process follows for both versions of the entrée system.
entrée Lot Number Assignment Warehouse staff cannot assign lots in EWM. You have 3 possible methods for getting Lot numbers assigned in the entrée system.
1.Your office staff can manually assign lot numbers in entrée during invoicing. 2.You can turn on entrée system option #106 to Auto Assign lots during invoicing. 3.You can scan the lot number embedded in the barcode label that comes on the product during receiving.
Once one of the 3 options lot number assignments options above are implemented entrée can automatically assign the Lot Numbers and other key information in EWM to meet your labeling requirements.
|

entrée V4 SQL
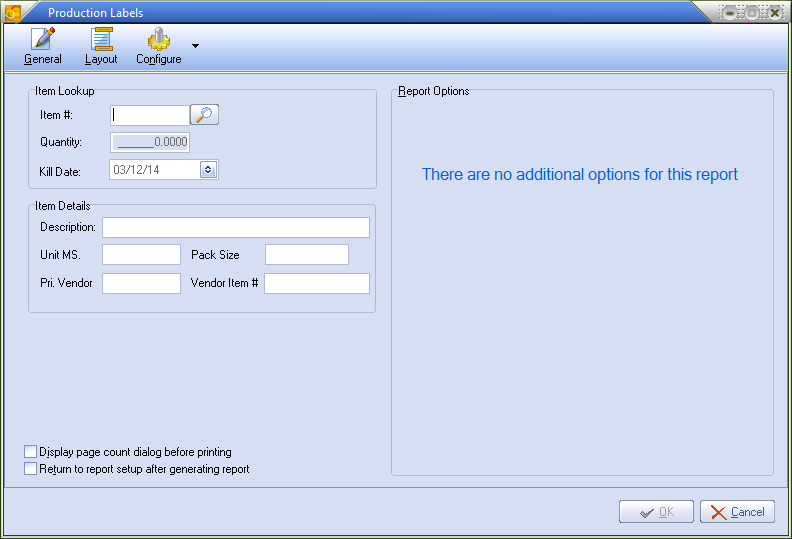
•To access all label design features go to the Inventory ribbon menu > Inventory Reports section > Labels drop down menu and select Production.
1. Find the item using the search tool  or enter the item number if you know it.
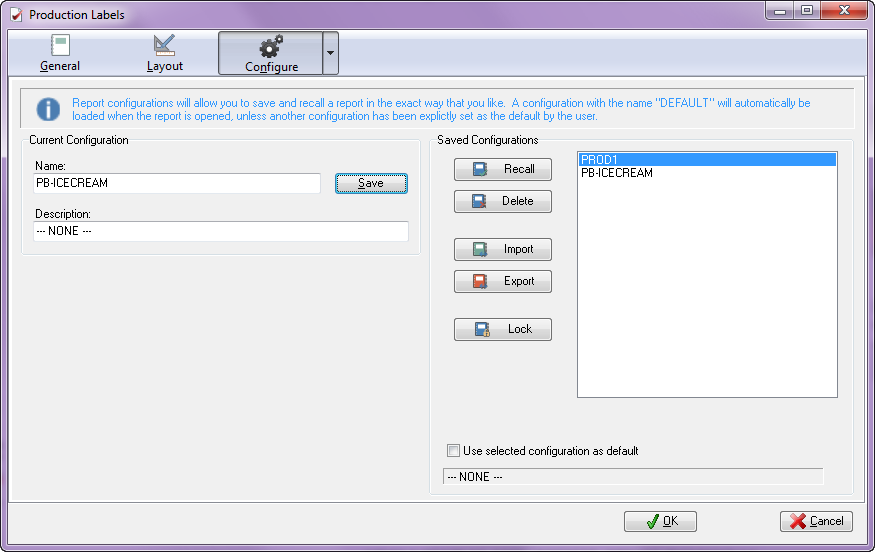
2. Enter Label Qty and Kill Date (if applicable). Click Configure.

3. Enter a Name for the configuration. Here we use PB-ICECREAM. Click Save.
4. Now go to the Inventory ribbon menu > Inventory tab and find the item you just created the label for.
5. On the Misc1 tab if a production label for the item has been designed and saved the Production Labels option will be activated in the Label Config menu.
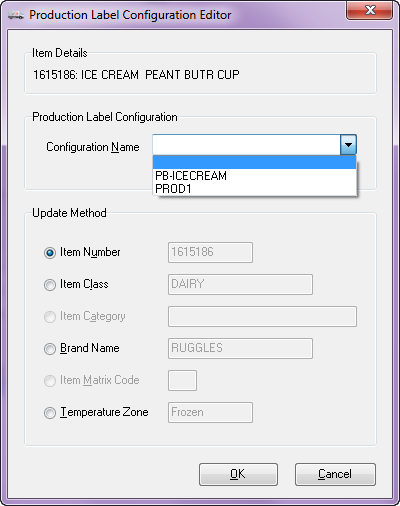
6. Click the Production Labels option in the Label Config menu and the Production Label Configuration Editor opens so you can assigned the saved configuration to the item.
•In this Production Label Configuration Editor example we have already created and saved a configuration called PB-ICECREAM.
7. Now assign the configuration to the item by selecting it from the options in the Configuration Name drop down menu.
8. Click OK.
9. You are now ready to print production labels for the item in EWM.
•For detailed information about designing labels see the Inventory Reports chapter Labels section of the entrée V4 SQL KnowledgeBase system guide.
|
|
entrée V3
To access production label design features in entrée version 3 use menu path: Reports > Label Printing > Production.
•For detailed information about designing and saving label configurations see the Reports chapter Label Printing section of the entrée V3 KnowledgeBase system guide.
•For instructions on how to assign a label configuration to an item see the Inventory File Maintenance chapter Misc1 Tab section topic on Picking Labels.
entrée V3 Assigning a label configuration to an item.
1.Go to the File > Inventory File > find item > Misc 1 tab.
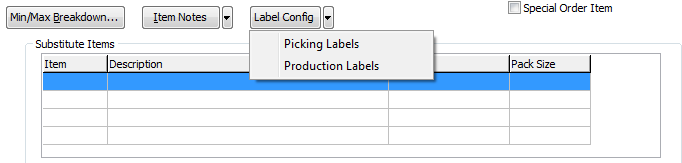
2.Click the Label Config drop down menu. The Production option is used to assign a saved label configuration to the item.
3.Select the label configuration to assign to the item and click OK.
4.See steps 6 - 8 in the version 4 instructions detailed earlier in this chapter for related information.
How to Print Production Labels in EWM
1. First on your tablet set the Default Printer in EWM to your label printer.
2. Click the Settings option in the EWM main menu.
|
|
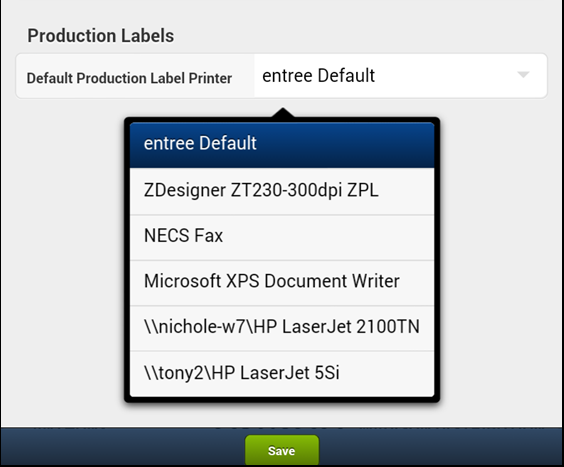
3. In Account Settings go to the Production Labels section.
4. Click on the drop down menu for Default Production Label Printer and select your label printer.
5. Click Save.
6. Click the Back button to return to the EWM main menu. |
|
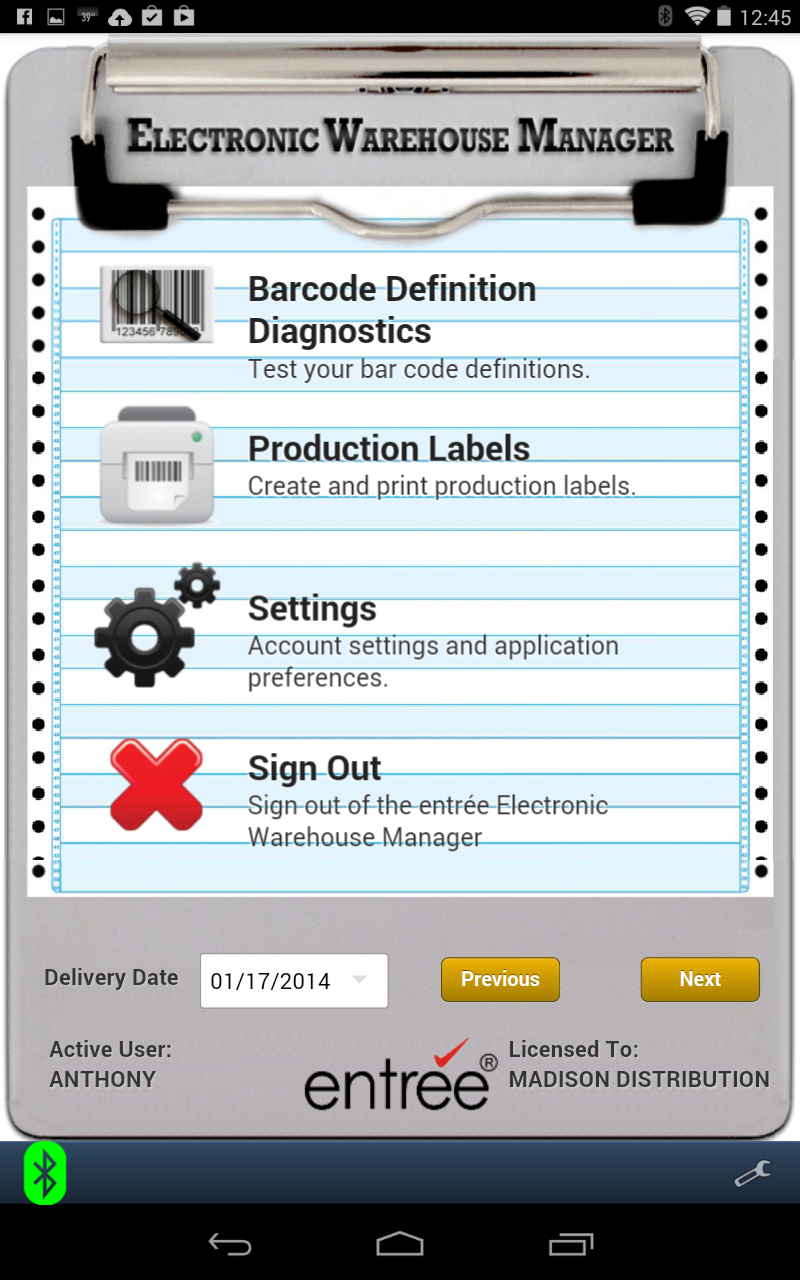
7. In the main menu click the Production Labels option.
8. You first need to find the item. You begin the Item Lookup process by clicking one of these options: Item, Class or Brand.
|
|
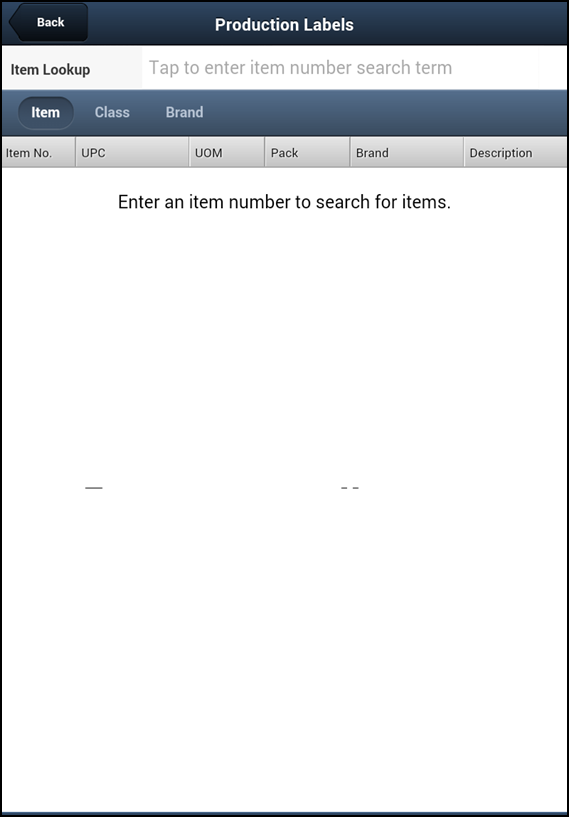
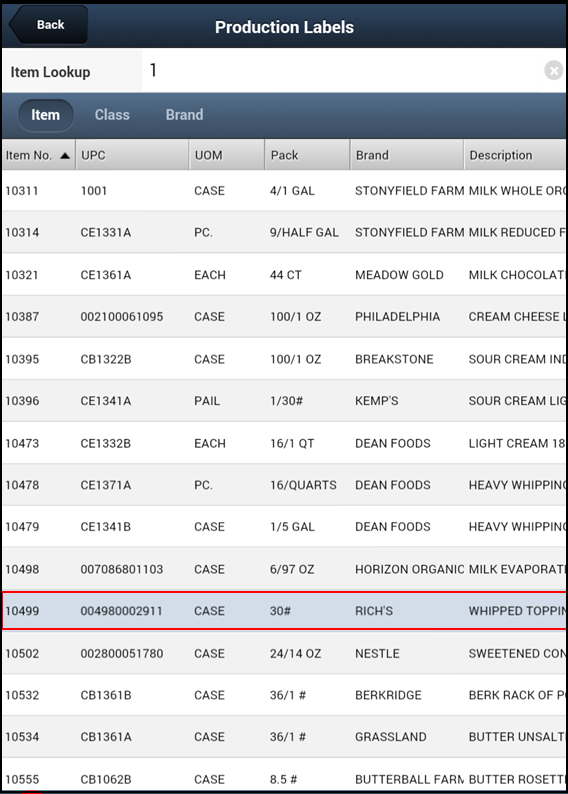
9. If Item was selected you will begin entering the desired item number in the Tap to enter item number search terms area and tap in the area.
10. A list of items that match the search term entered will display.
11. Tap and select the desired item in the list. |
|
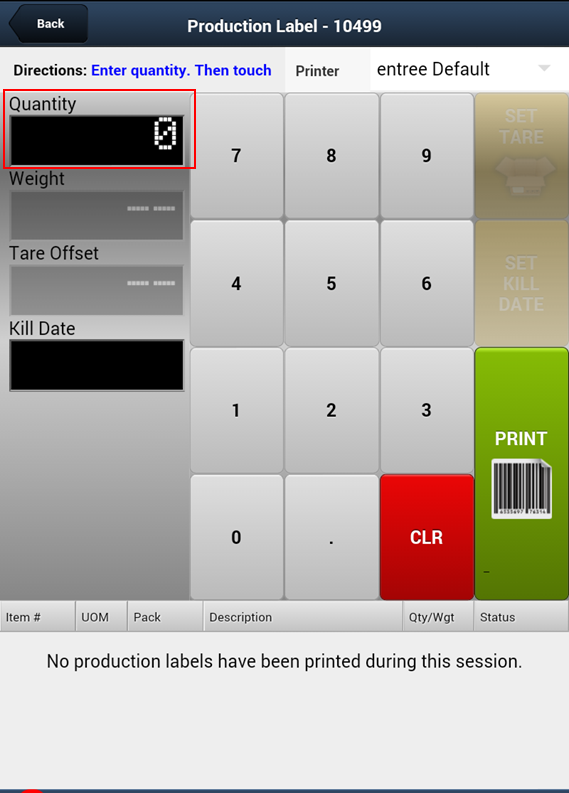
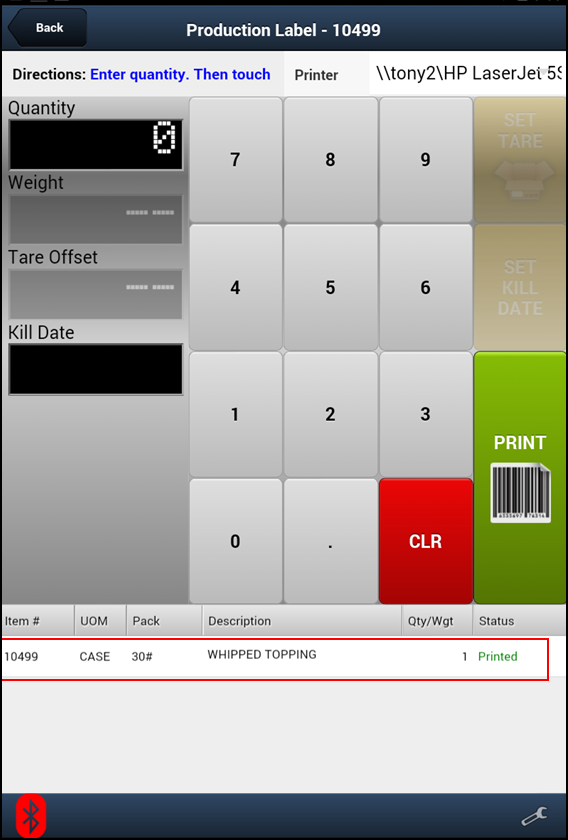
12. The Production Label print feature will open with the item number selected displayed at the top.
13. Tap and enter the Quantity of labels to be printed using the keypad.
14. Enter the Weight, Tare Offset and Kill Date as required for the specific item. |
|
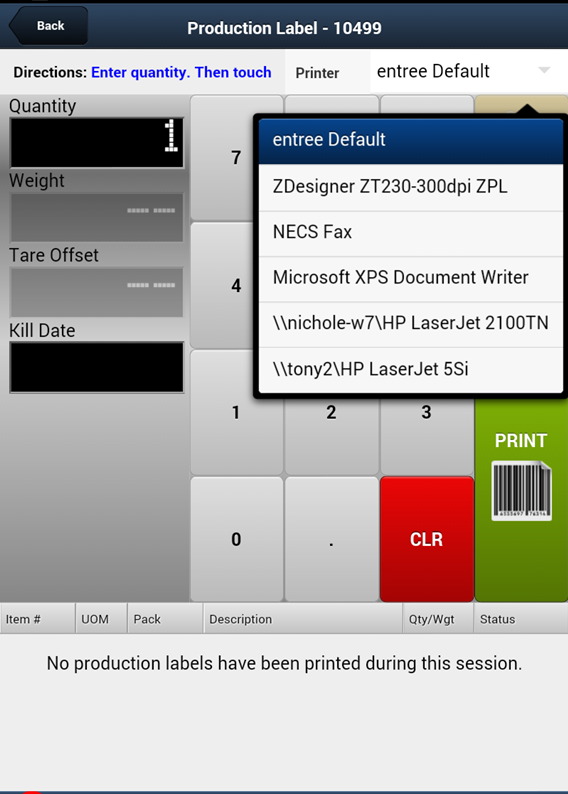
15. The entree Default drop down menu on this screen allows you to change the printer to be used for the current production label.
In the event that you are having problems with one printer you can switch to another as needed.
|
|
16. Tap the Print button to send the print job to the designated printer.
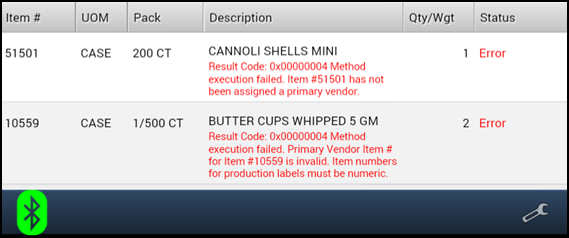
17. If the print job was successful you will see a message in the area below the keypad displaying the Item #, UOM, Pack, Description, Qty/Wgt and Status.
•When the Status is "Printed" the production label printing was successful.
|
|
•When the Status is "Error" you will see the error message below the item description as shown here.
•As you can see in the error messages below items need to have a primary vendor assigned and must have valid primary vendor item numbers before you can successfully print production labels.