Importing Contacts from Outlook

Contents
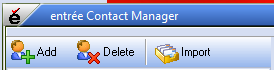
1. Click the Import button and Outlook import process will be initiated. |
|
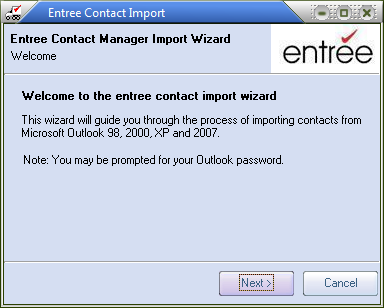
2. entrée Contact Manager Import Wizard pop-up dialog will display.
3. Click Next to continue. |
|
| 4. | If this is your first time importing contacts the Outlook icon will appear in your Windows tool bar. |
5. a. Click the
b. Use the drop down menu to select the profile. |
|
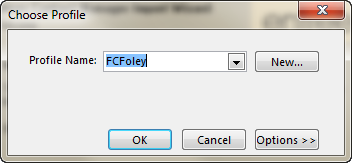
c. Click the Options button to access the Set as default profile option if this will be the default for the current user.
d. Click OK in the Choose Profile dialog.
|
|
 This can be skipped if the default profile is correct.
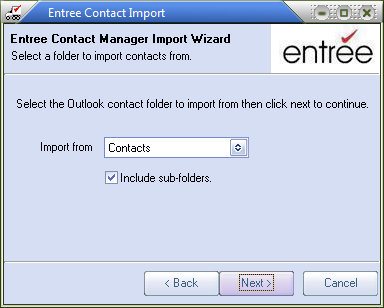
6. Next in the wizard dialog select the Import From folder where your contact information will be imported from.
8. Click Next to continue. |
|
| 9. | Older versions of Microsoft Outlook may display this warning dialog message: "A program is trying to access e-mail addresses you have stored in Outlook. Do you want to allow this?". |
| a. | Check the Allow Access for option. |
| b. | Set the time to 10 minutes. |
| c. | Click Yes to continue. |
10. The Import Contacts window will open with a list of contacts available to import.
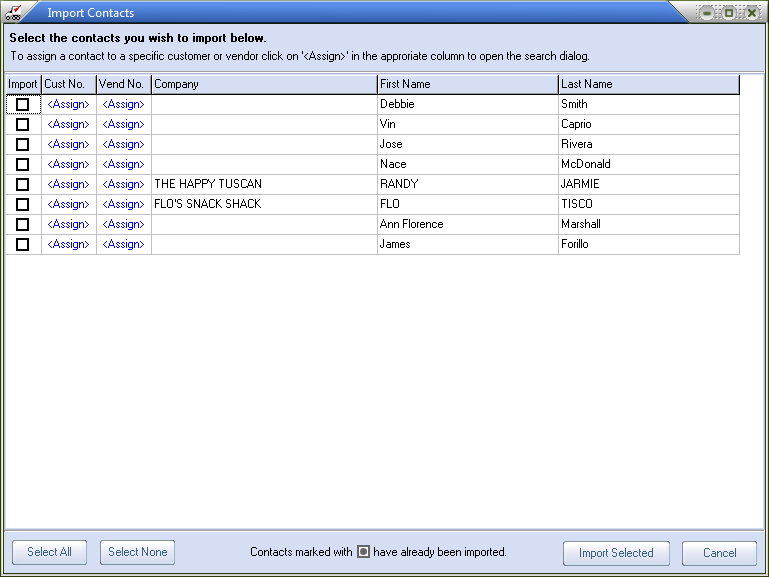
11. Check box in the Import column for the contacts you wish to import from the list.
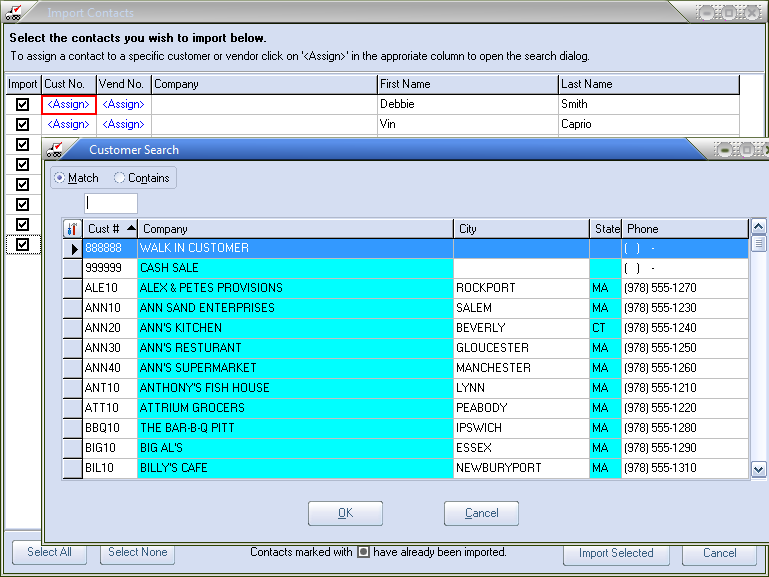
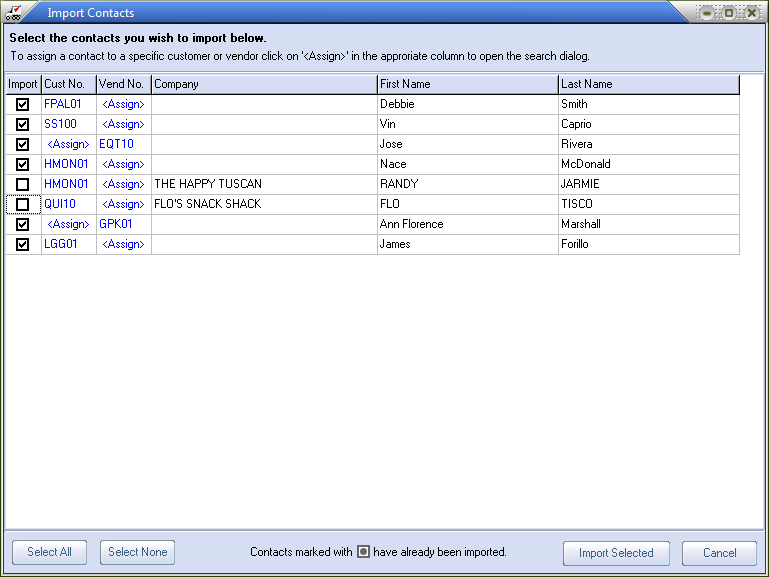
12. Click Assign in the Cust No. or Vend No. columns to open the search dialog for those files. Now assign each contact to customer # or vendor #.
13. Enter the company name in the Company column.
14. Click the button for the desired action: Select All, Select None or Import Selected. In our example we used the Import Selected option because not all the contacts in the list are being imported at this time.
15. A Confirm dialog box may pop-up asking "You have not assigned a customer or vendor number to one or more contacts selected for import. Would you like to import these contacts into the Miscellaneous category?"
If you want any unassigned contacts imported to the Miscellaneous folder click Yes. Click No to not include these contacts in your import.
16. A progress bar pop-up displays during the import process.
17. Upon completion of the Outlook contact import the entrée Contact Manager main screen will display with the new contacts visible. |
|
