Creating an Account

Contents
Creating an entrée.NET Account
When a customer requests access to our entrée.NET system you will need to create an account and assign a username and initial password. (Your System Administrator controls the settings that give you permission to create customer accounts.)
Once customers have this information they can login and submit orders and run reports at their convenience. Or you can place their orders for them if a customer does not want an account. Follow these simple steps to create your customer accounts:
1.Click on the Customer tab.
2.Use the Search tool to find the customer requesting an entrée.NET account.
3.Click the Load Customer icon  to view the customer’s account information.
4.Click in the Customer Account section.
5.Click the Create Account button. 
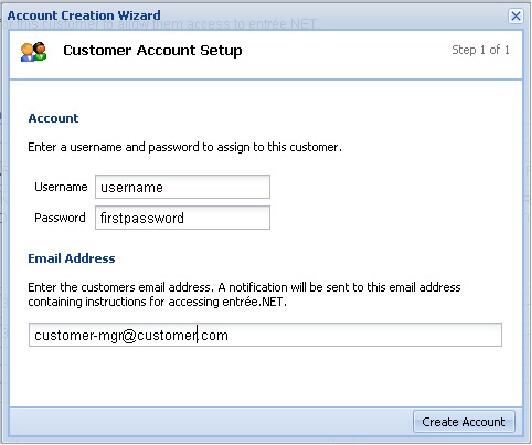
6.The Account Creation Wizard displays the Customer Account Setup dialog box.
7.Enter a Username and Password for your customer in the Account section.
8.In the Email Address section enter the email addresses where your customer
wants to receive their account setup information and order confirmation emails.
9.Click the second Create Account button. 
10.Now a Customer Account Setup email will be automatically sent to your customer’s email address. Multiple email addresses can be entered for the customer by separating each email addresses with a semi colon.
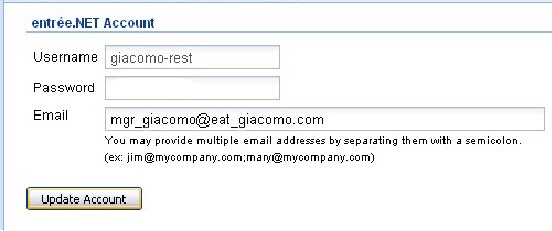
11.The customer’s entrée.NET Account section will look like the image below with a blank Password field after account creation.