Message Setup
Staying in close contact with your customers and salespeople is important in today’s fast paced business world. With the messaging system built into entrée.NET, you can easily stay in touch with messages that will appear on the user’s home page as soon as they log in to the system. Messages can optionally be emailed to recipients using the email addresses from your customer and sales account information.
•Click on the Messages tab.
•Your previously posted messages are listed here starting with the Edit Message  and Delete Message
  tools, followed by Subject, Message text and Posted date and time.

Posting New Messages & Emails
1.Click on the Messages tab.
2.Click the  button and the Post Message dialog box displays.
3.Recipient: Click the button to select the recipients of the new message.
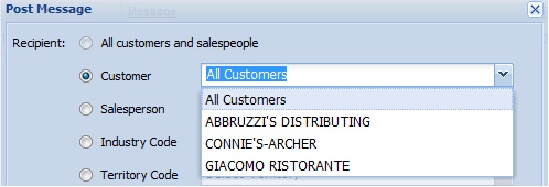
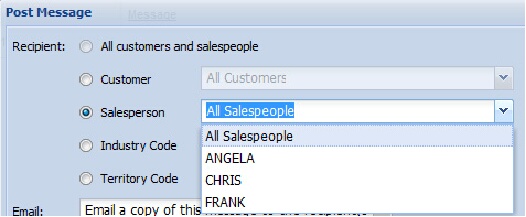
4.Use the drop down lists for each Recipient category to select individual businesses and salespeople to receive your message.
5.Multiple recipient options are available including Industry Codes and Territory. If you have this data set up in your main entrée system these recipient options will be available to you here.
The Recipient Customer drop down list is used to select a specific customer for the message.
|
The Recipient Salesperson drop down list is used to select individual salespeople for the message.
|
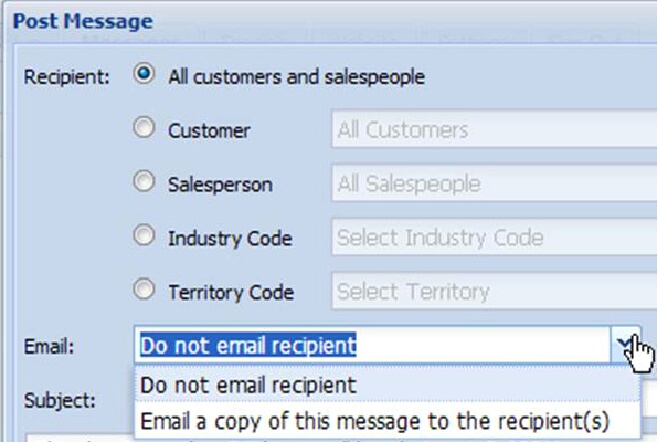
6.Email: Use the email drop down list to make your selection. The default email option is “Do not email recipient”.
Your other option is “Email a copy of this message to the recipient(s)”. This option will send two communications to your recipients a system message and an email. |
|
7.Subject: Type a short description about the subject of your email.
8.Message: Below the Subject is the area where you will type your email message.
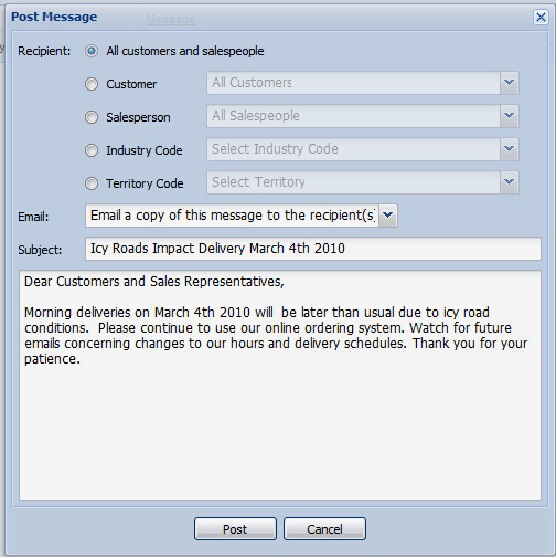
9.Once your message has been entered, click the Post button  to send your message to the recipients.
10.If you decide not to send the message, click the Cancel button.
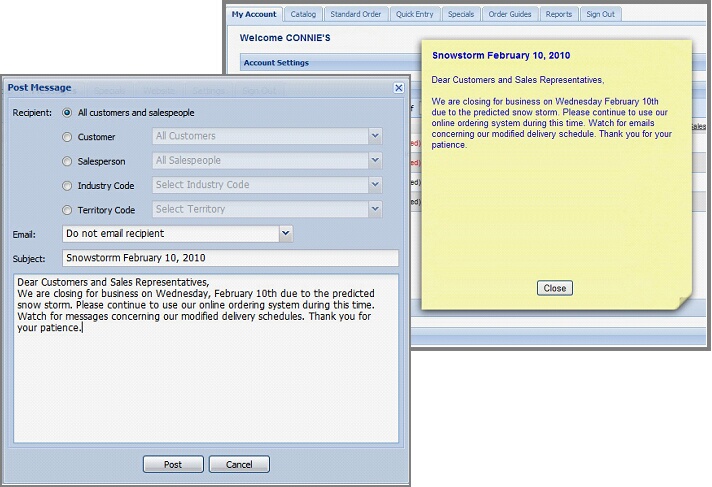
11.The message has been sent and will post on your customer’s My Account page. When the customer logs in to the system your message is the first thing they see.
Left image: The Post Message dialog box before you post the message.
Right image: The customer’s message posted on their My Account page after they log in.
Managing Posted Messages
•Delete Message  tool click this to remove unwanted messages from the posted messages list. The Delete Message? dialog box displays then click Yes.
•Edit Message  tool is used to edit previously posted messages. There may be some messages that you frequently send to your customers. You can save time by editing and reposting these frequently used messages from your posted messages list. An example would be messages relating to holiday hours and order cut off times.
How the Edit Message tool Works with Posted Messages
1.Select a message from the posted messages list and click Edit Message. 

2.The Post Message dialog box displays the details of that message.
3.Modify the information in the old message to create your new message. Be sure to change recipients, dates and times in the message to fit the new message’s details.
4.Click the Post button to send your new edited message to the recipients.
5.The Email Message? pop-up box will display:
“Will no longer be able to edit this message once it has been emailed. Save and Email?”
6.Click Yes to save and email the new message. |
|
7.The newly posted message has now replaced the posted email message you edited in the list.
8.The new posted message has now replaced the previous message in the posted messages list.


