Activating the Translation Service
1. To activate the Language Translator Service the System Administrator must login to entrée.NET.
2. Click the new Translation tab that will be in the entrée.NET main menu.

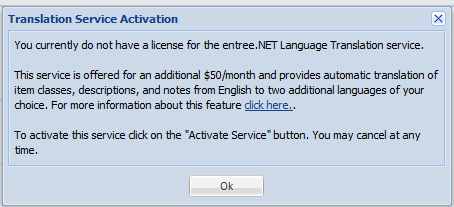
3. When you first click the Translation tab a message box will display explaining the Language Translator Service and the monthly fee. Click OK to close the Information box.
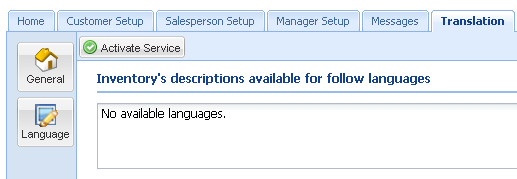
4. Click the Activate Service button on the Translation tab to begin the activation process.
5. The Activate Service? dialog box will display. Respond Yes to activate the Language Translator service.

NECS will immediately have the Language Translator service available in entrée.NET. An email notification will be sent to you to confirm activation of the Language Translator service and the monthly fees involved.
6. Next click the Language button on the left to open the language selection screen which lists the available languages.
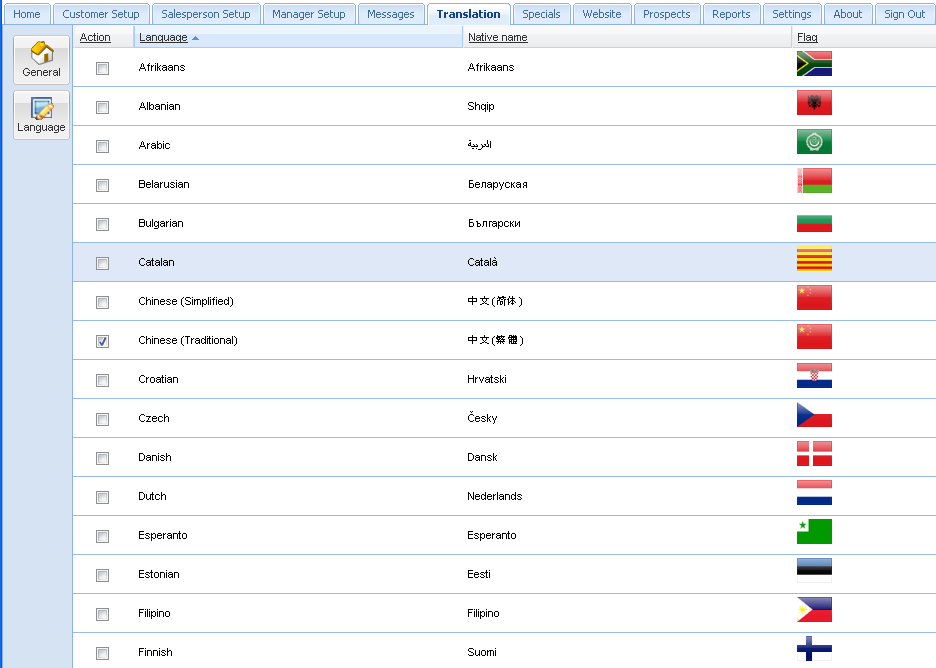
7. Check the box for the one or two languages to select them. Your Translator Service license limits you to two languages.
8. Now click the General button. The languages you selected are listed in the selected languages box in the center of the screen with a status of “Not applied yet”.
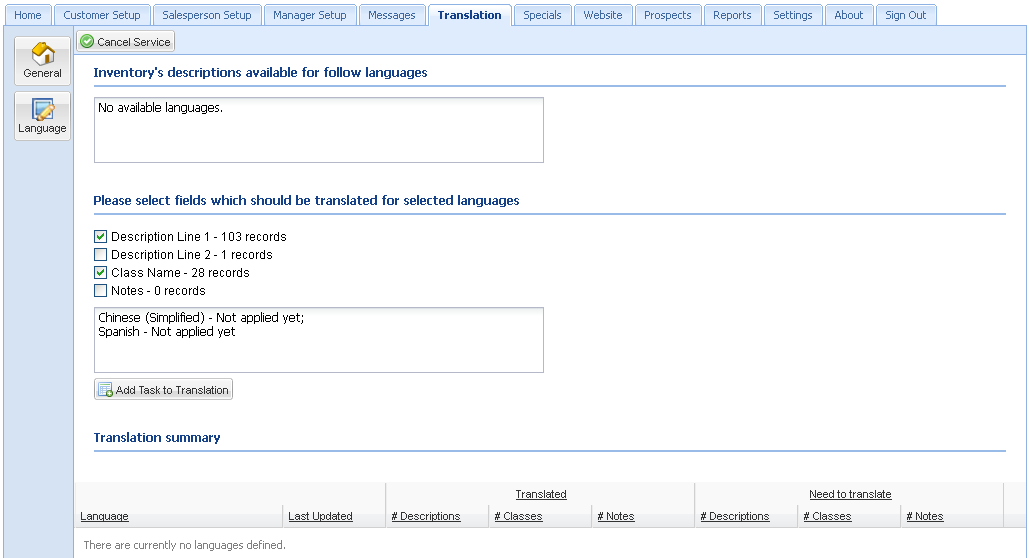
9. Now you will check the boxes for the fields you would like to be translated into your chosen languages. In this section the number of records that will be translated for each field in your database is displayed.
Fields to select from are:
•Description Line 1
•Description Line 2
•Class Name
•Notes
Note: The information in these fields comes from the main entrée system. So when the information in entrée changes and is exported to entrée.NET you will need to run this translation process again for your selected languages to convert the new data.
10. Once your fields are selected you will run the translation process by clicking the  Add Task to Translation button.
11. Once you click the Add Task to Translation button the Server answer message box will be displayed.
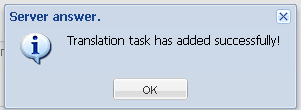
12. Click OK to run the language translation process. Translating and loading the fields you have selected should take about 5 minutes or less depending on how much data must be translated.
13. While the language translation process is running look in the Translation Summary section of the screen and you will see that the value of the Last Updated field for the selected languages will be Pending.
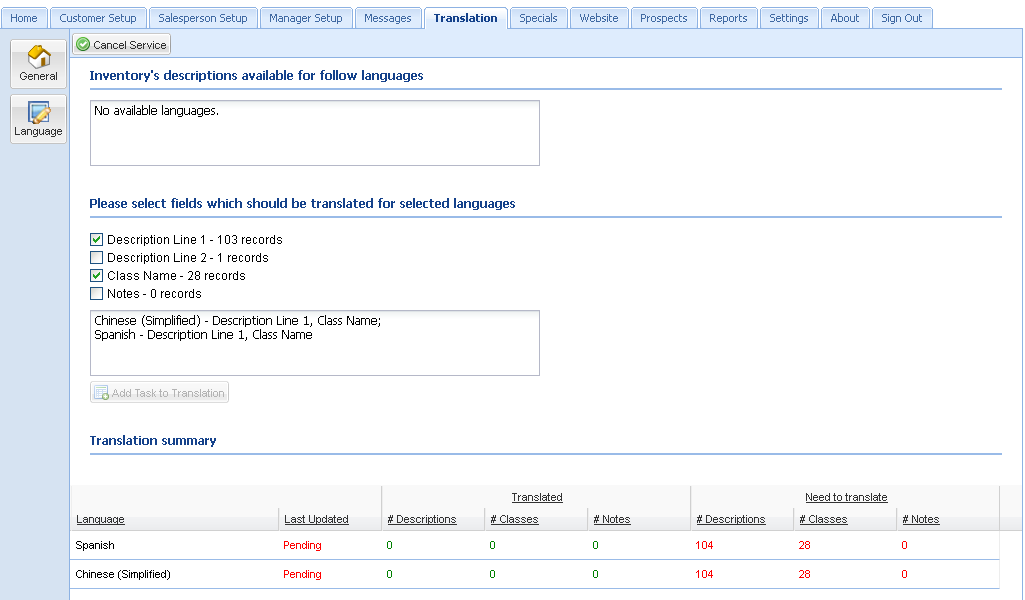
The number of Descriptions, Classes and Notes that need to be translated will be shown in the Need to Translate area in red text.
14. Once the process has completed the Translation Summary section Translated area will show how many fields were successfully translated for each language in green text. The Last Updated field will display the date of the translation.
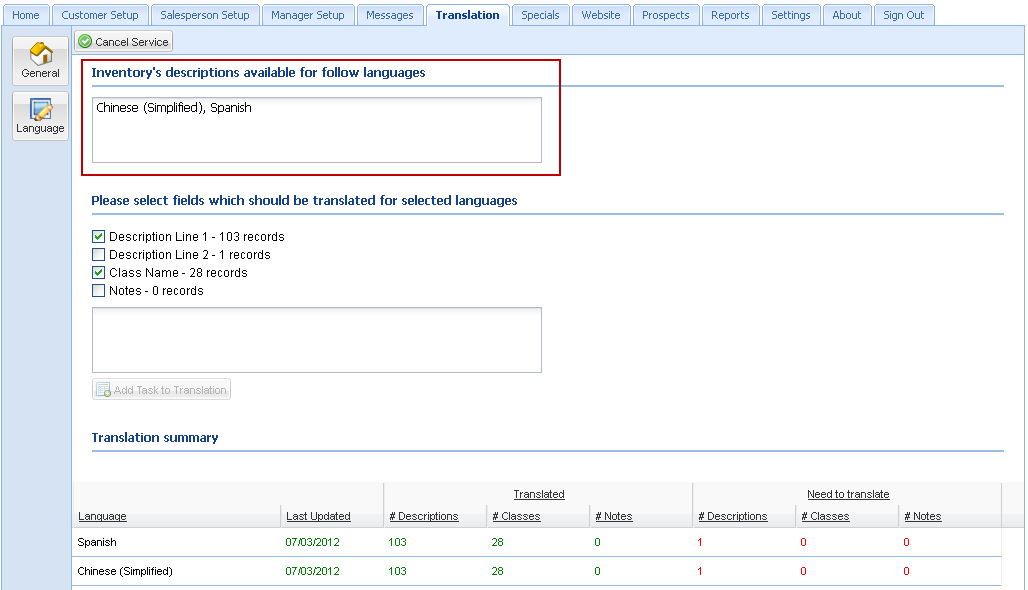
15. When the translation of your fields is done the Inventory’s descriptions available for the following languages section at the top of the screen will list the languages available. In our example we have Chinese (Simplified) and Spanish. (see image above).
