Prospects Tab

Contents
The purpose of the “Prospects” feature is to provide the distributor with a set of tools which can be used by the distributor and your salespeople to manage and prepare quotes for potential customers. Three new tabs have been added to your menu to support this feature; Prospects, Manager Setup and Reports. The Prospects tab is where you will create and maintain your prospects information, guides and eventually convert your prospects to regular customer accounts. The Manager Setup tab is used to provide administrative access to managers or salespeople for managing prospects of your website. The Reports tab contains two new reports created to support prospect management, the “Prospect Listing” and “Prospect Guide”.
 Orders cannot be placed for prospects and they are not included in your customer listing. Each prospect has a “Status” associated with them to indicate their current position in the prospect to customer conversion chain. These statuses are:
Active |
Initial state indicating that this is an active prospect. |
Pending |
Indicates that this prospect is ready to be converted into a customer. |
In Process |
Indicates that the conversion to a customer is in process and pending confirmation from the main system. |
Converted |
Indicates that the prospect has been converted to a customer. |
Quote Sent |
Indicates that the prospect has been sent a quote. |
Enabling the Prospects Feature
First Perform Settings Tab Updates
1.Click the Settings tab.
2.Click the Options button on the left.
3.Go to the General section.
4.Click in the “Current Settings” column to set these options to Yes.
a.Enable “Prospects” feature. Turning this option on will display the “Prospects” and “Reports” tab for the distributor and designated salespeople in the system.
b.Create prospects for quote requests from the website. Set this option only if you have the website option and prospects will automatically be created in the system.
5.Go to the Salesperson assigned to new prospects option.
6.Select a salesperson from the drop down list. This option allows you to assign a default salesperson to manage the prospects generated from your website. This option is not required for the prospects feature to work.
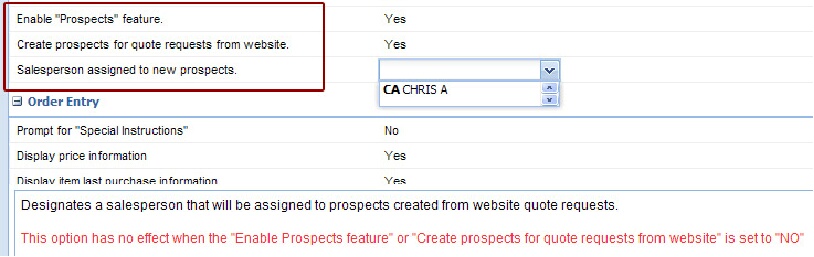
The General section of Options in the Settings tab.
The current settings and drop down list have been set to enable the Prospects feature.
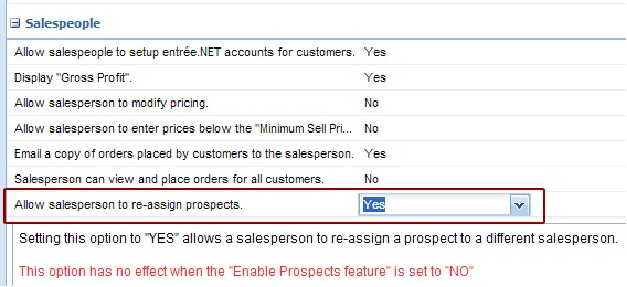
7.Go to the Salespeople section.
8.Set the Allow salesperson to re-assign prospects option to Yes.
This option controls if a salesperson has permission to transfer a prospect to a different salesperson. Generally this functionality is only provided to the distributor or a prospect manager. Designating an employee as a prospect manager will be covered later in this chapter.
This option has no effect when the “Enable Prospects feature” is set to “No”.
9.Once the modifications to the Settings tab are completed the system will automatically update.
10. The new Manager Setup, Prospects and Reports tabs will appear in your menu.

11. Now the Prospects feature has been enabled in your entrée.NET system.