Specials Setup
Everyone loves a special and entrée.NET makes it easy for you to highlight them for your customers. The Specials tab allows you to easily manage and display weekly featured items.
You can control whether specials will appear on your company’s website Specials page, add an image and a description (with an NECS designed site).
Your customers will view an informative list of all your specials, as well as see specials as they enter their orders and receive emails that are sent automatically. Sale and break pricing information will be displayed to customers for products that qualify while ordering.
Specials Tab
Click on the Specials tab to view the Specials screen. entrée.NET will then display all the items from your main entrée system that have been defined in the “Sale Pricing” tab of Inventory File Maintenance.
•Edit Extended Info button:  displays the Edit Special dialog box for the selected item. Functions the same as the Edit Extended Info icon.
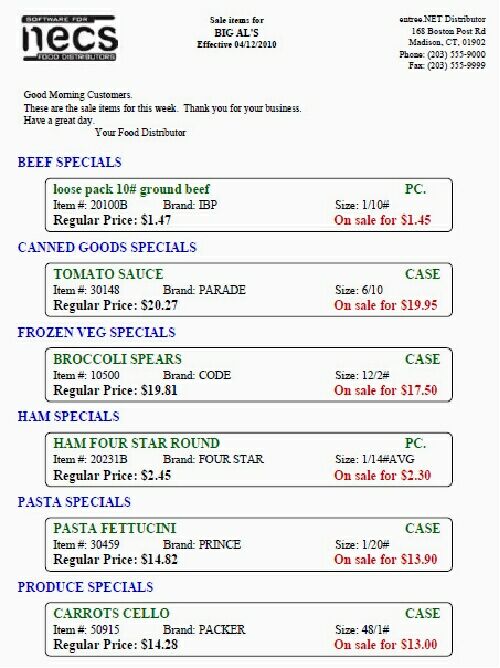
•Email Customer Specials button:  runs the dialog used to email information about all your specials to your customers.
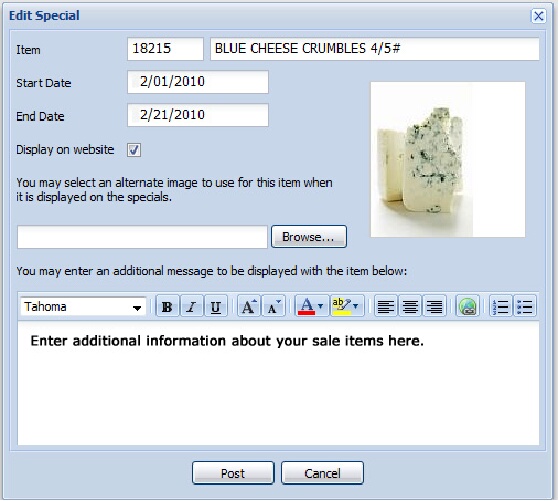
•Edit Special icon: Click ![]() to edit the special. The Edit Special dialog box will be displayed. You can add an image and a note to the special.
to edit the special. The Edit Special dialog box will be displayed. You can add an image and a note to the special.
•Website: Check this box if you want the special to be displayed on the Specials page of your website.
•Item #: The item number from your main entrée system.
•Description: The product description from the main entrée system.
•Note: Comes from the message you enter in the Edit Special dialog.
•Start: The start date for the item special taken from the main entrée system data.
•End: The end date for the item special taken from the main entrée system data.

Editing Specials
1.Click on the Specials tab. 2.Click the Edit Special icon for the item you would like to edit.
3.The Edit Special dialog box will display with the item’s information from the Specials tab.
4.Display on website: You can also change this setting here.
5.You may select an alternative image to use for this item when it is displayed on the specials.
|
|
Adding an image to the Special item
1.Click the Browse button.
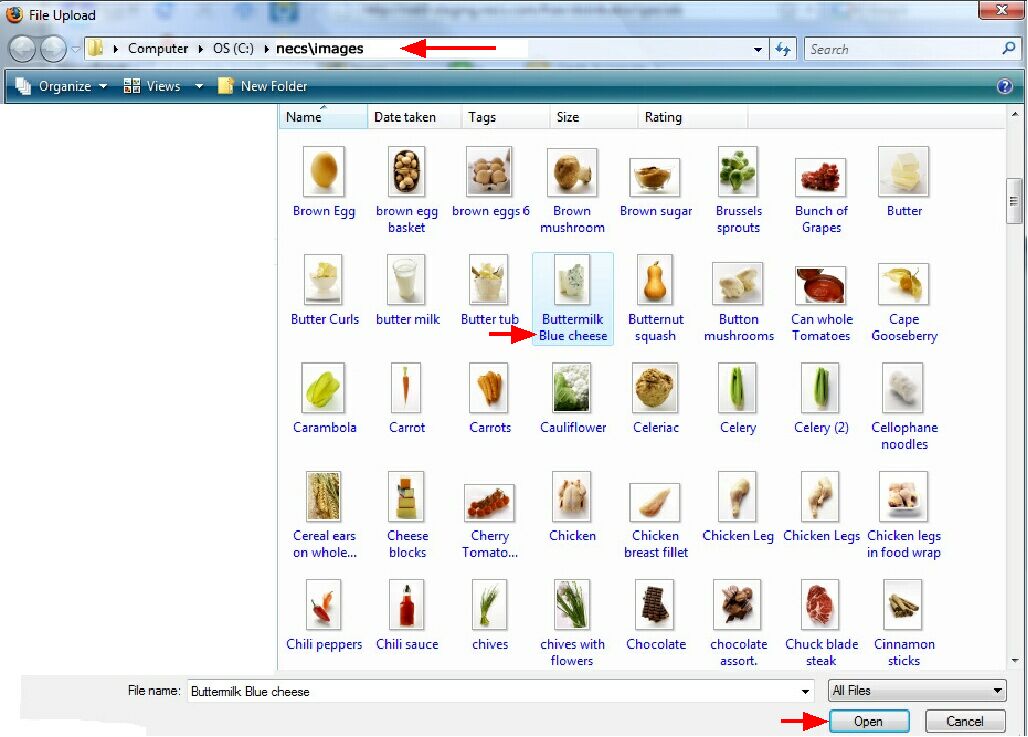
2.The File Upload window will now open.
3.Find C:\necs\images your entrée images folder on your computer.
4.Double click to open your images folder.
5.In the tool bar set the View(s) so you can see the images. Some browsers use “thumbnails” or “icons” in their View(s) menu to display images. Find the desired image and click on it to select it.
6. Click the Open button and the image will be loaded and displayed in the Edit Special dialog box.
7. You may enter an additional message to be displayed with the item below. Enter a message or information about the special or the product in the message box. Use the tools above to control the font, color and format of your message.
8. Once you have completed editing your Special click the Post button.
9. Your special is now updated. It will appear in your customers Specials tab and be posted on your website Home page and Specials page, if you checked the Display on website option.
What will your customers see after you post your Specials?
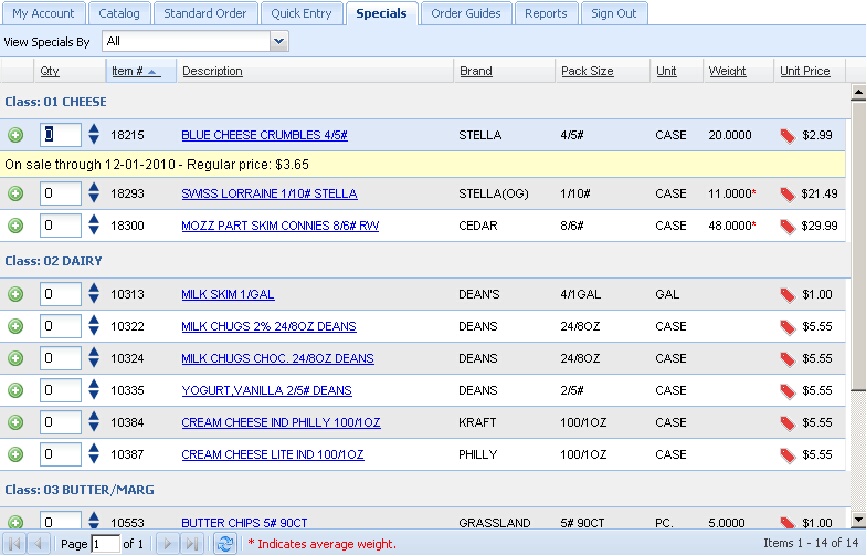
•This is an example of what your customer would see in their entrée.NET Specials tab.
•The “View Specials By” drop down menu allows your customers to select “Featured”, “All”, or any class defined with specials.
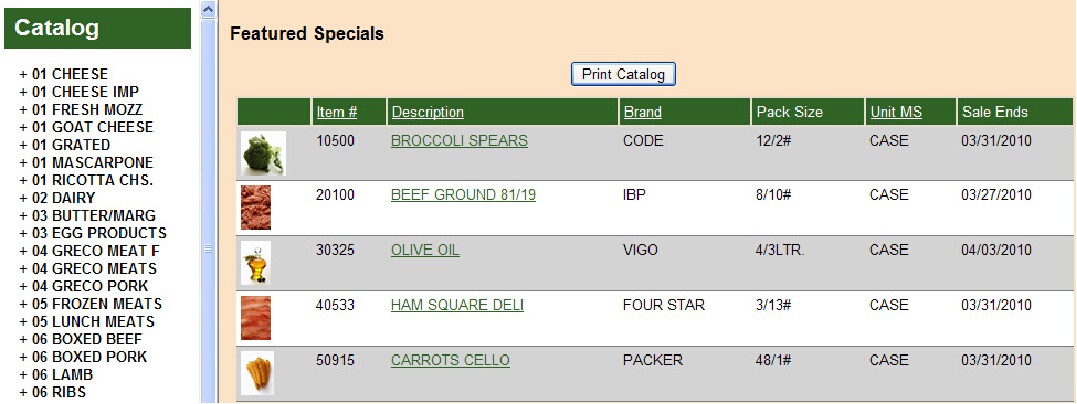
 Website Specials page where your customers will find all the featured specials with the Display on website option checked. Customers also have the option to print your product catalog from your website.
Emailing Customer Specials
1.Click on the Specials tab.
2.
3.Click the Email Customer Specials button.
4.The Email Customer Specials dialog box displays.
5.Effective date: Use the calendar tool to select an effective date for the specials in your email.
6.Recipient: Select from the drop down who should receive this email. Your options are: Promotion Customers, Promotion Customers by Industry Code and Promotion Customers by Territory Code or All Customers in the lower drop down list.
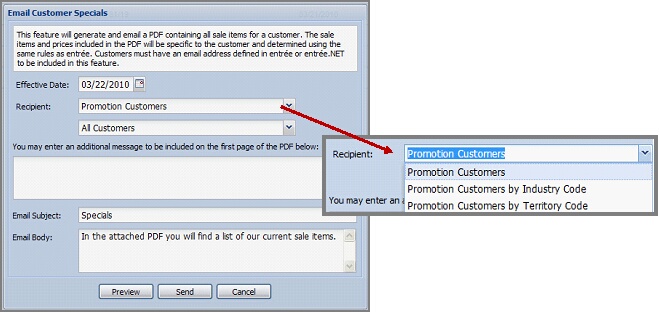
6.You may enter an additional message to be included on the first page of the PDF below: Enter the message you want to appear in the first page of the Sale Items Report you are emailing.
7.Email Subject: Specials is automatically entered. You can edit the subject if you like.
8.Email Body: Enter the message you would like to send with this email.
9.Click the Preview button to see the specials PDF document that will be emailed to your customers. A new browser page will open displaying a box with the title “Sale Items Report Preview” If you do not have the Adobe Reader installed on your computer use the link provided to get this free software. Click on Click the link to download the preview. In the next window click Open to view the preview.pdf file.
10.Click the Send button to send the email to your customers.
11.Click Cancel to stop the email process.
 Sale Items email sent to a customer.
