Updating Web Page Contents
The web page update process is basically the same for all your web pages. The information contained in the individual pages will be changed periodically to match your company requirements.
1.Click the Website tab, and then click the Content button. 
2.Click on the web page name in the Content list on the left.
3.The information currently on the page will display when you click the Content tab.
4.Your web page content will initially display with in a Page Mode of Standard. You can choose to edit your web page content using Advanced Page Mode by selecting it from the Page Mode drop down list. Both Page Modes provide you with the same editing tools and the Search Engine Optimization tab.
▪Standard Page Mode – Will display the stock images loaded into the system in the Photo tab. This mode limits you to selecting or uploading a single image.
▪Advanced Page Mode – Does not have a Photo tab. This page mode allows you to insert multiple images into each web page using the Image ![]() tool in the editing tool bar. No stock photos will be displayed in this mode.
tool in the editing tool bar. No stock photos will be displayed in this mode.
Most of the editing tools provided in the Website tab you already have used in other software on your computer. To find out what the tool does just roll your cursor onto it and a tool description will pop up. An explanation of each tool can be found later in this chapter.
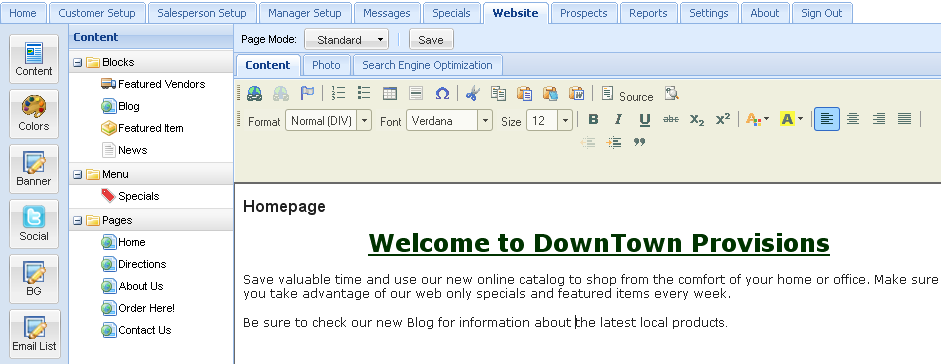
5.Add your new information and images and remove any obsolete content by using the tools in the tool bar.
6.When your Content tab changes are complete, click the Save button to update.
 If you do not click the Save button your changes will NOT be saved in your web page.
 Website Design Tips:
Tip 1: Plan your web pages on paper before you use entrée.NET to create them.
Tip 2: Have any images for your website edited and ready to go on your computer.
Tip 3: Pressing the right mouse button while selecting an area of the web page will display a related menu of options.
Tip 4: If you choose to upload and link to documents created in Word, Publisher or other software, convert the documents to .PDF format before you upload them. Using .PDF format will guarantee that all your customers can open and view your documents using the free Adobe Reader software.
Page Mode Editing Tools
Page Mode editing tools may be very familiar to you if you have used any word processing software. These tools will be listed below in their order on the tool bar image above with a brief description of their purpose.

•Format – Paragraph format options drop down menu is used for organizing your text and to distinguish different parts of your text.
•Font – Use the drop down menu to make a selection from a short list of the fonts best suited for web pages.
•Size – Font size drop down menu.
•Bold – Make the selected text bold.
•Italic – Make the selected test italic.
•Underline – Underline the selected text.
•Strike Through – Inserts a strikethrough line into the selected text.
•Subscript – Places the index at the bottom of the text like the “2” in B2.
•Superscript – Places the index at the top of the text like the “th” in 4th.
•Text Color – Change the color of the selected text.
•Text Highlight Color – Change the background color behind the selected text.
•Left Justify – Align the selected text to the left.
•Center Justify – Center the selected text.
•Right Justify – Align the selected text to the right.
•Block Justify – Each line of text will have the same length.
•Decrease Indent – Moves the selected text left.
•Increase Indent – Moves the selected text right.
•Block Quote – Use block quotes whenever a quote exceeds four lines of text. This can be use to add direct quotes from your customers into your web page text.

•Link – Make the selected text a hyperlink.
•Unlink – Remove the hyperlink from the selected text.
•Anchor – Create a link to an anchor in the text of your web page. This is used to move web page visitors directly to a selected topic in a web page. The topic anchors are usually listed at the top of the web page and link to the topic farther down the web page.
•Image – Insert an image.
•Numbered List – Start a numbered list.
•Bullet list – Start a bullet list.
•Table – Create a table with a defined number of columns and rows. Tables are used to organize information on a web page.
•Insert Horizontal Line – Inserts a divider line (horizontal rule).
•Insert Special Character – Inserts symbols and special characters (accented characters, trademark, currency symbol, etc.).
•Cut – Cut the highlighted text to the clipboard. (Removes the text from the page and stores it in the clipboard area.)
•Copy – Copy the highlighted text to the clipboard.
•Paste – Paste the data from your clipboard into the web page.
•Paste as plain text – Paste text without it’s format on fonts, headings, and hyperlinks.
•Paste from Word – Paste content copied from Microsoft Word or similar applications. By using this option you may paste the text from Word ignoring the Font Face definitions or removing Styles definitions.
•Source – Switch to source edit mode to edit the HTML code.
•Show Blocks – Display where the blocks are in the web page.
Spotlight on Web Design Tools
In this next section some of the most commonly used web page design tools will be examined in more detail including information about working with the Tables, Images, and Special Characters tools.
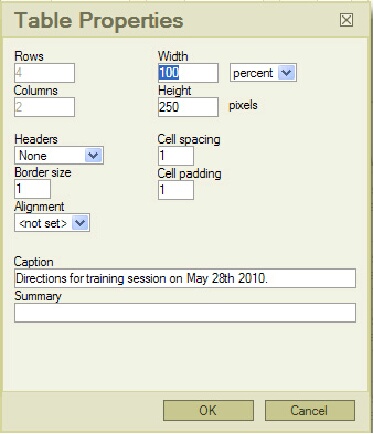
The Table Properties tool is used to insert a table into your web page.
Tables can be used to organize lists of products or create columns for text and images in your web page. Follow these steps to use this tool:
1.Move the cursor to the desired table location in the web page.
2.Click the Table icon. ![]() The Table Properties pop up box will display.
The Table Properties pop up box will display.
3.Enter the number of Rows and Columns in your table.
4.Enter a number for the Width of the table. Select either pixels or percent of the web page from the drop down list. For example; you can enter 50 for Width and select percent and your table will be one half the web page’s total width in the browser.
5.Enter the number of pixels for the Height of the table.
6.Headers – Are used to add titles on your rows and columns. Select from none, First Row, First Column or Both. Then type the title in the header area of the table.
7.Cell Spacing – Enter the number of pixels for the space between table cells.
8.Cell Padding - Enter the number of pixels for the space between the contents of the cell and the cell wall.
9.Border size – Enter a number here for the width in pixels of the table border. Enter a zero if you want no visible border line on the table.
10.Alignment – Select from Left, Center or Right for the alignment of the text in the table.
11.Caption – Enter the caption you would like to appear above the table.
12.Summary – Enter a summary of the information in the table.
13. Click OK.
The Table Properties dialog box used to create the driving directions table. |
|
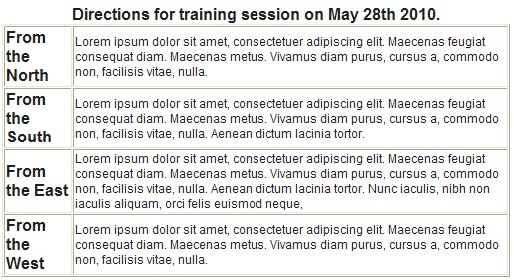
The table created using the table properties in the image on the left.
The Caption is displayed above the table.
The table has a 1 pixel border with 4 rows and 2 columns. |
|
Edit an Existing Table:
You can view and change its properties by right-clicking the table with your mouse. Select Table Properties from the list. When the Table Properties pop up box displays make your modifications and click OK.
Delete a Table:
Right-click on the table with your mouse and select Delete Table.
 Not all of the options are required to build a table. You have to fill only rows and columns. The remaining fields are optional and you may use them depending on your needs.
How to insert an image using the Image Tool:
1.Move the cursor to the location for the image. 2.Click the Image icon
3.Click on the Image Info tab.
4.URL - Click the Browse Server button and locate the image on your server or computer.
5.Alternative Text – Type a name or description of the image here.
6.Width / Height – Enter a number in pixels to set these image properties.
7.Border – If you would like a border line around the image enter the border width in pixels here.
8.HSpace - Enter a number in pixels to set the horizontal space between the image and surrounding text.
9.VSpace - Enter a number in pixels to set the space above and below the image.
10.Align – Select from Right, Center and Left for the image alignment.
11.Click OK when done. |
|
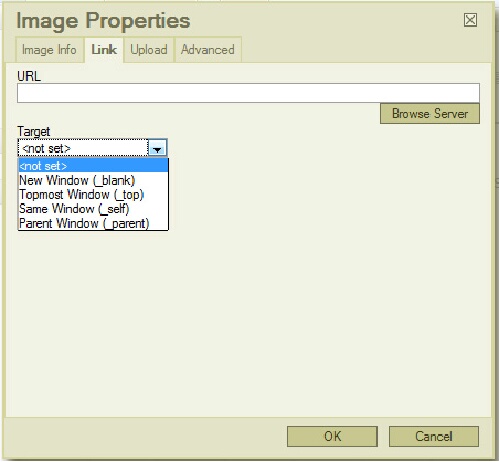
How to use an image as a link:
1.Complete the Image Info process above or open the Image Properties of an existing image.
2.Select the Link tab in the Image Properties pop up box.
3.URL - Click the Browse Server button and locate the web page you would like to link to or type the URL of the desired website or web page.
4.Target – Choose from the drop down list where you want this new link to open in the browser. Select from New Window, Topmost Window, Same Window, Parent Window or not set.
5.Click OK. |
|
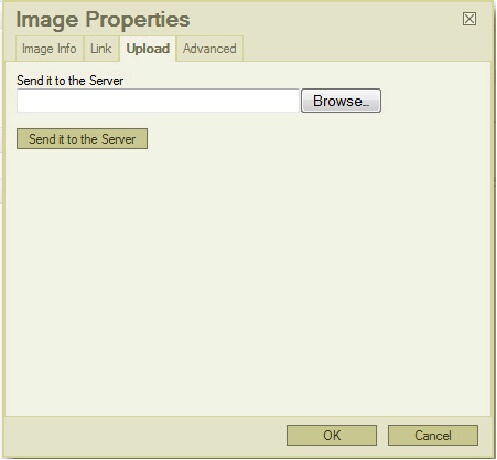
How to upload an image to your server:
1.Select the Upload tab in the Image Properties pop up box.
2.Click the Browse button and locate the image on your computer. Select the image file.
3.Click Send it to Server.
4.Click OK. |
|
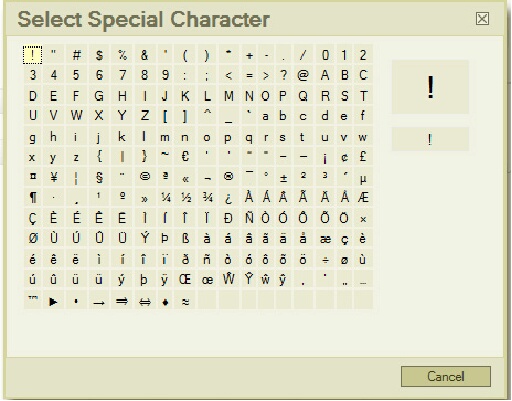
How to insert special characters:
The Select Special Characters tool is used to insert characters into your web page text that are not available on your computer keyboard. Follow these steps to use this tool:
1.Move the cursor to the desired location in the text.
2.Click the Insert Specials Characters icon.
3.The Select Special Characters pop up box will display.
4.Click on the character and it will be inserted in your web page.
|
|


