Dashboard Features
Dashboard Menus
Many dashboards in entrée version 4 have a drop down menu arrow on the Dashboards button to access the dashboards specifically designed for the Inventory, Customer, Vendor, Salesperson, Brand and Class Files. These custom menus will be discussed later in this document.
Unique Data Icons ![]()
![]()
![]()
![]()
Our dashboard design includes unique icons for each type of data so they can easily be recognized.
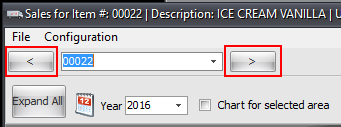
Navigation Using left and right arrows provide the ability to move between different entries in the dashboard without having to close the current dashboard. |
|
Turn On/Off Navigation Option: When set to Off the option will turn off the pre-load of the entire database file and autocomplete.

This is a time saver when you have thousands of items in your inventory file and it takes time to load and you know the item number you want to analyze. You can save this setting in your new default configuration for the dashboard. Autocomplete and navigation are enabled by default.
Hide/Show Details Button
This control is for situations when the system Theme Engine is disabled so the user can control the Hide Charts screen splitter. * See Hide Charts feature later in this section.
Dashboard Pivot Grid Areas
▪Filter Area - Stores the data available for use in the grid.
▪Column Area - Data here will be in the columns of your chart.
▪Row Area - Data here will populated the rows of your chart.
▪Data Area - This is the data you selected to analyze and run in your chart.

Drag, Drop, Sort & Group Data
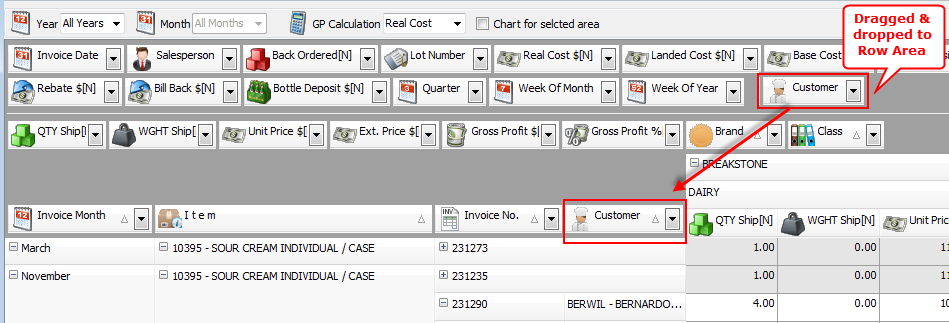
Easily drag and drop data from the Filter Area at the top of the screen into the Row Area to sort by those fields. Or drag a field into the Column Area or Data Area to analyze those numeric fields to see different data patterns.
 In the example below the Row Area contained Invoice Month, Item, Invoice Number. Then we clicked the “Customer” in the Filter Area and dragged it to the Row Area to add “Customer” as the fourth grouping level.
Quantity Decimal Formatting
You can control the formatting of decimals in your Qty fields on all dashboards by turning on System Option #15 Allow decimals in Invoicing.
 Please read the System Option #15 description carefully before turning it on.
PivotGrid Data Pre-filter Feature
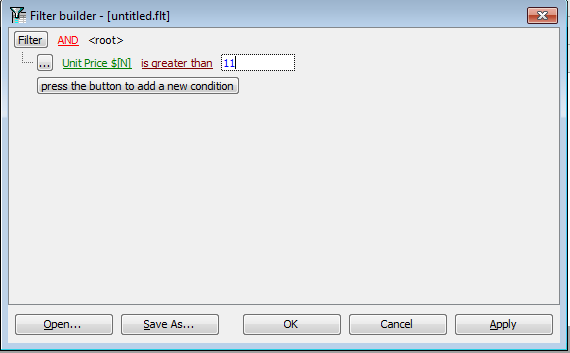
 Click the Pre-filter button, on the right side of the Prefilter bar area, to access the Filter builder dialog (see the following Data Prefilter section). The Filter builder dialog is where you can select a Group (data) to be pre-filtered with conditions to further restrict the data you analyze in the dashboard.
Right click on the Group, Condition or Value text box to make a selections from the list. The Group list for inventory is on the right.
In this Filter builder example the pre-filter of Unit Price is greater than 11 has been created. Click Save As to save for reuse. You can see the results of this filter on the Inventory Sales dashboard in the following Data Prefilter section.
 Click to access the Add Condition, Add Group and Remove Row options.
▪Apply: Pre-filters can be applied to a dashboard and not saved but will only be available while you are in the current dashboard session.
▪Save As: Pre-filters can be saved with a name for future use. You must create a folder on your computer to store your saved Prefilter during the saving process.
▪Open: Used to locate and open saved filters for the current dashboard.
▪Prefilter Controls: On the left side of the Prefilter bar area is where you can select from the applied prefilters or click the red X box to remove the pre-filters completely from the data in the dashboard (see the following Data Prefilter section).
PivotGrid Data Prefilter Feature
The Prefilter bar area, outlined in red, is where you create, save and control your prefilters.
 Clicking the Prefilter button on the right side of the Prefilter bar opens the Filter builder dialog as described on the previous page.
 Inventory Sales
The prefilter of “Unit Price greater than 11”, (shown in the previous section), has been applied to the item. The Data Area Unit Price column and the Column diagram chart below reflect the prefiltered conditions.

•Row Controls: Row data hierarchy can be expanded or collapsed using the plus or minus button. 
•Sort Controls: The Sort arrow button on the right side of the Filter data and Row data controls sort in ascending or descending order as desired. 
•Numeric Data: If a data group has an “[N]” following the data name this means it is numeric and follows those constraints in the entrée system. Sort results will reflect the same constraints.

Multiple Charting Style Options
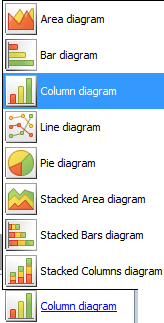
Generates a diagram to visualize your data using any one of eight different chart styles for the Summary Chart including:
▪Area ▪Bar ▪Column ▪Line ▪Pie ▪Stacked Area ▪Stacked Bar ▪Stacked Columns
|
|
Diagram Area Options
The Diagram area not only generates the Summary Chart but for some customer and salesperson dashboards there are additional menu and grouping options.
Header: Shows the header details for the selected. See the Customer Sales Dashboard in the Customer Dashboard section of this chapter for an example.
Items: Shows item details for selected customer, salesperson or invoice number. See the Customer Payments Dashboard in the Customer Dashboard section of this chapter for an example. |
|
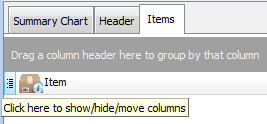
Drag a column header here to group by that column: Drag any field from the columns listed in the diagram area to the gray drag to bar to group data by that column.
Click here to show/hide/move columns:
▪Click the icon to open the drop down list of columns in the diagram area. ▪Check columns to add them to the column list. ▪Uncheck columns to remove the column from display. ▪Drag columns to new positions in the column list to rearrange them for your needs. |
|
•Hide Charts Option
You have the ability to hide the charts and the bottom section of the dashboard screen in the configuration options. You can set a screen split position and update the configuration so the bottom section of the dashboard will be closed.

Export / Print Dashboard Reports
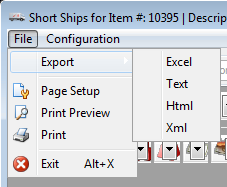
From the File menu you can Export or Print a hard copy of your dashboard analysis.
Export: Once you have done your analysis in a dashboard you can export the data to Excel, Text, HTML or XML using the File menu. > Export menu path. |
|
Exporting Reports to Excel
1. Use menu path: File >Export > Excel.
2. The Save As dialog box will open. It will be pointing to your NECS_Shared folder for the 01 company.
 On the Save As screen is a Hide Folders button when enabled the dialog screen below is what you will see. You will normally see the Browse Folders screen with all the drives and folders listed on the left as you have seen many times before.
3. File Name: Enter a meaningful file name for your report. The system automatically wrote “History Export” in the file name field when it opened.

To make the file name more meaningful we added “CA”, our Salesperson’s initials, “Tyson”, the brand selected in the Brand dashboard and Sales.
4. Save as type: You do not have to make any selection it knows your selection from the main menu.
5. Click Save and in the background the report is exported as an Excel file to the designated folder.
6. Now use Excel to access the report data.
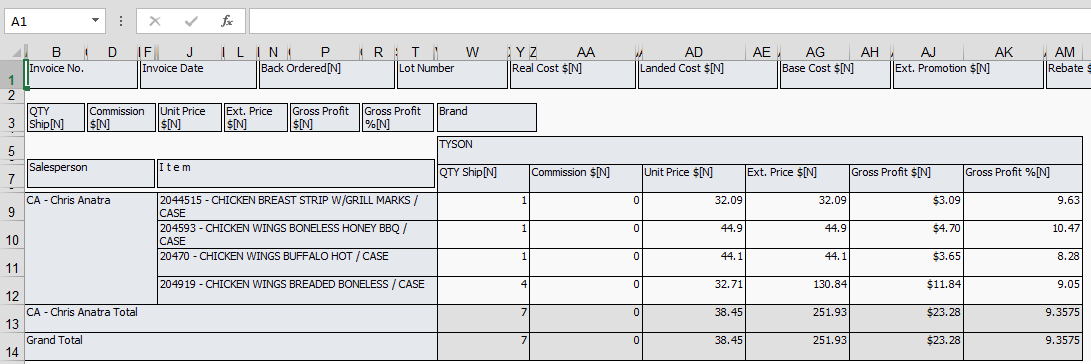
 Brand Sales Report
The report example below was created in the Brand dashboard to show sales figures for “Tyson” brand items for our salesperson Chris.
Custom Dashboard Configurations
entrée provides default configurations for all dashboards. You are encouraged to customize dashboard analysis and save those custom configurations to fit your business needs.
Saving dashboard configurations you have customized will allow you to more quickly access the vital information to keep on top of activity in your business.
Each dashboard screen has the Configuration option in the menu in the top left side of the screen.
Managing Dashboard Configurations
Once you have spent the time to customize a dashboard and want to save that custom configuration for reuse click the Save as New option in the Configuration menu.
|
|
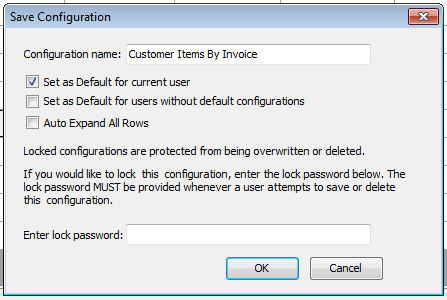
In the Save Configuration dialog you will enter a unique and descriptive Configuration Name.
Check the box to enable these options: ▪Set as Default for current user. ▪Set as Default for users without default configurations. ▪Auto Expand All Rows.
|
|
You have the option to lock the saved configuration so only you will be able to save or delete it.
▪Type a password in the text box for Enter lock password.
Once the first configuration is saved the remainder of the Configuration menu options will display including:
▪Load
▪Edit Current
▪Set Current as Default
▪Lock Current
▪Delete Current
▪Export Current Configuration
▪Export All Configurations
▪Import Configurations
Here the “Customer Items By Invoice” configuration was selected from the Load option in the Configuration menu.
|
|
To see what this saved configuration does see the Customer Sales By Item configuration example in the Customer Dashboards section.

