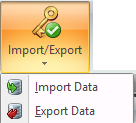
Import/Export
|
The Import/Export Tab in the Add-Ons ribbon menu is used to access purchased electronic data exchange modules.
The entrée.EDI Catalog, accessed via the Support menu in our website, provides information about all EDI interfaces available for purchase as modifications for your system. |
NECS EDI Utility
This generic EDI utility built into the entrée system is available to all companies running entrée V4. It allows for the electronic data exchange of invoices and purchase orders between trading partners that are running entrée.
The NECS EDI Utility can be scheduled and run by the entrée Task Execution Scheduler (TEA).
The NECS EDI Utility provides file transfer utilities for use between each company within an entrée multi-company setup, or from one company to another, as long as all the companies are running entrée.
File Paths
Path Type |
Location |
|---|---|
Import Staging |
SharedFolder\xx\NECS EDI\Import\Company Name |
Import Archive |
SharedFolder\xx\NECS EDI\Import\Company Name\Archive |
Export Staging |
SharedFolder\xx\NECS EDI\Export\Company Name |
Export Archive |
SharedFolder\xx\NECS EDI\Export\Company Name\Archive |
Shared Directory |
SharedFolder\xx\Shared Directory\ Company Name |
Shared Directory |
SharedFolder\xx\ Shared Directory\ Company Name\Archive |
•Where xx represents the entrée company number for mutli-company entrée systems.
Files Exchanged
Document |
Import/Export |
Naming convention |
Send/Receive Frequency |
Format (edi/flat/csv) |
|---|---|---|---|---|
Purchase Order |
Import |
xxxxxx.xml |
|
XML |
Invoice |
Export |
zzzzzz.xml |
|
XML |
•Where x = purchase order number and z = invoice number.
File Transfer Protocols
•The method of file transfer is configurable based upon each company’s requirements, with the option of transmitting files via FTP, SFTP, and necs_shared folder.
•The necs_shared folder file transfer method is used for operations running entrée in multi-company mode.
•File transfer within entrée multi-company operations utilizes and is supported by the entrée system’s necs_shared data directory.
Configuring File Transfers
File Transfer Settings are configured per Vendor or Customer trading partner using the NECS FTP ID.
Vendor File Settings
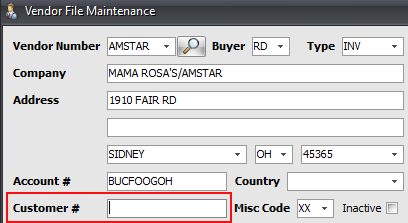
In Vendor File Maintenance there are two steps that must be performed to set up the NECS EDI with your trading partner.
1. Go to the Misc. sub-tab to use the NECS FTP ID feature to enter the information for your trading partners file transfer protocol. (Information and examples can be found in the topics that follow).

2. In Vendor File Maintenance you will need to enter your assigned Customer number for the vendor partner you are interfacing with.
Customer File Settings
In Customer File Maintenance go to the Miscellaneous tab to use the NECS FTP ID feature to enter the information for your trading partners file transfer protocol. (Information and examples can be found in the topics that follow).
Using NECS FTP ID Using NECS FTP ID in the Customer File and Vendor File:
1.Go to the NECS FTP ID section > 2.Click the Search tool
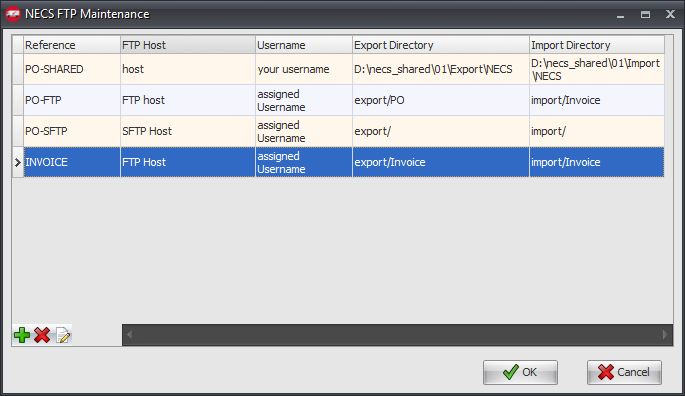
3.NECS FTP Maintenance dialog opens so you can manage all NECS EDI transfer configurations. |
|
NECS FTP Maintenance
The NECS FTP Maintenance dialog is where you add, edit and delete file transfer configurations for vendors or customers.
Buttons
|
Green Plus + - Add Configuration Red X - Delete Configuration Paper & Pencil - Edit Configuration |
Add Configuration
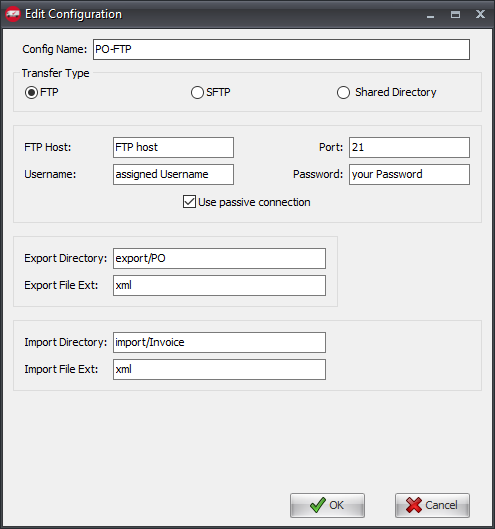
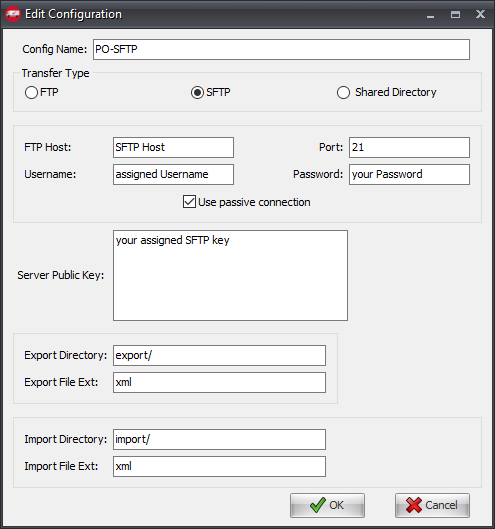
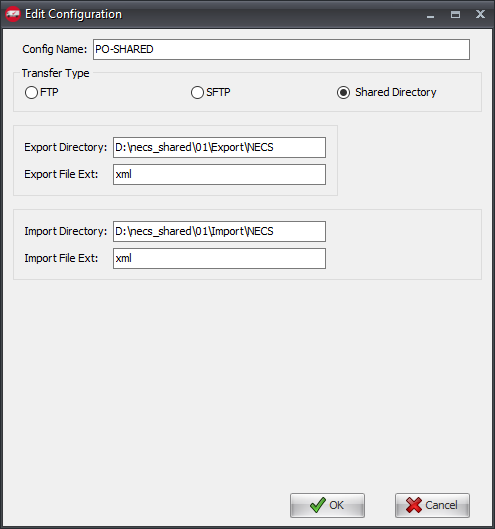
•You will be adding a new FTP configuration for each partner using this dialog.
•Once you select the Transfer Type only the fields required for that type will be displayed.
•Enter the information provided by the partner vendor or customer you will be exchanging data with.
•Click OK to save the configuration.
|
|
 FTP Configuration Example
 SFTP Configuration Example
 Shared Directory Configuration Example
Running the NECS EDI Import
This process is accessed via the Add-Ons ribbon and imports a purchase order from a designated NECS EDI location and converts it into an entrée invoice.
1. Menu path: Add-Ons ribbon menu > Import/Export drop down menu > Import Data > Import data from > select NECS Import Invoices.
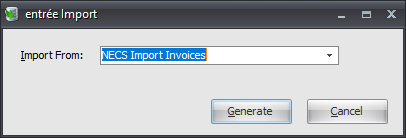
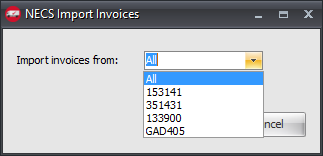
2. Click Generate and the NECS Import Invoices dialog opens.
3. Use the Import invoices from menu to select which customer to import from or import from All customers. 4. Click OK to run the import. 5. Invoices will be imported into the folder designated in the transfer configuration created via the NECS FTP Maintenance feature. |
|
Running the NECS EDI Export
Once the associated invoice has been printed, it should be exported using the Export Data menu by selecting the “NECS EDI” option. This will transmit the invoice to the customer. Once the invoice has been exported no further edits to that invoice will be allowed.
The NECS EDI Export also supports exporting purchase orders to vendors.
1. Menu path: Add-Ons ribbon menu > Import/Export drop down menu > Export Data > Export the data to > select NECS EDI.

2. Click the Generate button which opens the NECS Export Orders dialog.
3. Select your Export Orders from and to dates.
4. Click the Load Orders button.
5. When the NECS Export Orders grid is loaded you see the entrée PO Date, entrée PO Number, entrée Vendor number, Send option box and the Sent Status information for all your orders.
6. Use the Select All or Select None buttons to quickly control the Send option box.
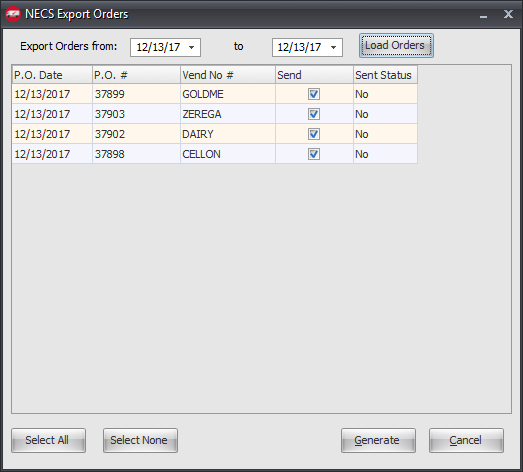
7. Click Generate to run the export.
8. You have the ability to resend orders after changes are made.
a.Perform steps 1 - 6 above. b.Then check the Send option box for the specific orders. c.Click Generate to rerun the export for those orders. |
|

