General Features |

|

|

|
|
General Features |
|
|

|
General Features |
|
|
|
|
General Features |
|
|
|
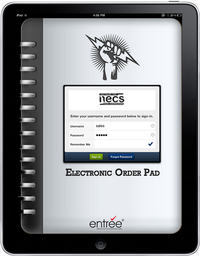
Signing In
When first starting the Electronic Order Pad, you will see the Sign In screen used to log onto your entrée.NET server. Each DSR (Distributor Sales Rep) will have been assigned a unique Username and Password.
Once the DSR signs in, the Electronic Order Pad will know all the details about their assigned customers, commission formulas, etc.
next time the DSR signs in. |
|
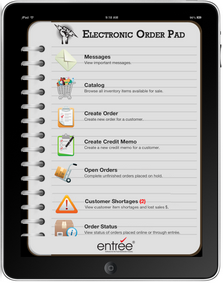
Menu
After signing in, you will be presented with the Electronic Order Pad's menu.
Simply tap the menu item you want to select.
You can drag the screen up and down to see all the menu options, which include:
|
|
Messages
The Messages option provides a means for the main office to communicate with the DSRs (Distributor Sales Rep).
When a new message is present, this menu option will display in bright red that there are new messages, and the number of new messages that have not yet been read.
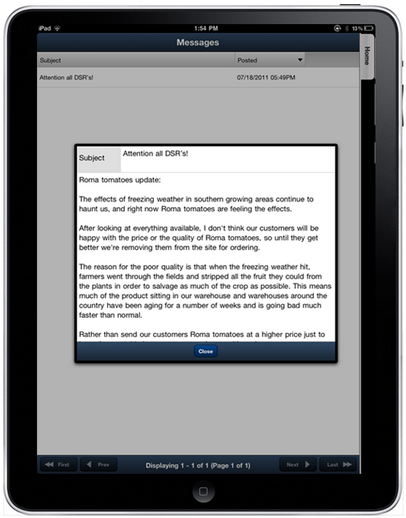
When the main office creates messages, they have the following options as to whom they are sent to. This includes:
| ▪ | All customers and salespeople (DSRs) |
| ▪ | All customers or specific customers |
| ▪ | All salespeople or specific salespeople |
| ▪ | All customer 'industry' codes or specific industries |
| ▪ | All customer 'territory' codes or specific territories. |
Any messages that should be read by the DSR using the Electronic Order Pad, will be found in the 'Messages' area.
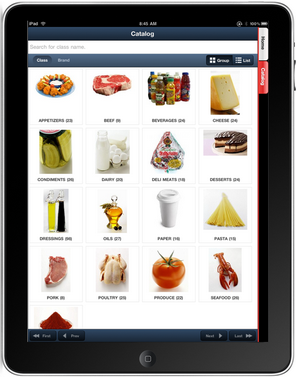
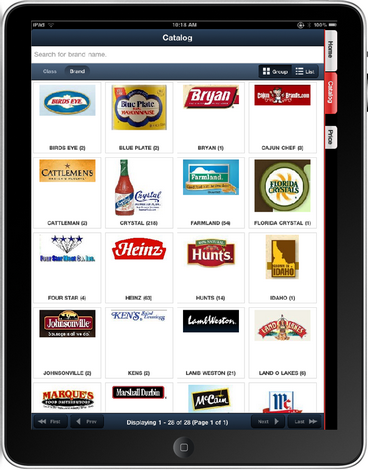
Catalog
When viewing the Catalog, your DSR (Distributor Sales Rep) will have full access to your complete inventory data file, with the ability view by item 'Class' or 'Brand Name' with advanced search capabilities.
Note that the number in parenthesis next to the name of each product class represents the total number of unique line items in that class. |
|
An extensive amount of information can be displayed or disabled for your Catalog, including:
|
|
Catalog By Brand
When viewing the Catalog, your DSRs (Distributor Sales Reps) will have the ability to search and have items grouped by Brand Name. This is an important feature of the Catalog which many DSRs have found extremely useful for locating and offering products to their customer.
In your main entrée system, you can assign Brand Name images which makes this feature of the Catalog even easier to use versus just seeing a listing of Brand Names.
An extensive amount of information can be displayed or disabled for your Catalog by Brand Name, including:
| ▪ | Pricing (will display customer specific pricing when customer is selected) |
| ▪ | Product Image |
| ▪ | Brand Names |
| ▪ | Units of Measure |
| ▪ | Pack Size |
| ▪ | UPC Number |
| ▪ | Item Constant or Average Weight |
| ▪ | Minimum Sell Price |
| ▪ | On Hand Quantity |
| ▪ | comprehensive item notes |
The number in parenthesis next to the name of each Brand Name, represents the total number of unique line items for that Brand.
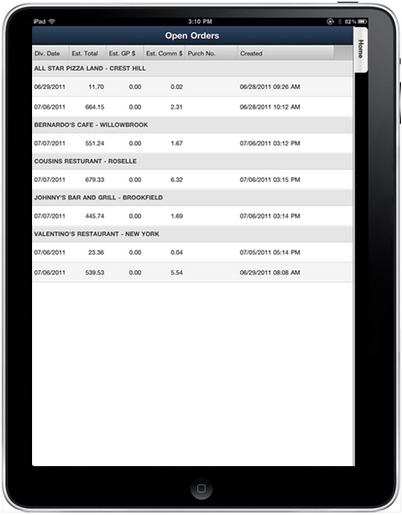
Open Orders
The Open Orders menu option will allow the DSR (Distributor Sales Rep) to complete unfinished orders placed on hold. These unfinished orders are orders that were started by the DSR, but were not completed because they had to move on to another task.
When choosing this option, a screen will be displayed showing all the customer orders available to finish.
Simply touch the order to be completed, and you will be put back where the DSR had left off in the 'Create Order' process.
![]() Since the Electronic Order Pad is an application that requires wireless access to your entrée.NET server, activity such as creating a customer order, is saved on the server as the order is built. Because of this, if the tablet looses wireless access or powers down suddenly, no data will be lost. Instead, the order status will immediately and automatically go into the 'On Hold' status. The DSR will simply log back in, go to the 'Open Orders' menu choice, and complete the order exactly where they left off.
Since the Electronic Order Pad is an application that requires wireless access to your entrée.NET server, activity such as creating a customer order, is saved on the server as the order is built. Because of this, if the tablet looses wireless access or powers down suddenly, no data will be lost. Instead, the order status will immediately and automatically go into the 'On Hold' status. The DSR will simply log back in, go to the 'Open Orders' menu choice, and complete the order exactly where they left off.
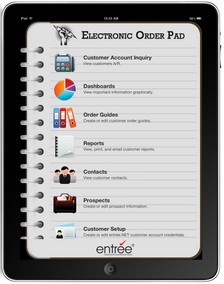
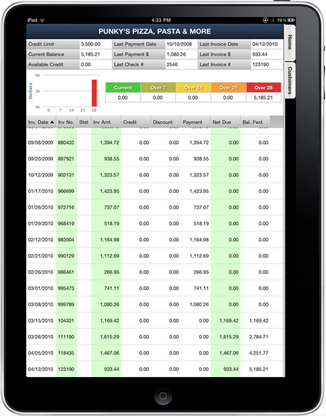
Customer Account Inquiry
You can select the Customer Acct Inquiry menu option to view a customer's accounts receivable status.
| • | First select the customer who's A/R status you want to view. This screen will first display important accounts receivable information for this customer, including: |
| ▪ | Credit Limit |
| ▪ | Current Balance |
| ▪ | Available Credit |
| ▪ | Last Payment Date |
| ▪ | Last Payment $ |
| ▪ | Last Check # |
| ▪ | Last Invoice Date |
| ▪ | Last Invoice $ |
| ▪ | Last Invoice # |
Next displayed is a 5 period aging summary broken down by days, which is derived from information in your main entrée system as to how aging periods are defined when you generate customer statements. For example, if you prefer to use an aging summary by 7 day periods:
A bar graph is generated to visualize the dollar amounts open for each of the aging periods. |
|
The final part of this screen displays a grid to show in detail the customers accounts receivable, listed by invoice. This information includes:
| ▪ | Invoice Date (pressing this column header will change the sort order of the invoices by date) |
| ▪ | Invoice Number |
| ▪ | Invoice Status Code (which includes 'NE' for Non-Extended invoice, 'CM' for Credit Memo, 'OP' for Over Payment, 'BC' for Bounced Check, 'FC' for Finance Charge, or 'CF' for Bounced Check Fee) |
| ▪ | Invoice Amount |
| ▪ | Credit Amount |
| ▪ | Discount Amount |
| ▪ | Payment Amount |
| ▪ | Net Due |
| ▪ | Balance Forward |
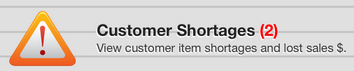
Customer Shortages
The Customer Shortages menu option allows you to be aware of and view shortage information for your customer invoices. This feature will make it easier for you to take care of shortage situations with customers early and avoid losing sales.
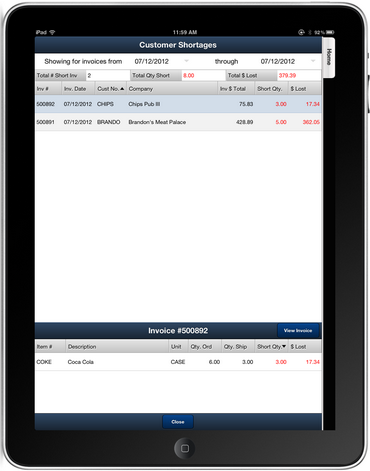
Only orders that have been submitted to the main entrée system and have been printed as an invoice are used when generating shortage information. When the Quantity Shipped is less than the Quantity Ordered it is interpreted as a shortage.
The red number next to the main menu option, Customer Shortages (2), tells you the current number of shortages. |
|
Tap Customer Shortages and view the default screen, a list of invoices that have a shortage and are scheduled for delivery on the current day.
Enter a new date or enter a date range to check be aware of potential shortages.
If no shortages exist for the dates entered a message will be displayed.
Customer shortage item details may be viewed by tapping the invoice in the list.
You can tap the View Invoice button in the Invoice section of the screen to see the entire customer invoice. |
|
Order Status
The Order Status screen displays information for all printed and unprinted invoices from the main entrée system making all your DSRs (Distributor Sales Rep) orders visible and manageable. This also allows them to see exactly where any of their orders stand throughout the order entry to printed invoice process.
The top of this screen provides the Order Source filtering option providing your DSR the ability to view invoices based on where they were created, for the following sources:
| ▪ | Any Source |
| ▪ | entrée (main system) only |
| ▪ | entrée.NET only |
| ▪ | Electronic Order Pad only |
| ▪ | entrée.DSR (laptop based software for DSRs) only |
The status filtering option (the line below the Order Source filter) provides another filtering method for your DSR to locate orders based on their status within entrée. These status filters include:
Simply tap any of the above filter names, and that filter will be activated. |
|
![]() For companies with the entrée.DOC (document scanning) add-on module, the .DOC column displays the paper clip icon that tells your salesperson that a scanned image of the invoice document is available for viewing. Touching the paper clip icon
For companies with the entrée.DOC (document scanning) add-on module, the .DOC column displays the paper clip icon that tells your salesperson that a scanned image of the invoice document is available for viewing. Touching the paper clip icon ![]() will display the scanned invoice on the screen.
will display the scanned invoice on the screen.
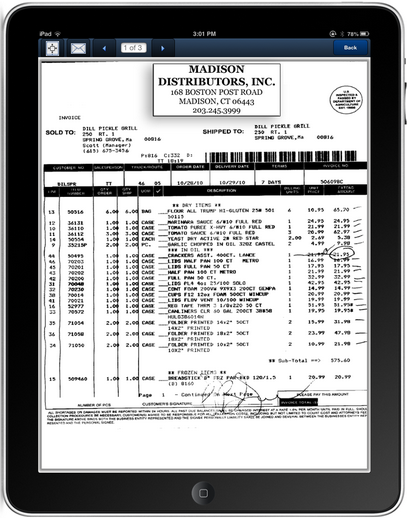
Viewing Scanned Invoices
For use by companies who have purchased the entrée.DOC document scanning add-on module for entrée. This feature allows you to see a copy of the original paper invoice.
You will see the .DOC icon (paper clip) when the scanned invoice is available for viewing in the Electronic Order Pad. Just tap the paper clip to view the scanned invoice.
.DOC Feature can be found in the following screens:
| ▪ | Order Status - You must add the .DOC column using the Information Panel Setup dialog to display the .DOC icon for invoices. |
| ▪ | Dashboards |
| ▪ | Customer Account Inquiry |
| ▪ | View Invoice |
View entrée.DOC Scanned Invoice
When viewing the scanned invoice the screen has a few tool icons at the top to add more functionality.
The email icon will open the Email Invoice dialog so you can send the scanned invoice.
The re-size and center icon if your scanned document does not fit on the screen. |
|