Brand Name List Management
List Management Controls
|
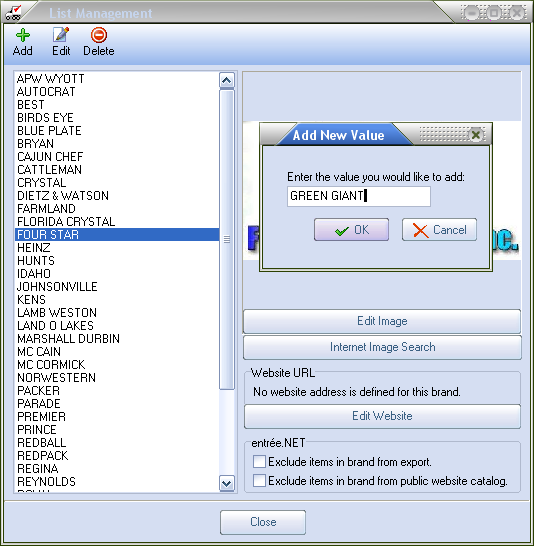
Add - Used to add a new Brand Name value to the list. Edit - Used to edit an existing Brand Name value. Delete - Used to delete a Brand Name value from the list. |
Add a new Brand Name to the List
1.Click Add (the green plus sign). 2.In the Add New Value dialog enter the new Brand's name in the text box and click OK. 3.The new Brand Name will now be displayed in List Management screen. |
|
Edit a Brand Name
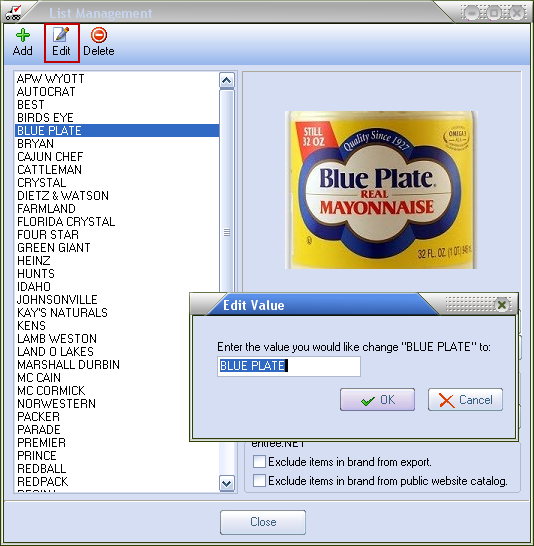
1. Select the Brand Name from the list.
2. Click the Edit button at the top of the screen.
3. The Edit Value dialog box will display. Enter your changes to the Brand Name value.
4. Click OK.
|
|
Delete a Brand Name from the List
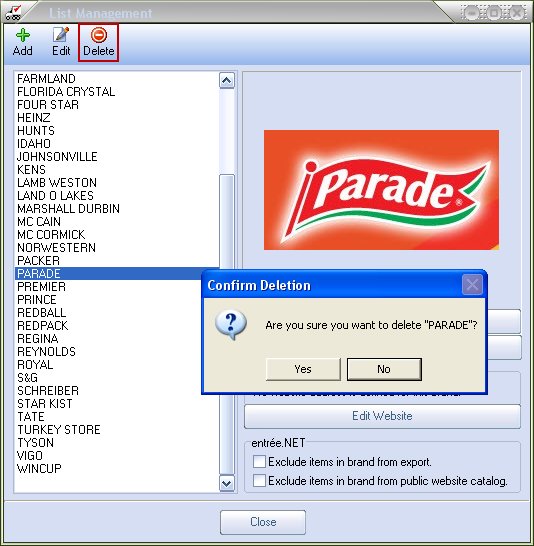
1.Select the Brand Name from the list.
2.Click the Delete button at the top of the screen.
3.The Confirm Deletion dialog box will display.
a. Click Yes to go forward with the removal of the brand name from the list.
b. Click No to cancel the removal of the brand name.
|
|
 Brand Deletions Note:
This utility will prevent deletion of any Brand Name value that is currently defined on an item in Inventory File Maintenance.
Add a Website URL to a Brand Name
1. Before you being use an Internet Browser, (Internet Explorer, Mozilla Firefox, Safari, Google Chrome), to find and copy the URL for the selected brand.
2. Click on the desired Brand Name in the list to select it.
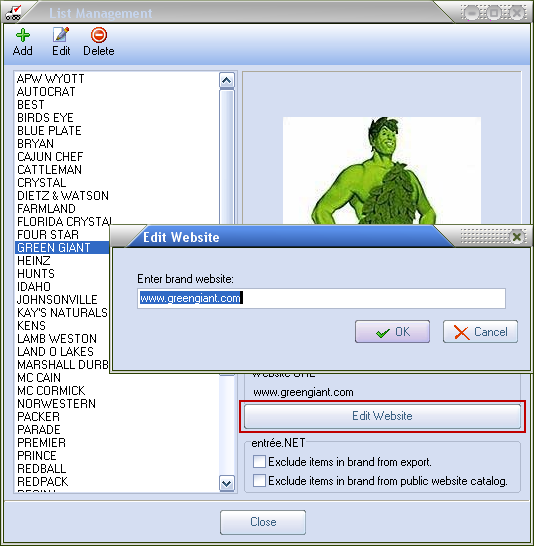
In this example "Green Giant" has been selected.
3. Click on the Edit Website button.
4. In the Edit Website dialog box paste or type the URL for the brand's website as shown in the image here.
5. Click OK to save it. |
|


