Previewing Changes
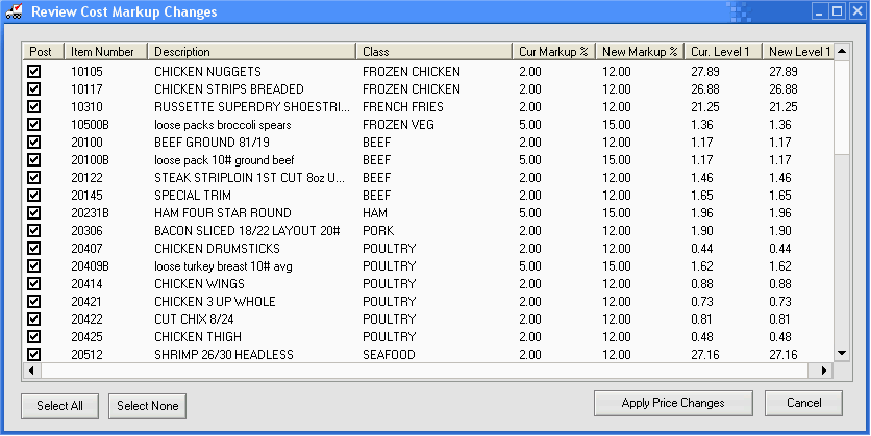
6. Click the Preview button. The Review Cost Markup Changes dialog box will open a new dialog. This shows a list of the items and the associated changes for you to review before initiating the actual price updates.

7. Make your final item selections in the Review Cost Markup Changes:
•Select All - By default all the items in the list will be selected. Remove check marks from items you do not want updated.
•Select None – Removes all check marks. Then manually you can add check marks to the specific items you want to change.
•Cancel – Cancels the cost markup change process.
8. Apply Price Changes: Once the desired items are selected, click the Apply Price Changes button.
 NECS strongly recommends all users are out of the entrée system, when this utility is run. This will ensure the data integrity is not compromised by another user, accessing one or more of the data files while the operation is being performed.
9. Confirm: The Confirm dialog box will be displayed saying "Would you like to print a report containing the cost markup change information?" To print a report containing the cost markup price change information click Yes.
•If you click “Yes” the Ré3 report printing option will be displayed.
 A report on cost markup changes to class "canned goods" is displayed below.

•If you select “No” the entrée price update process will proceed while displaying an update “Progress” bar.

