Using & Printing Picking Labels

Contents
Create a Print Configuration for Picking Labels
Use menu path: Reports > Label Printing > Picking
| 1. | Click Configure button. |
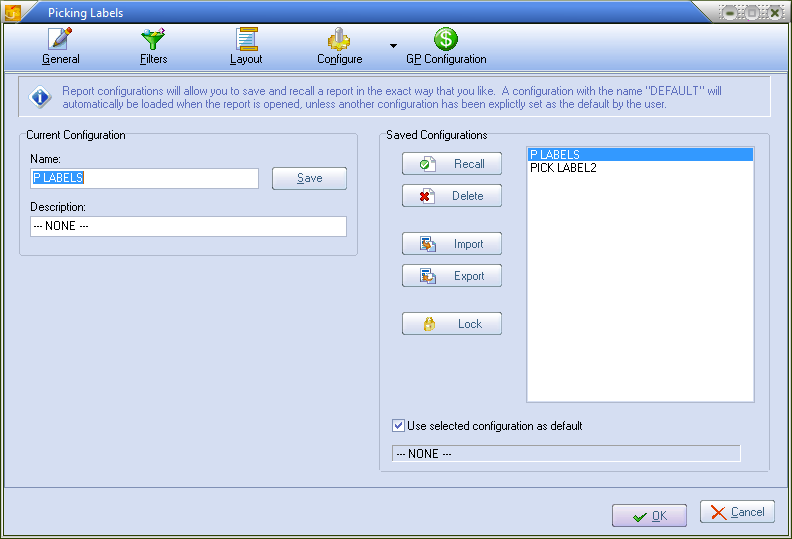
| 2. | Enter a new name in the Current Configuration Name field. |
| 3. | Enter text for the Description. |
| 4. | Click Save. |
Part One:
| 1. | Click the Layout button and the Label Options window will open. |
| 2. | Click the Label Layout tab. |
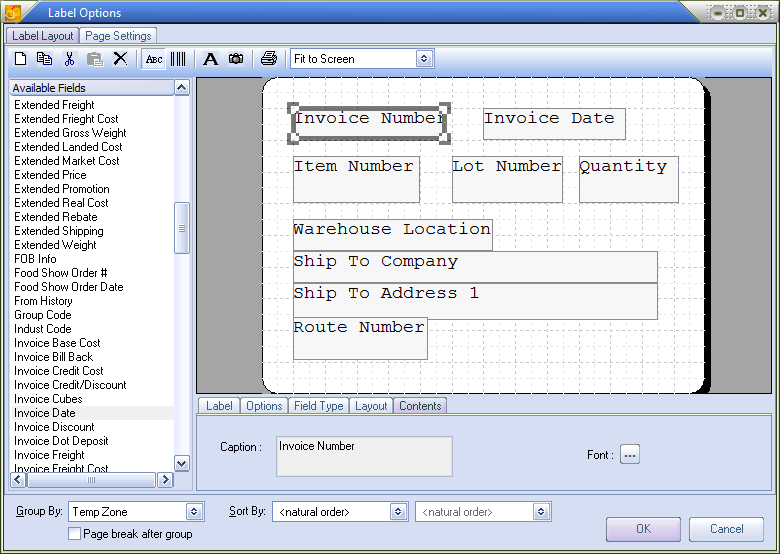
| 3. | Drag the desired fields for the picking labels from the list on the left. |
4. Drop the field into the desired place on the label.
| 5. | Click the field in the label and edit the font using the Font button as desired. |
| 6. | Use the tool bar options to add text, insert a picture and set printer options. |
| 7. | Use the tabs below the label edit section to edit the label field options. |
| 8. | Click the button to designate the Label Style, Laser or Dot Matrix. |
| 9. | Click OK to save. |
Part Two:
| 10. | Click the Label Options Page Settings tab. |
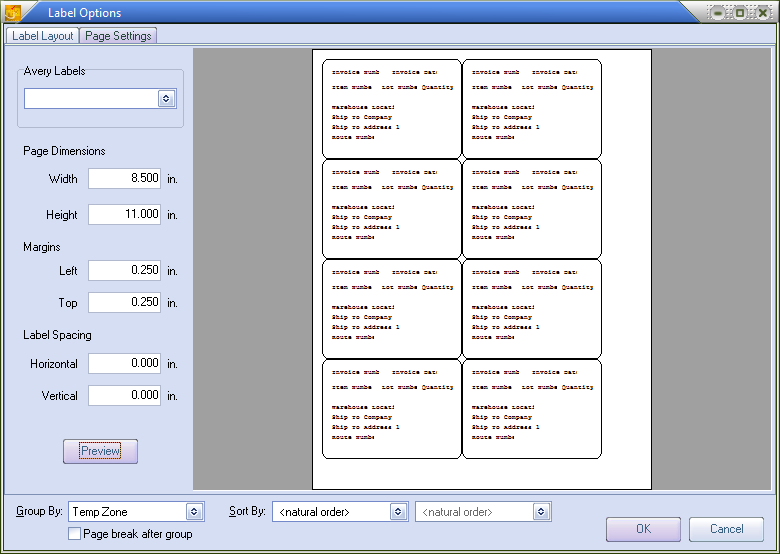
| 11. | Select your Avery Label from the drop down list. |
| 12. | Check to the Page Dimensions and adjust as required. |
| 13. | Click the Preview button and adjust your label layout as required. |
| 14. | Select a Group By option. |
| 15. | Select a Sort By option. |
| 16. | Check the box to Page break after group if desired. |
| 17. | Click OK to save. |
18. Click OK on the Picking Labels main page and your Picking Label print configuration is saved.
| 19. | You should now see in listed on the Saved Configurations list. |
 Create as many different configurations as your business requires. Use these print configurations to send document print jobs to different printers by company location, temperature zones or what ever suits your business.
•Printing picking labels uses multiple configurations and works in conjunction with the report configuration name assigned to individual items in Inventory File Maintenance.
•When picking labels are generated they can be routed to multiple printers (using the printer assignment saved in the configuration file) or using multiple designs (again, as saved in the specified configuration).
Support for “Box ID” on Picking Labels
Support for printing a "Box ID" value has been added to the Picking Labels configuration in the Reports system. The purpose for the “Box ID” value is to provide a unique bar code number to identify each box on a truck in a customer's order using a hand held scanner. “Box ID” is printed on the label as a code 39 bar code. Use of the "Box ID" value ensures that the truck delivers a customer’s entire order.
“Box ID” field format:
•8 Character Item Number (right padded with spaces)
•4 Character Line Number (left padded with 0)
•5 Character Box Number (left padded with 0)
 If a customer has ordered:
2 CASE 10107 FRIES
1 CASE 20300 KETCHUP
3 CASE 10900 ONION RINGS
For the order above the following “Box ID” values would be printed on labels as bar codes:
10107 000100001(the first case of fries)
10107000100002 (the second case of fries)
20300000200001 (the first case of ketchup)
10900000300001 (the first case of onion rings)
10900000300002 (the second case of onion rings)
10900000300003(the third case of onion rings)
Add a “Box ID” to a Label
1.Use menu path - Reports > Label Printing > Picking
2.Click the Layout button and the Label Options dialog box will display.
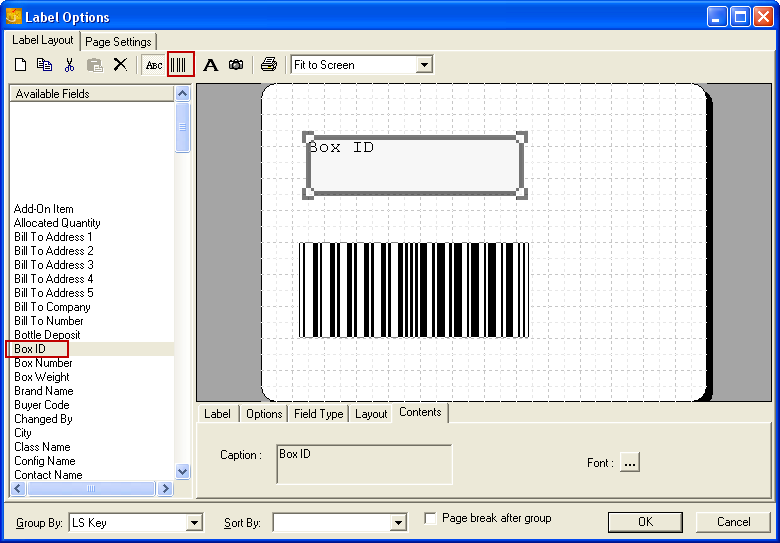
3.Click the Label Layout tab. In the Available Fields list click on “Box ID” and drag it to the label.
4.To add the “Box ID” as a bar code click the “Add Data Field as Barcode” button (outlined in red in the toolbar) then drag the “Box ID” field to the label.
The Picking Label Configuration Editor in the Inventory File Maintenance Misc1 tab Picking Labels button is where you can select to update the item's label configuration by Temperature Zone, Item Number, Item Class or Brand Name and assign a Picking Label Configuration Name.
Picking Label General Tab Options
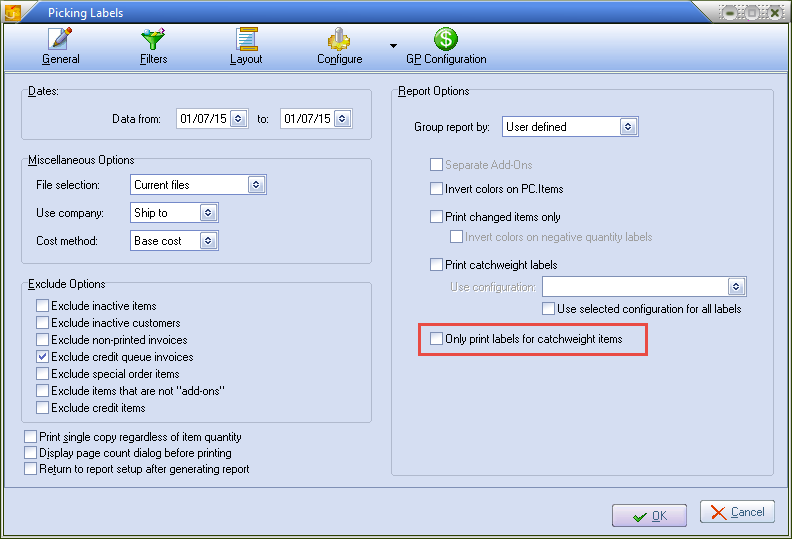
Dates
•Data from: / to: Select a date range for your input data.
Miscellaneous Options
•File selection - Your choices are Current files, History files, or Use All available data.
•Use Company - Ship to is your choice.
•Cost Method - Your choices are Real cost, Base cost or Market cost.
Exclude Options
•Exclude inactive items
•Exclude inactive customers
•Exclude non-printed invoices
•Exclude credit queue invoices
•Exclude special order items
•Exclude items that are not "add-ons"
•Exclude credit items
Print Options
•Print single copy regardless of item quantity
•Display page count dialog before printing - Help you keep track of the number of pages of labels that will be printed.
•Return to report setup after generating report - Brings you back to this report screen after the labels are generated.
Report Options
1. Group report by - Your choices are: Invoice Number, Customer Number, Route Number, Salesperson ID or User defined.
2. Separate Add-Ons - is not available for this label.
3. Invert colors on PC. items
4. Print changed items only. When this option is enabled then the quantity information recorded by the previous feature is used so that labels will only be printed for items that have been added, changed or removed since the last printing.
• 1: If 3 labels had been printed for a given item and the customer added on 2 more boxes, only 2 more labels would be printed.
• 2: If the customer reduced the order to only 2 boxes, again 1 label would be printed with a -1 as the quantity. The option to inverted colors on negative-quantity labels (white on black background), will assist Warehouse Pickers in the scenario in example 2.
5. Invert colors on negative quantity labels (white on black background).
6. Print catchweight labels. The feature was extended so the option setting can be applied across all label configurations regardless of the "Print Catchweight Labels" setting that is saved with those configurations. Normally the printing of Catchweight Labels is directly tied to the active Picking Label configuration which allows for labels to print for only certain configurations or to have different Catchweight Label layouts assigned to different Picking Label configurations.
•Check box option to Use selected configuration for all labels. This option will take the Use Configuration value and override the normal behavior so that the selected Catchweight Label configuration will be used for all qualifying items. This allows you to use a custom configuration for the label.
7. "Only print labels for catchweight items" option check box will only print picking labels for catchweight items.