Overview Purge Year-to-Date Files

Contents
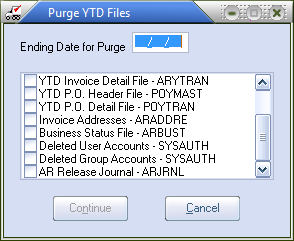
| 1. | Enter the ending date for the purge operation in the Ending Date for Purge field. All entries with a transaction date up to and including the date entered in the field will be removed from the entrée system. |
|
|
4. A Progress dialog box will display as the selected files are purged.
5. When the purge completes, the Information message box will display informing the user the process has completed successfully.
Click OK to close the message box. |
|
NECS strongly recommends all users are out of the entrée system, when this utility is run. This will ensure the data integrity is not compromised by another user, accessing one or more of the data files while the operation is being performed. |
