Visual Options

Contents
The settings of the Visual Options tab allow you to personalize the appearance of the entrée application.
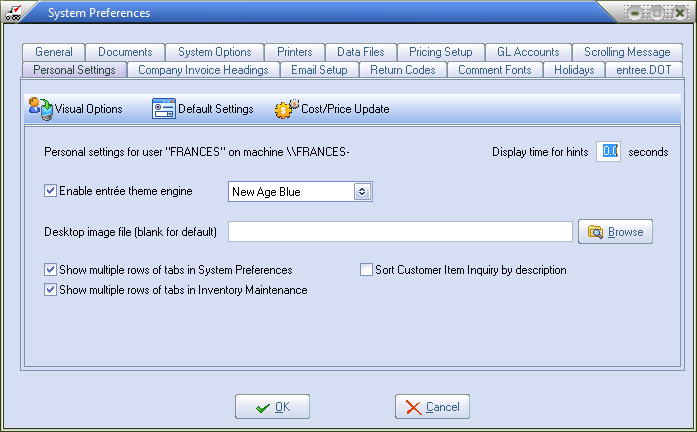
Display time for hints
Some controls in entrée have "pop-up" hints associated with them. The hints are activated by placing the mouse cursor over the control
and letting it sit idle for a couple of seconds. By default, the hint will be displayed for 2.5 seconds.
•By entering a non-zero value in this field you can alter the amount of time the hint will be displayed for.
Enable entrée theme engine
Each entrée system user has the ability to personalize their screen theme. The theme engine in entrée comes with approximately 70 themes which provide custom color schemes that are applied to all of the entrée windows and dialogs. The desired theme for each user is linked to their user account so it will be displayed on any workstation that they log into.
| 1. | Check this option to activate the entrée theme engine. |
| 2. | Select the theme from the drop-down list. As soon as a theme is selected it is applied immediately so you can preview what it will look like. |
|
By placing the cursor inside the theme drop-down list box, you can use the up and down arrow keys, on the keyboard, to browse the available themes. |

Desktop image file
The background image displayed on the entrée application window can be changed on a per user basis to any BMP, JIF, JPEG, or JPG image by entering the full path to the desired image file in this field.
If the path is not known, clicking the Browse button will open the Select Desktop Image dialog which can be used to visually navigate to the desired image file.
•If this field is left blank, the default image (WinBack.bmp) will be used.
The tabbed displays in the entrée system have been updated so the active tab will be highlighted with colored text and underlined. The color that is used for the highlight can be changed on a "per user" basis. The options listed below enhance the visual utility in the menus displayed on those screen.
Show multiple rows of tabs in System Preferences
This feature makes it easier to view all tabs at once and identify which tab you are on in System Preferences. If this option is disabled, you will need to use the Prior / Next buttons to bring the desired tab into view.
Show multiple rows of tabs in Inventory Maintenance
This feature makes it easier to view all tabs at once and identify which tab you are on in Inventory File Maintenance.
Sort Customer Item Inquiry by Description
This option will control how the Customer Item Inquiry screen is sorted by description or item. Use menu path: Accounting > Accounts Receivable > Customer Item Inquiry to view the screen.