Grids
 Grid Settings
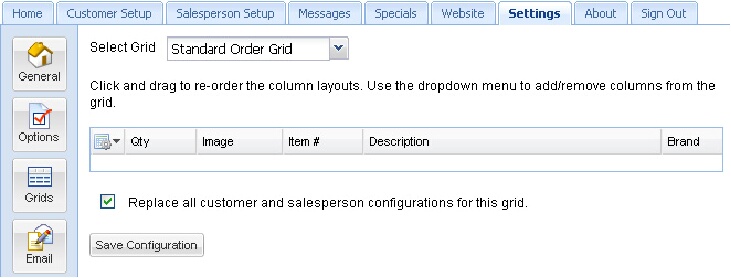
entrée.NET allows you to customize the display of column information in the Standard Order, Search and Quick Entry Grids.
1.Use the Select Grid drop down menu to choose the grid to customize.
2.Click and drag column names to reorder and move them to their new locations.
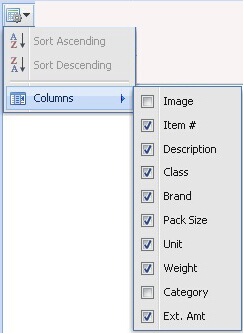
3.Click the tools icon
4.If you want to remove all the custom grids your customers and salespeople have defined, the click the box to “Replace all customer and salesperson configurations for this grid. “ Leaving this box unchecked will only affect new customers and salespeople added after you save this configuration.
Warning: It is advised that you NOT CHECK this box if your entrée.NET system has been in use for a while, as customers and salespeople will lose the grid settings they took time to customize.
5.Click the Save Configuration button |
|

This image of the Grids option page in the Settings tab has the “Replace all customer and salesperson configurations for this grid” option checked.


 to save your changes.