Assigning Images in entrée
Your first option is to use the stock item images installed with your entrée system. These image files are ready for you to assign to your inventory items. These images are not specific to a manufacturer, brand or product line. If you want am image of a particular brand item you will have to use one of the other sources described previously in this chapter.
entrée V4 SQL
In the entrée V4 SQL system you have the ability to assign an image to an item, class, brand, manufacturer and customers. Images of the products that are being sold can be viewed while invoicing or displayed on a price list report that is sent to one of your customers.
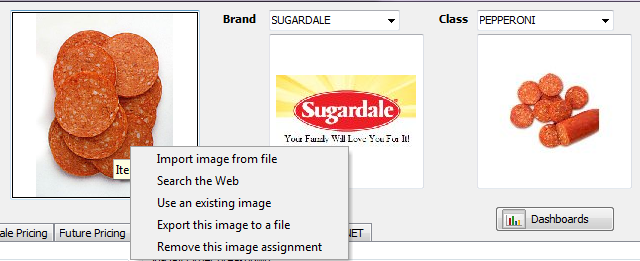
Here you see the images section of the Inventory screen with the item image right-click menu options.

•Use the Brand, Manufacturer and Class options in the Inventory ribbon menu to manage those images.
•Use the Customer option in the Customer ribbon menu to manage their images.
The imaging system in entrée V4 stores the actual images within database files. Images that are assigned to customers, brands and items can be uploaded to entrée.NET.
Although images of any resolution are supported, it is recommended to use 640x480 resolution to save hard disk space and the amount of time it takes to upload the images to the entrée.NET.
•To assign an image to an item when the image is not assigned yet
1. Right-click in the item image box to open the Right-Click for Options menu.
2. Make a selection from these options to add or replace an image:
▪Import Image from File
▪Search the Web
▪Use an existing image.
Follow the steps for each process documented below.
3. Very Important: You must always run the Export to entrée.NET once all your image editing is completed. Sending updated images via the export is how you get them to display in your website.
entrée V4 SQL
•Import Image from file
1. If you select Import Image from File the dialog will open.
2. On your computer or network find the image file and select the saved image.
3. Click Open.
4. The Image Preview screen will display where you can confirm the import of the image for the item, brand, class, or customer.
5. Click the OK button to confirm the image assignment.
6. Click Apply in the Inventory screen to save the image on the item.
7. Run the Export to entrée.NET.
•Search the Web
Use the Search the Web option when you choose to search the Internet for images that can be associated with your inventory items. You can search by Brand and/or Description and/or UPC or use the “Limit search to” option.
1. When you select the Search the Web option the Internet Image Search dialog will run an initial internet search using the item's Brand and Description. These search results will be displayed when the dialog opens for the first time.
2. Search results are displayed so you can page through using the Next and Previous buttons.
3. If no desired images are found or you encounter a message like "This image could not be downloaded from the source server. Please try another image." make another image selection or search again using different search options.
4. Click the image to selected it and the Image Preview dialog box will display.
5. Click the Select button in the Image Preview dialog to download the image.
6. Click the Apply button.
7. Run the Export to entrée.NET.
•Use an existing image
In the event that you already have an image saved in the system that you want to use for the items, like when you create case and piece items for a product, you can use this option.
1. When you right-click on the item image area and select the Use an existing image option the ImageSelectFrom dialog opens.
2. Scroll through the database of existing images and select an image. The selected image will display in the Preview Area on the right.
3. Click the OK button and the item image will update.
4. Click the Apply button to save the image.
5. Run the Export to entrée.NET.
•For more information about image assignment go to the entrée V4 SQL KnowledgeBase Inventory File Item Information topic.
entrée V3
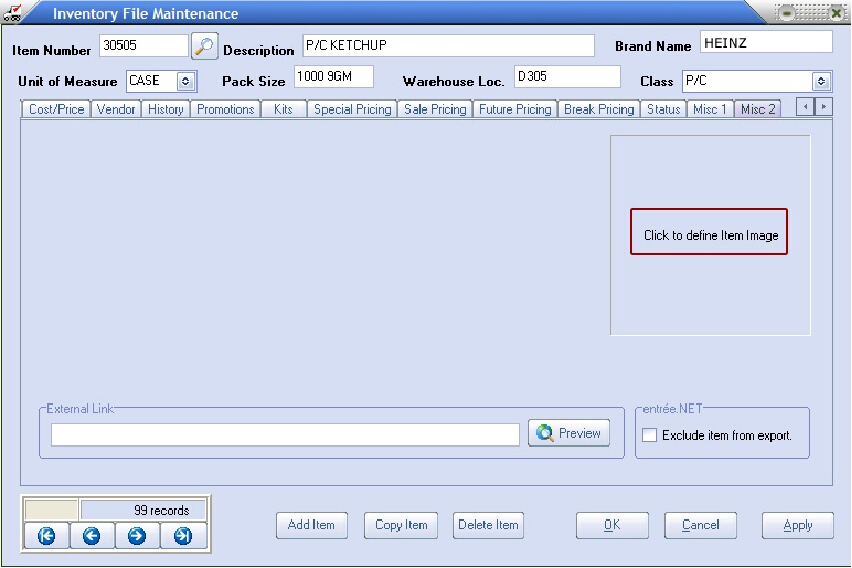
The stock images are located in the C:\necs\images folder on your computer and were installed with your entrée V3 system software. Follow these steps to assign images for items in the Inventory File Maintenance Misc2 tab.
1.Log in to the main entrée system and use menu path: File > Inventory Maintenance.
2.Click the magnifying glass  to find the item.
3. Go to the Misc2 tab and click the “Click to define Item Image” link (outlined in red). |
|
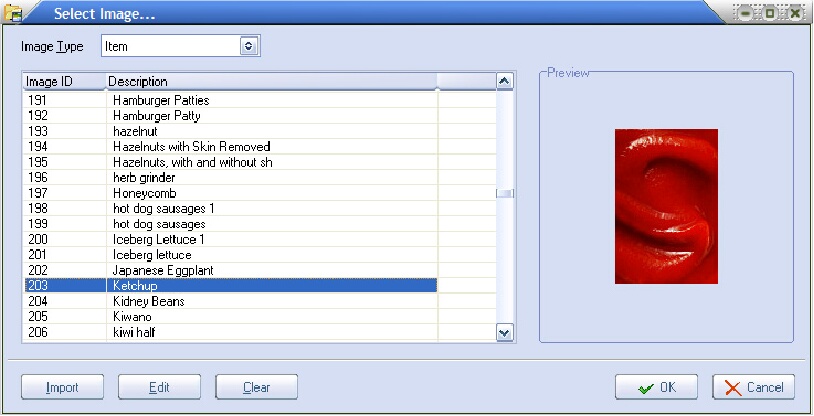
4. The Select Image dialog box will display.
a.If you installed the image files during your entrée system installation process you will be able to scroll through the stock images list to find an image. Select the image and click OK. Then click OK in the Misc2 tab.
b.If you have images you found on the Internet or created with a camera and saved in a folder on your computer follow these steps to import images.
I.In Select Image click the Import button. II.The Import Image dialog box displays. Select Item from Image Type, and then click the “Click to define” link. III.The Load Image dialog box displays. Now locate the folder and select the desired image file and click Open. IV.The image will display in the Import Image dialog box.
V.In the Select Image dialog box click OK. |
|
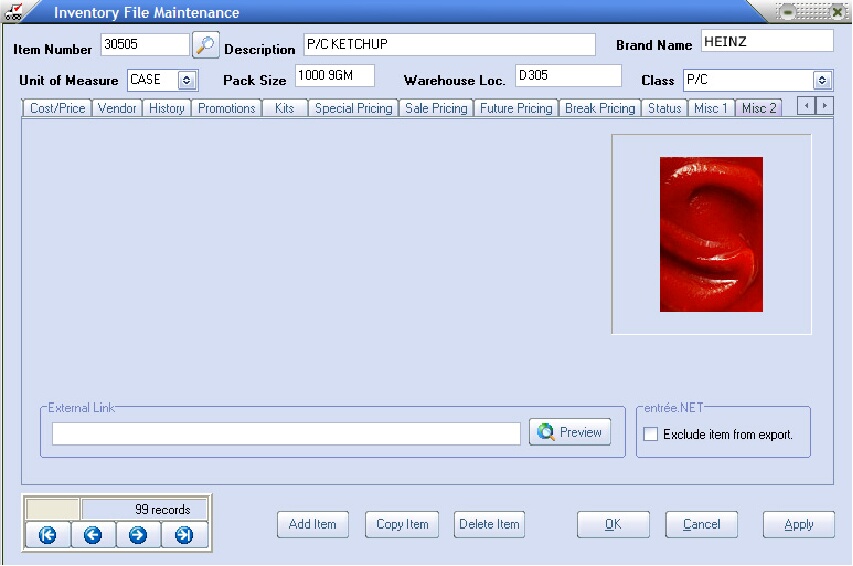
5.Then you will return to the Misc2 tab click Apply then OK. |
|
6.The next time you run the Export to entrée.NET the item will have the image for display.
7.If you want item images to display in entrée.NET you must check that option in the Settings tab > Options > General section that “Display item images” is set to Yes.


