Data Export / Scheduler
Ensuring that item information in entrée.NET is synchronized with the main entrée system can be a time consuming task. The entrée.NET Scheduler works with the entrée export utility to automate this process for you. The Export to entrée.NET utility is located in the Invoicing menu in the main entrée system.
It can be set to update your entrée.NET system as often as every hour. Once the entrée.NET Scheduler is set up and enabled you can be sure you are providing your customers and salespeople with an updated catalog, product images and information.
Exporting entrée Data to entrée.NET
This section will detail how to do a manual export your updated item data and images to your remote entrée.NET server from entrée V3 or entrée V4 SQL.
entrée V4 SQL Export to entrée.NET
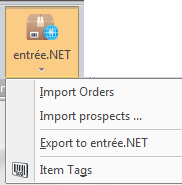
In entrée V4 SQL the entrée.NET icon and drop down menu are activated in the Add-Ons ribbon menu for customers who have purchased the entrée.NET add-on module.

1. Sign-in to the entrée V4 SQL system.
2. Go to the Add-Ons ribbon menu and click the entrée.NET icon drop down menu.
3. Select Export to entrée.NET and the export will run. |
|
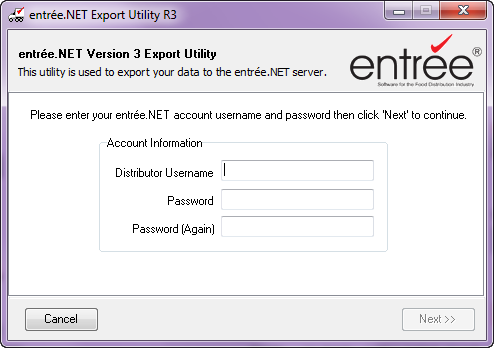
4. The entrée.NET Version 3 Export Utility dialog box will display.
Enter your username and password to sign-in to your entrée.NET account.
Click Next to continue.
5. The rest of the steps are the same as the entrée V3 export process that follows.
|
|
entrée V3 Export to entrée.NET
1.Sign-in to your entrée V3 system.
2. Use menu path: Invoicing > entrée.NET > Export to entrée.NET.
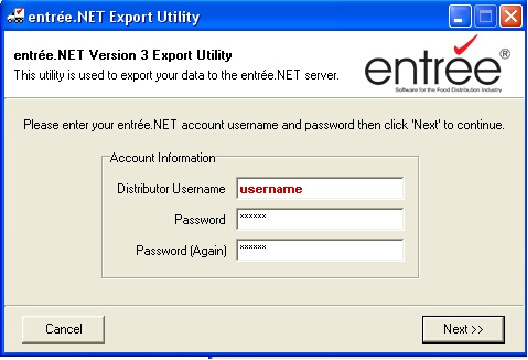
The entrée.NET Export Utility dialog box will display.
Enter your username and password to sign in to your entrée.NET account.
Click Next to continue.
|
|
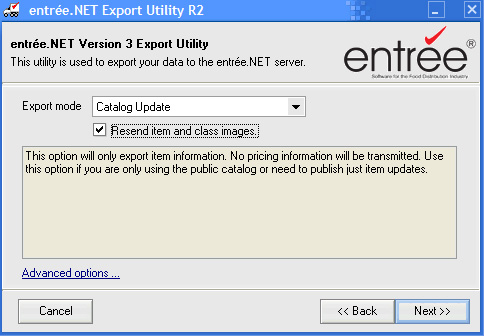
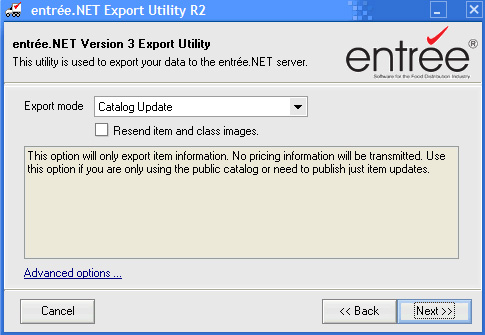
3. Check the Resend item and class images option if you have updated images for item/class in entrée.
The maximum image size supported by entrée.NET has been increased to 550 x 550 pixels.
Your customers may now click on item images in the grid or on the "Item Information" pop-up window to view a larger version of the product image. |
|
•Images can be added to items in the main entrée system via the “Misc2” tab in “Inventory File Maintenance.” Then you must run a "Catalog Update" export mode and check off the "Resend item and class images" option to send new images to entrée.NET.
4. The only export mode option in the menu is Catalog Update. It will transmit item information and images to entrée.NET. No pricing information will be transmitted.
Use this option if you are only using the public catalog or need to publish just item updates.
|
|
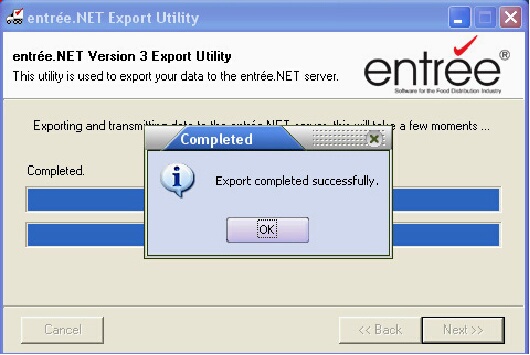
5. Click Next. The export utility will now begin exporting and transmitting your data. The progress of your export will be displayed using the blue bars.
6. Once the export utility is done the Completed dialog box will display to confirm the export.
Click OK.
Your current data is now loaded into your entrée.NET catalog. Your system is ready for customers to view your catalog and place their orders. |
|
entrée.NET Export Utility Advanced Options
WARNINGS
1. Do NOT use the Advanced Options unless NECS Tech Support directs you to use it!
2. Use of this option will delete the table data that is checked.
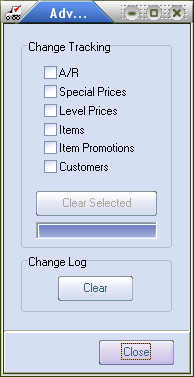
The "Advanced Options" button in export utility, outlined in red in the image above, allows you to clear out selected sections of the new change tracking file.
entrée V4 SQL 1. Use menu path: Add-Ons ribbon menu > click the entrée.NET icon drop down menu > Export to entrée.NET > sign-in > Advanced options button.
2. Then check the table data in the Advanced Options dialog box shown on the right. Choose from A/R, Special Prices, Level Prices, Items and Customers.
3. Click Close. Now perform steps 4 - 6 below.
entrée V3 1. Use menu path: Invoicing > entrée.NET > Export to entrée.NET > sign-in > Advanced options button.
2. Then check the table data in the Advanced Options dialog box shown on the right. Choose from A/R, Special Prices, Level Prices, Items and Customers.
3. Click Close. Now perform steps 4 - 6 below.
|
|
4. Then for Export mode select "Standard Update" from the drop down list.
5. Click Next. The export utility will now begin exporting and transmitting your data. The progress of your export will be displayed using the blue bars.
6. Once the export utility is done the Completed dialog box will display to confirm the export. Click OK.
entrée Exclude Item Option
NECS has built into the main entrée system the ability for you to exclude any of your inventory items from export to your entrée.NET online ordering system. Follow these steps to perform the items updates in entrée V4 SQL or V3.
entrée V4 SQL Exclude Item
The options related to the entrée.NET add-on module and the “Exclude item from export” check box is located on the Inventory ribbon menu > Inventory option > find the item > select the .NET Tab.
•Once you are in the .NET Tab follow steps 5 - 8 from the version 3 instructions below. Remember to use the V4 Export to entrée.NET instructions documented earlier in this chapter for your export.

•Exclude item from export - NECS has built into the main entrée system the ability for you to exclude any of your inventory items from export to your entrée.NET online ordering system. Check the box to activate this option. Reference the entrée.NET Administrator's Guide chapter 4 Data Export / Order Import / Scheduler for detailed information.
•Exclude item from public website catalog - This option has been added to be used to tailor the items listed in your public website catalog since you may not want every item you sell to be shown. When this option is checked that specific item will still be listed during order entry for salespeople and for logged-in customers in entrée.NET and the Electronic Order Pad, but these items will not be listed in your public website catalog.
•Restricted Item - Define items to be "restricted", as a general rule, from entrée.NET, so that they will not appear to the customer when they are placing their order online, searching for items, etc. However, what makes this enhancement unique is that if the customer does have the item defined in the Customer Special Price/Standard Order file, they will still be allowed to purchase it, and it will be displayed to them when placing an online order. You can use this feature for situations such as a special order item, that you purchase for a specific customer (or group of customers), that your normal customer base is not allowed to order. An item may be set as restricted by checking the box for "Restricted item".
•Allow item to be sold at $0.00 - Provides support for selling items at no cost to the customer. This option has been added to assist distributors with in dealing with manufacturer product giveaways. Checking this option on an item allows it to be displayed in entrée.NET and added to an order with no price. For salespeople this will allow them to change the price for the item to $0.00 even if a valid non-zero price was calculated by the system.
entrée V3 - Exclude Item
1.Login to your entrée V3 system.
2.Use menu path: File > Inventory File Maintenance.
3.Find the desired inventory item.
4.Click on the .NET tab.
5. Check the box for the Exclude item from export option.
6. Click Apply.
7. Click OK.
8. Once you have completed marking individual inventory items for exclusion you will need to export this updated inventory data to entrée.NET. There are two ways the export to entrée.NET can be run:
a.The entrée.NET Scheduler will export data at the next scheduled run time.
b.Or the updates can be done immediately in entrée. Use menu path: Invoicing > entrée.NET > Export to entrée.NET.
9. The Export mode will be "Catalog Update".
10. Click Next. The export utility will now begin exporting and transmitting your data. The progress of your export will be displayed using the blue bars.
11. Once the export utility is done the Completed dialog box will display to confirm the export. Click OK.

