Email Account Settings
If you are using the entrée.NET option which includes a website for your company, then this chapter will be of special importance to you.
When you have your own website, such as www.mydistributingcompany.com, you can have email addresses that use your domain name. So instead of using AOL, MSN, YAHOO, GMAIL, etc. (ex: myname@aol.com) for your email, you can have your own professional email address.
An example would be: myname@mydistributingcompany.com.
Included with your entrée.NET website package is the ability to create 10 email accounts for your company. If you need more email accounts, please contact NECS.
The goal is that all they key people in your organization will have their own private email addresses, as well as more general email addresses such as sales@mydistributingcompany.com or service@mydistributingcompany.com.
These general types of email addresses can be used by groups of your employees, rather than just one. You will be using an online web service or “control panel’ called “Plesk” to manage your email accounts.
•Before you begin to set up your email accounts in the Parallels Plesk Panel you will need to gather some information.
1.Make a list of the email accounts you will need to create for your business. You have 10 email accounts at your disposal. As you create the email accounts write down the passwords you have assigned next to each for your records.
2.You will need the following information about your ISP (Internet Service Provider).
a.The name of your Outbound Mail Server (SMTP), for example: “smtp.comcast.net”.
b.The type of mail retrieval server on your ISP, either POP3 or IMAP is acceptable.
3.Your inbound mail server will be: mail.mydistributingcompany.com (where you will substitute “mydistributingcompany.com” with your actual website domain name.)
Plesk Control Panel Login
The person who will function as your System Administrator will have access to the email administration panel that has been set up in Plesk by NECS. Plesk is used to manage your email accounts. To create and edit the email addresses you would like to use, you need to login to your “Parallels Plesk Panel”.
The System Administrator login process is as follows:
1.To get to your Plesk control panel type the following URL into your browser:
http://cp.mydistributingcompany.com (where you will substitute the “mydistributingcompany.com”
with your actual website domain name.)
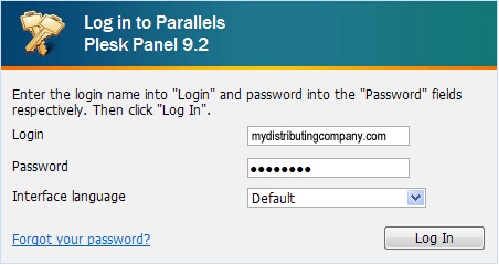
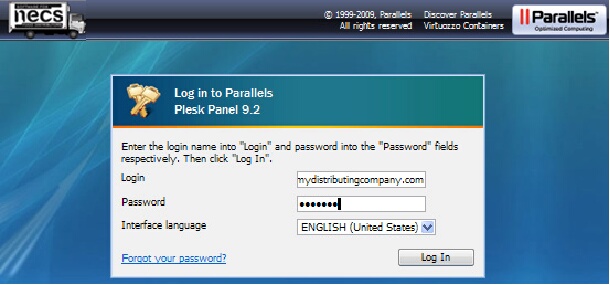
1.Enter your domain name as described in step 1 above for the Login field and the Password provided by NECS.
2.Select an Interface language if you desire. The default setting is U. S. English.
|
|
How to Create the Administrator’s Mailbox
1.Login to your “Parallels Plesk Panel” as detailed above.
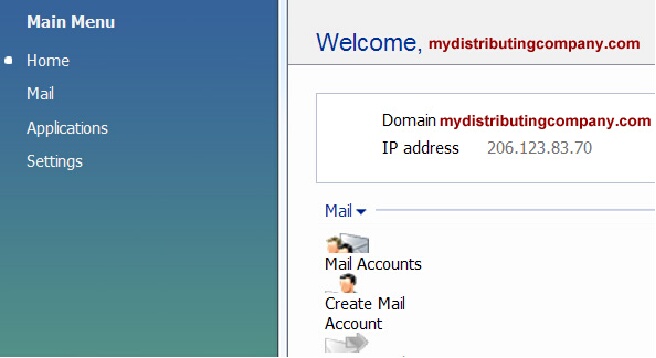
2.You will see your domain name and IP address displayed on the Home page.
Use menu path: Home > Create Mail Account.
|
|
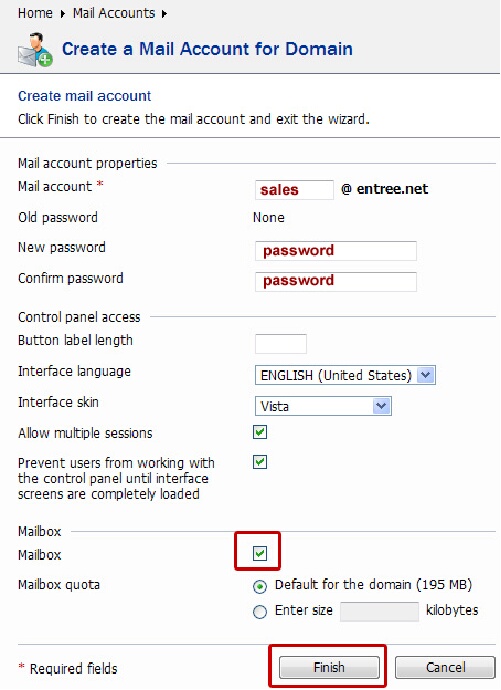
3.In the Mail Account field your domain name is shown to the right of @ sign, (in the example below entrée.net is the domain name.) Just enter the desired name for the mailbox here.
This can be, for example, your first name and last name separated by a dot, a department name, or any other text in Latin symbols. The name should be short enough to remember. It can comprise alphanumeric, dash, dot and underscore symbols.
4.Specify a New password and Confirm password that will be used to access your mailbox.
5.Be sure to check Mailbox.
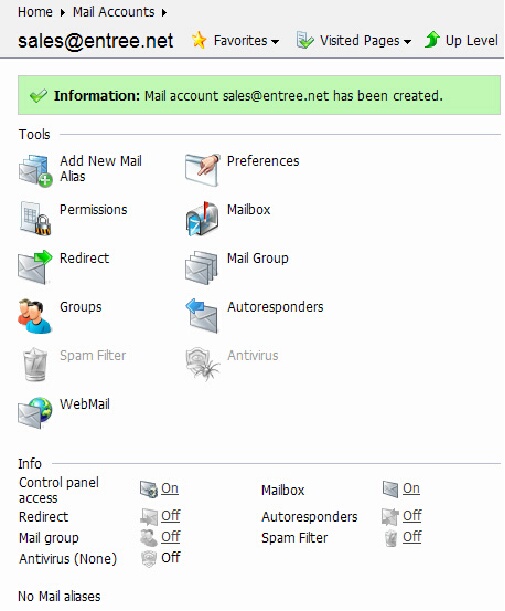
6.Click Finish. A message confirming the creation of the mailbox is displayed. You are now in the control panel for that mailbox.
•To create your mailbox the only settings required are indicated in red. |
|
•The screen displayed after the mailbox creation process has been successfully completed. |
|
Creating Mailboxes for Other Users
1.The System Administrator will login to the “Parallels Plesk Panel” for your domain. Use menu path: Home > Create Mail Account.
2.In the Mail Account field the domain name is shown to the right of @ sign, (in the example below entrée.net is the domain name.) Just enter the desired name for the mailbox here. This can be, for example, the user's first name and last name separated by a dot, a department name, or any other text in Latin symbols. The name should be short enough to remember. It can comprise alphanumeric, dash dot and underscore symbols.
 Full email addresses:
a.Department mailbox: sales@mydistributingcompany.com
b.Employee mailbox: angela.zelos@mydistributingcompany.com
3.Specify a password that mailbox owner will use for accessing his or her mailbox.
4.Specify the settings related to the appearance of user's control panel, if desired: interface language, theme (skin), the limit on number of characters that can appear on custom buttons placed into the control panel by the mailbox owner.
5.Leave the Allow multiple sessions box checked. This will allow the mailbox owner to have several simultaneous sessions in the control panel.
6.Leave the Prevent users from working with the control panel until interface screens are completely loaded box checked. This will forbid users from submitting data or performing operations until the control panel is ready to accept them.
7.Make sure to check Mailbox.
8.If required, limit the amount of disk space that this mailbox and its auto responder attachment files can use. To do this, under Mailbox quota select the Enter size option and type the desired value in kilobytes.
 Mailbox owners should not have access to the Plesk control panel.
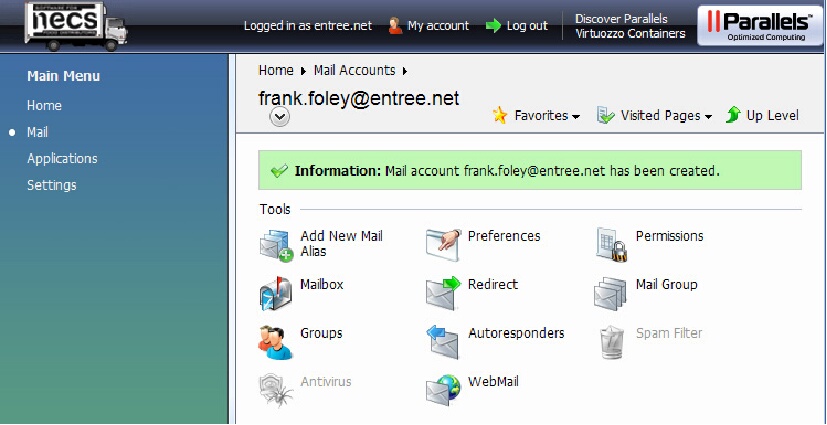
9.Click Permissions in the Mail Accounts page to configure and use spam filters, antivirus, protection and click OK.
How will my Business Access Email?
Your business has two options available for email processing. You can use WebMail accessed via a web browser or use the mail client software running on your computers.
What is WebMail?
WebMail is an email service accessed via your web browser. Anywhere there is an internet connection you will be able to check your WebMail. It is not the same inbox as your mail client software running on your computer such as Microsoft Outlook.
Can I use a WebMail service to read and send email online?
Yes, NECS has already enabled WebMail in your domain’s account in Plesk Mail Preferences. A step by step procedure for WebMail login is documented below.
Accessing Your Mail Using a Web Browser
You can read your mail and compose new messages even if you are far from your home or office computer. NECS has already provided access to the WebMail interface that is integrated with your domain. So you can work with your email from any computer with an Internet connection and Web browser installed, or a WAP-enabled cellular phone or a handheld computer (PDA).
How to Access WebMail
1.Open an internet browser (or a WAP browser, if you are working from a handheld device).
2.Type the URL: http://webmail.mydistributingcompany.com, where “mydistributingcompany.com” is the name of your domain.
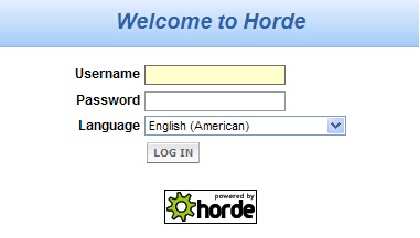
3.Press ENTER. The WebMail login page will open.
4. Type the Username and Password for your mailbox and click Log in.
a.Username - is the department or employees full Email Address.
For example: angela.zelos@mydistributingcompany.com
b.Password - is the password for the email account. |
|
Now that the mailboxes for your business have been created on the NECS server, you will need to set up your email client program to receive and send email through your new mailboxes.
Microsoft Outlook and Mozilla Thunderbird are two of the most common email client programs used for this purpose. You may already have one of these programs running on your business computers. Consult your email client documentation and Help topics to get the correct update process for the software used by your business. An example of the process to setup an Outlook email client program follows.
How to Setup Email Accounts in Microsoft Outlook
After you've created your email accounts in Plesk, you can add this account to your preferred Mail Client, or you can read your email using the WebMail service which is part of every hosting account.
1.Run Microsoft Outlook on the user’s computer.
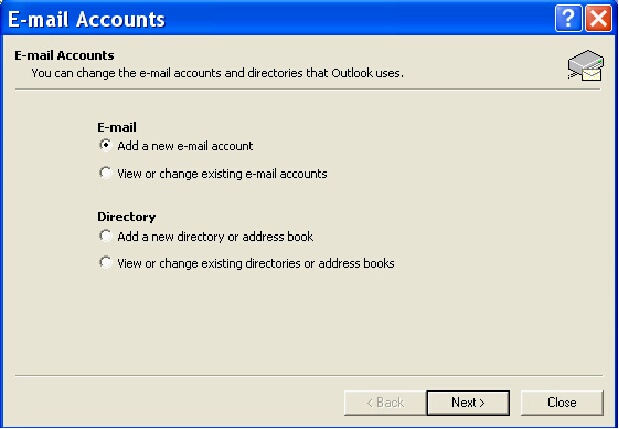
2.Go to the Tools > E-mail Accounts.
3.In the E-mail Accounts dialog box select Add a new e-mail account.
4.Click Next. |
|
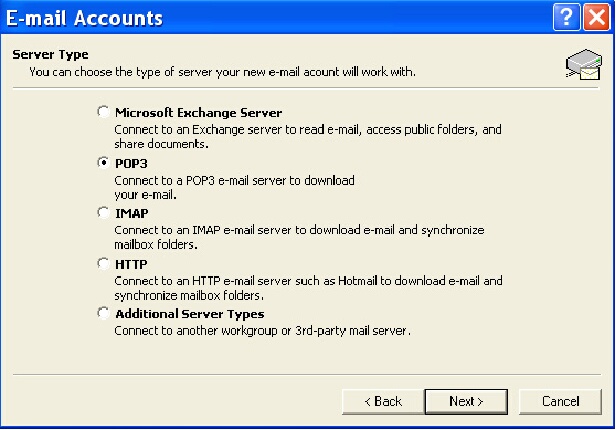
5. The Server Type dialog box will display.
6. Select POP3 or IMAP for your Server Type.
7. Click Next. |
|
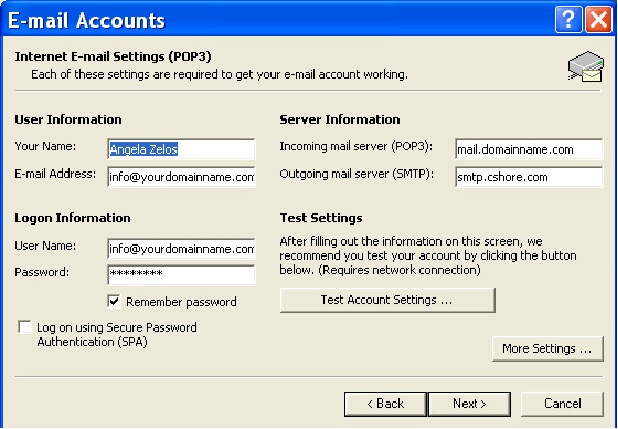
8.In the E-mail Account dialog box you will provide the following account information:
User Information
•Your name – Enter your first and last name.
•E-mail Address - The full email address, including the domain name, of the account you created in Plesk. E.g. angela.zelos@mydistributingcompany.com
Mail Account represents the person’s name or a department, whatever the System Administrator assigned. Substitute the “mydistributingcompany.com” with your actual website domain name.
Logon Information
•Username – Is the full Email Address in User Information box above.
•Password - Is the password you entered when you created the account in Plesk.
Server Information
•Incoming Mail server (POP3) - mail.mydistributingcompany.com where “mydistributingcompany.com” is your actual website domain name.
•Outgoing Mail Server (SMTP) - Your Outgoing Mail Server (SMTP) is the same as your ISP's outgoing mail server. Use the same setting provided by your ISP to avoid problems delivering email.
 In the email account setup example above the email address would be: angela.zelos@mydistributingcompany.com. The info@yourdomain.com email address was used for testing purposes only.
 Most Virus and SPAM conscious ISPs now require you to use their outgoing Mail server to help reduce the proliferation of viruses and eliminate SPAM.
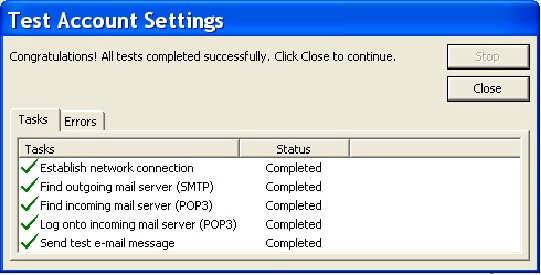
9.Now click the Test Account Settings button. An analysis of your settings will be run. Any errors will be displayed in the Errors tab. Review and resolve any errors to continue.
10. If all tests were completed successfully, then click Close. |
|
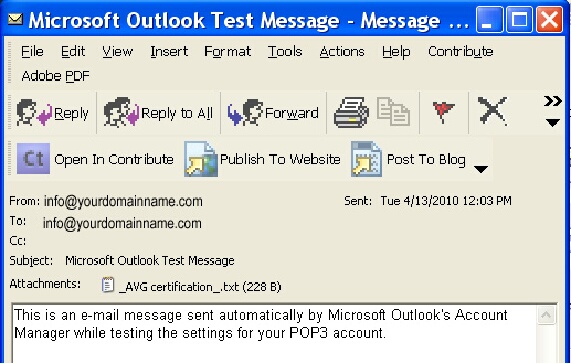
11.A test email has been sent to your email account as a part of the account testing process. An example of the email you will receive is below.
12. Now you will be brought back to the E-mail Accounts Internet E-mail Settings (POP3) dialog box in step 8 above. Click Next.
13. The E-mail Accounts Congratulations dialog box displays. Click Finish.
 This Microsoft Outlook setup process must be repeated for each user on their business computer for all your new Plesk email accounts.
Source: www.parallels.com ©Parallels Holdings, Ltd.

