Slot Location Builder Tool

Contents
Follow these steps to use the Slot Location Builder Tool to manually build the Warehouse Location ID format you will use for the warehouse section.
1. You are using the Manual Mode so do not check the Use Auto Create Locations option.
2. Click the Slot Location Builder Tool tab.
3. Check the boxes (outlined in red below) for the ID fields you want to include in your Warehouse Location IDs.
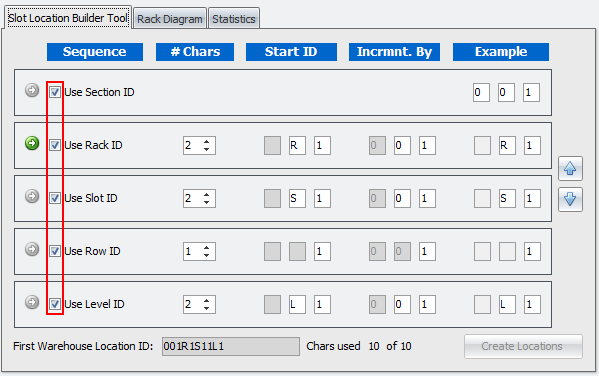
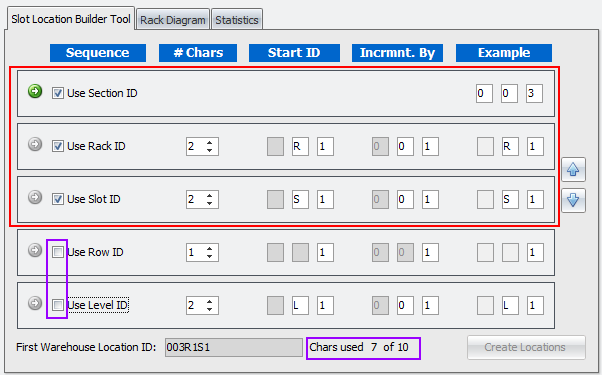
In the image here the Row ID and Level ID are not checked.
The First Warehouse Location ID is provided at the bottom of the section. In this example the warehouse is using just the Section, Rack and Slot ID fields. |
|
4. Enter all the Slot Dimensions in inches for the section you are defining.
5. Click the Apply button to save the slot information.
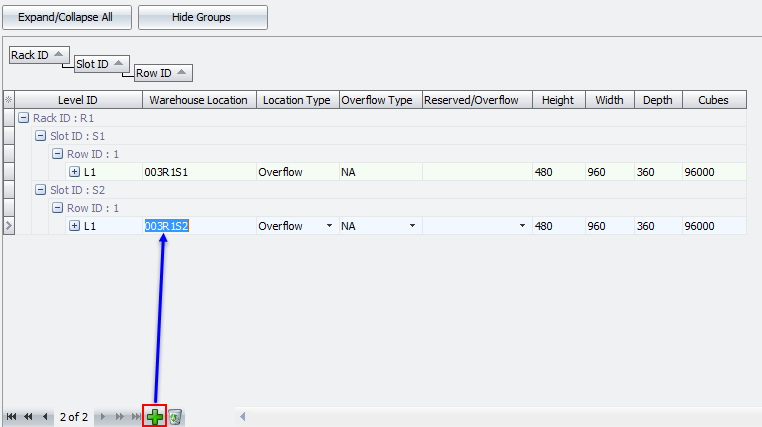
6. Using the information from our example above, go to the the Section Dashboard on the right and click the green plus button. A new slot ID will be added with each click of the Add button (green plus sign). The slot ID numbers will be incremented with each click using the information entered in the Slot Location Builder Tool as seen below.
7. Click the Apply button to save the information.