Using the Update Utility

Contents
You will first encounter with the Update Utility during the V4 SQL update process which will transition your software from entrée version 3 to entrée V4 SQL. During the V4 SQL update process you will setup the required folders, database accounts and connections to the shared folder and the new entrée version 4 databases. After the update process has been completed you will run both versions of entrée parallel for a period until your business is ready to only use version 4.
Once your business is fully running only on version 4 you will be using the Update Utility to perform common file and database maintenance functions. The features of the Update Utility will be discussed in this chapter.
Update Utility Main Features
•Updates SQL databases & files to the latest entrée version: Allows you to see which of your users are still logged in before you proceed with the utility.
•Update Advantage Database Server (ADS) License: Use this process to update your server without needing to reinstall it. Use the option to change the number of ADS licenses your business has and more.
•Backs up SQL files: Copies your SQL files from their protected directory, into another location where your backup software can access. Create an editable "Windows Task Scheduler" event to automate the copying of the files to local or Internet based off site storage.
•Checks Backup Space: Use this option in the Utilities menu to check potential locations for your backup to be sure there is enough space before you proceed.
•Restores SQL files: Can take a file or your entire file set to restore and replace entrée SQL file(s).
•Re-indexes SQL files: For those rare occasions when you need to Re-index a specific file or group of files, you will only be able to perform that function here. The old "Re-index Files" feature is no longer available or needed from within the main entrée software.
•Edit NECS Shared Data Folder: Edit the location of the shared data folder in the event that it must be moved to a new network location.
•Repair Data:
▪Purge Duplicates: Removes duplicate records from SQL databases.
▪Validate Character Dates: Reviews and Validates “Character”- style date values.
▪Fix Zero Dates
▪Fix Contact Manager Sequence values
▪Re-link DOC image data
•Check Databases: Checks your SQL databases to see if an update or re-index is required.
•Review Database Constraints: This process will review both the constraints as well as the data in entrée to be sure all existing data complies with the defined constraints. If not entrée errors could occur.
Rules for Using the Update Utility
1.Only System Administrator level users should ever have access to the Update Utility.
2.You MUST run the Update Utility on your server which is required when using Sybase Advantage SQL software.
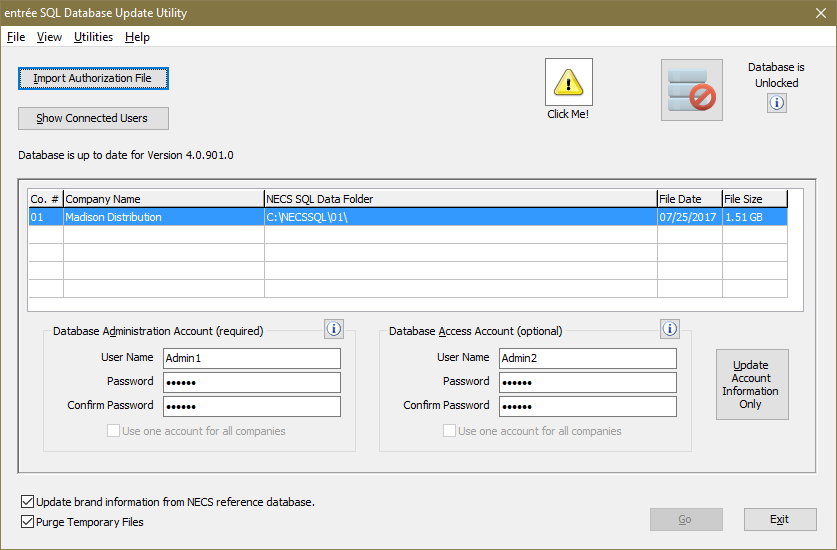
3.Running the Update Utility requires that ALL users exit entrée. Use the Show Connected Users button  in the update utility screen to see who is in entrée.
4.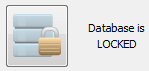 The V4 SQL databases must be "locked" before an update. Once all users are out of the system click the Database Lock / Unlock button in the update utility screen to lock the databases before you perform an update.
5.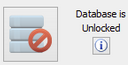 Then click the Database Lock / Unlock button again to unlock the entrée databases after the update utility work is done.
 If the Update Utility detects connections from the Task Scheduler the “Click Me!” icon will now post a message to indicate that one or more Task Scheduler applications are running and will remind you that you need to lock the databases to shut down those connections.
•When you issue the “lock” command there will also be a flashing message in red while the Task Scheduler system processes the shutdown notification.
•When the shutdown process is complete then the message will no longer be displayed and you should be able to launch the version update.
Import Authorization File Button
Used to import or update the authorization file from NECS. This file will tell the system what add-on modules and custom modifications you have purchased. The Import Authorization File dialog box will open. Browse to find and select the NECS.DAT file on your server and click Open. The NECS.DAT file will be processed by the Update Utility. The Install Part 2 chapter of the system guide covers the use of this feature when you first install V4 SQL.
Informational Tools
In the Update Utility there are a few informational tools to help you understand features in the screen and what is required for input during the update process. You can easily find software version information menu.
•Help Menu
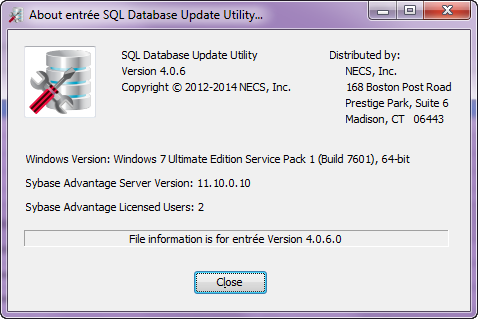
Click Help in the menu bar provides you with version information for entrée, Windows, and Sybase Advantage software. |
|

In the Help About example shown here the entrée version is 4.0.6
|
|
 Click Me! Button
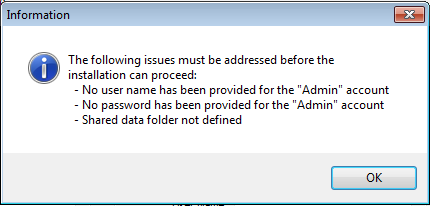
Provides information about what other fields are required before the utility can be run the first time you update.
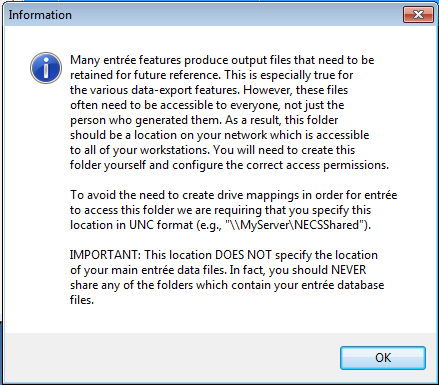
The Information message opens to list the tasks that must be complete before proceeding. |
|

 Important / Information Buttons
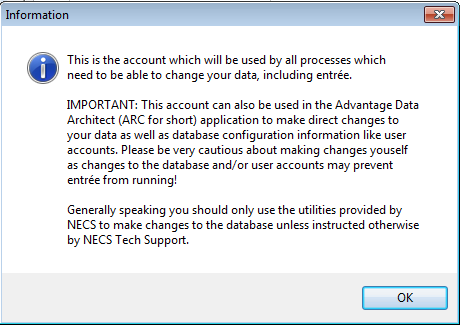
• These buttons will provide you with information about the specific field it is near on the screen.
•The Database Administration Account, Database Access Account, NECS Shared data folder and the Database Lock / Unlock button for the SQL databases all have an Information button.
On the right is the Information displayed for the Database Administration Account section. |
|
Database Account Updates
When you first ran the Update Utility you created the required Database Administration Account and optionally created a Database Access Account. To maintain these accounts and their passwords you will use the Update Utility.
 Update Account Information Only Button - When you change either the User Name or Password information for either of the Database Accounts in the update utility you must click the Update Account Information Only button to update the accounts in the entrée system.
 Database Account Security Tips
•Please be sure to save this login information in a secure place.
•Only share this information with a limited number of people who require System Administrator access to your databases.
•Users with this login information have update access and can modify your entrée databases which can potentially cause a loss of critical data for your business.
•Use the Update Utility to change the password on this account if you think it has been compromised.
Multi-Company Note: For businesses with the multi-company add-on module you can check the Use one account for all companies option to use the accounts set up here for all the companies in entrée.
Update Brand Information
If you check the "Update brand information from NECS reference database" option box the utility will update your entrée system brand information from the NECS brand database.

Keeping this option checked will ensure that you always have the latest brand information for new items you need to add to entrée. When you include a new brand in entrée, the system will automatically have the brand logo and website address/URL ready to load if it finds a match. If an existing brand has information missing, and there is a match in our 600+ brand database, the system will automatically insert the logo and website address/URL.
Purge Temporary Files
If you check the "Purge Temporary Files" option box then during the database updating performed by the utility any leftover temporary files will be purged from the system. This will help to control space usage and system resources because temporary files can become quite large.
File Menu Options
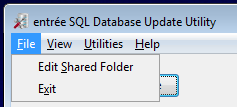
•Edit Shared Folder - There may come a time when due to space limitations or some other reason you need to designate a different location for your NECS Shared data folder. This is when you would use the Edit Shared Folder option in the File menu. |
|
When the Edit Shared Data Folder dialog opens click in the folder name text box and enter the new location or use the Browse button to find and select the new folder you have setup. You must get the Location verified message displayed in the image below to proceed.
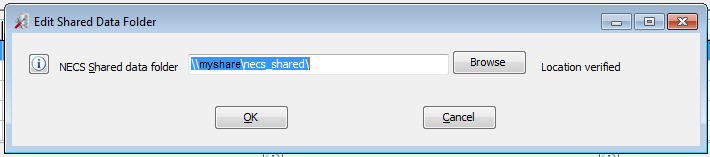
If your location can not be verified here your location may not be shared with Read/Write permissions on your network. Click Cancel and check the folder settings on your network.
|
|
About the NECS Shared Data Folder
For version 4 you will need to have a location set up for the required NECS Shared data folder on your network. You need to specify this location in UNC format.
 For example: \\MyServer\NECSShared, where “MyServer” is the name of your local server.
▪All entrée users must have Read / Write permission for this folder.
▪The NECS Shared data folder stores the entrée Help files, imported and exported files and output files.
•Exit - Use this option to exit the entrée SQL Database Update Utility.
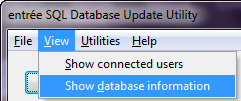
View Menu Options
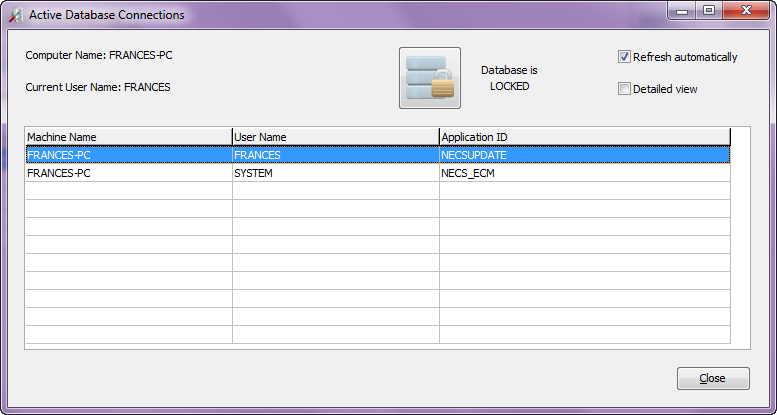
•Show Connected Users - Use this option to see what users are logged in the entrée system in the Active Database Connections screen. •Before you perform an update with the entrée SQL Database Update Utility ALL users must be out of the system and the databases must be locked. |
|
Application ID Values in Show Connected Users
•Application ID beginning with “ECM” are part of the entrée Client Monitor system and do not affect the operation of the Update Utility.
•Application ID value of “ENTREE_V4” are connections opened by a regular copy of entrée. These IDs are actual users in the entrée system. We recommended that you have those users exit entrée before you issue the “lock” command. This will prevent the loss of documents or data that the user was working on.
•Application ID value of “NECS.exe” will normally be secondary connections to the database which were opened by one of the other applications in the list.
1.A list of users in the system is displayed. You can contact them to log out.
2.Once all users are out of the system, click the Database is Unlocked button. The databases will now lock and the button text will change to the Database is LOCKED.
3.When your update is complete click the Database is LOCKED button to unlock the entrée databases again. Now your users can login to work.
4.Send out a message system-wide to notify users.
•Show Connected Users - Refresh Automatically Option - When this option is checked the list of user in the entrée system will update automatically when users login or exit the system.
•Show Connected Users - Detailed View Option - When this option is checked more detailed information about the users and their computer logged into the entrée system is displayed.
Active Database Connections screen columns:
▪Machine Name: The name assigned to the user’s computer.
▪User Name: The user’s name in entrée.
▪Application ID: The application in entrée that the user is currently working in.
When the Detailed View option is enabled these additional columns are displayed:
▪Comp #: The number of the Company in entrée where the user is working.
▪Database User: The Advantage user account that is being used to access the database for the connected users information. It can be one of the accounts you created in the Update Utility or the “AdsSys” master account as seen in the image above.
▪Network Address: IPC connection number of the Terminal Services host machine.
▪Term Client Address: The client address of a user connected through Terminal Services, which for a normal direct client connection is "0.0.0.0".
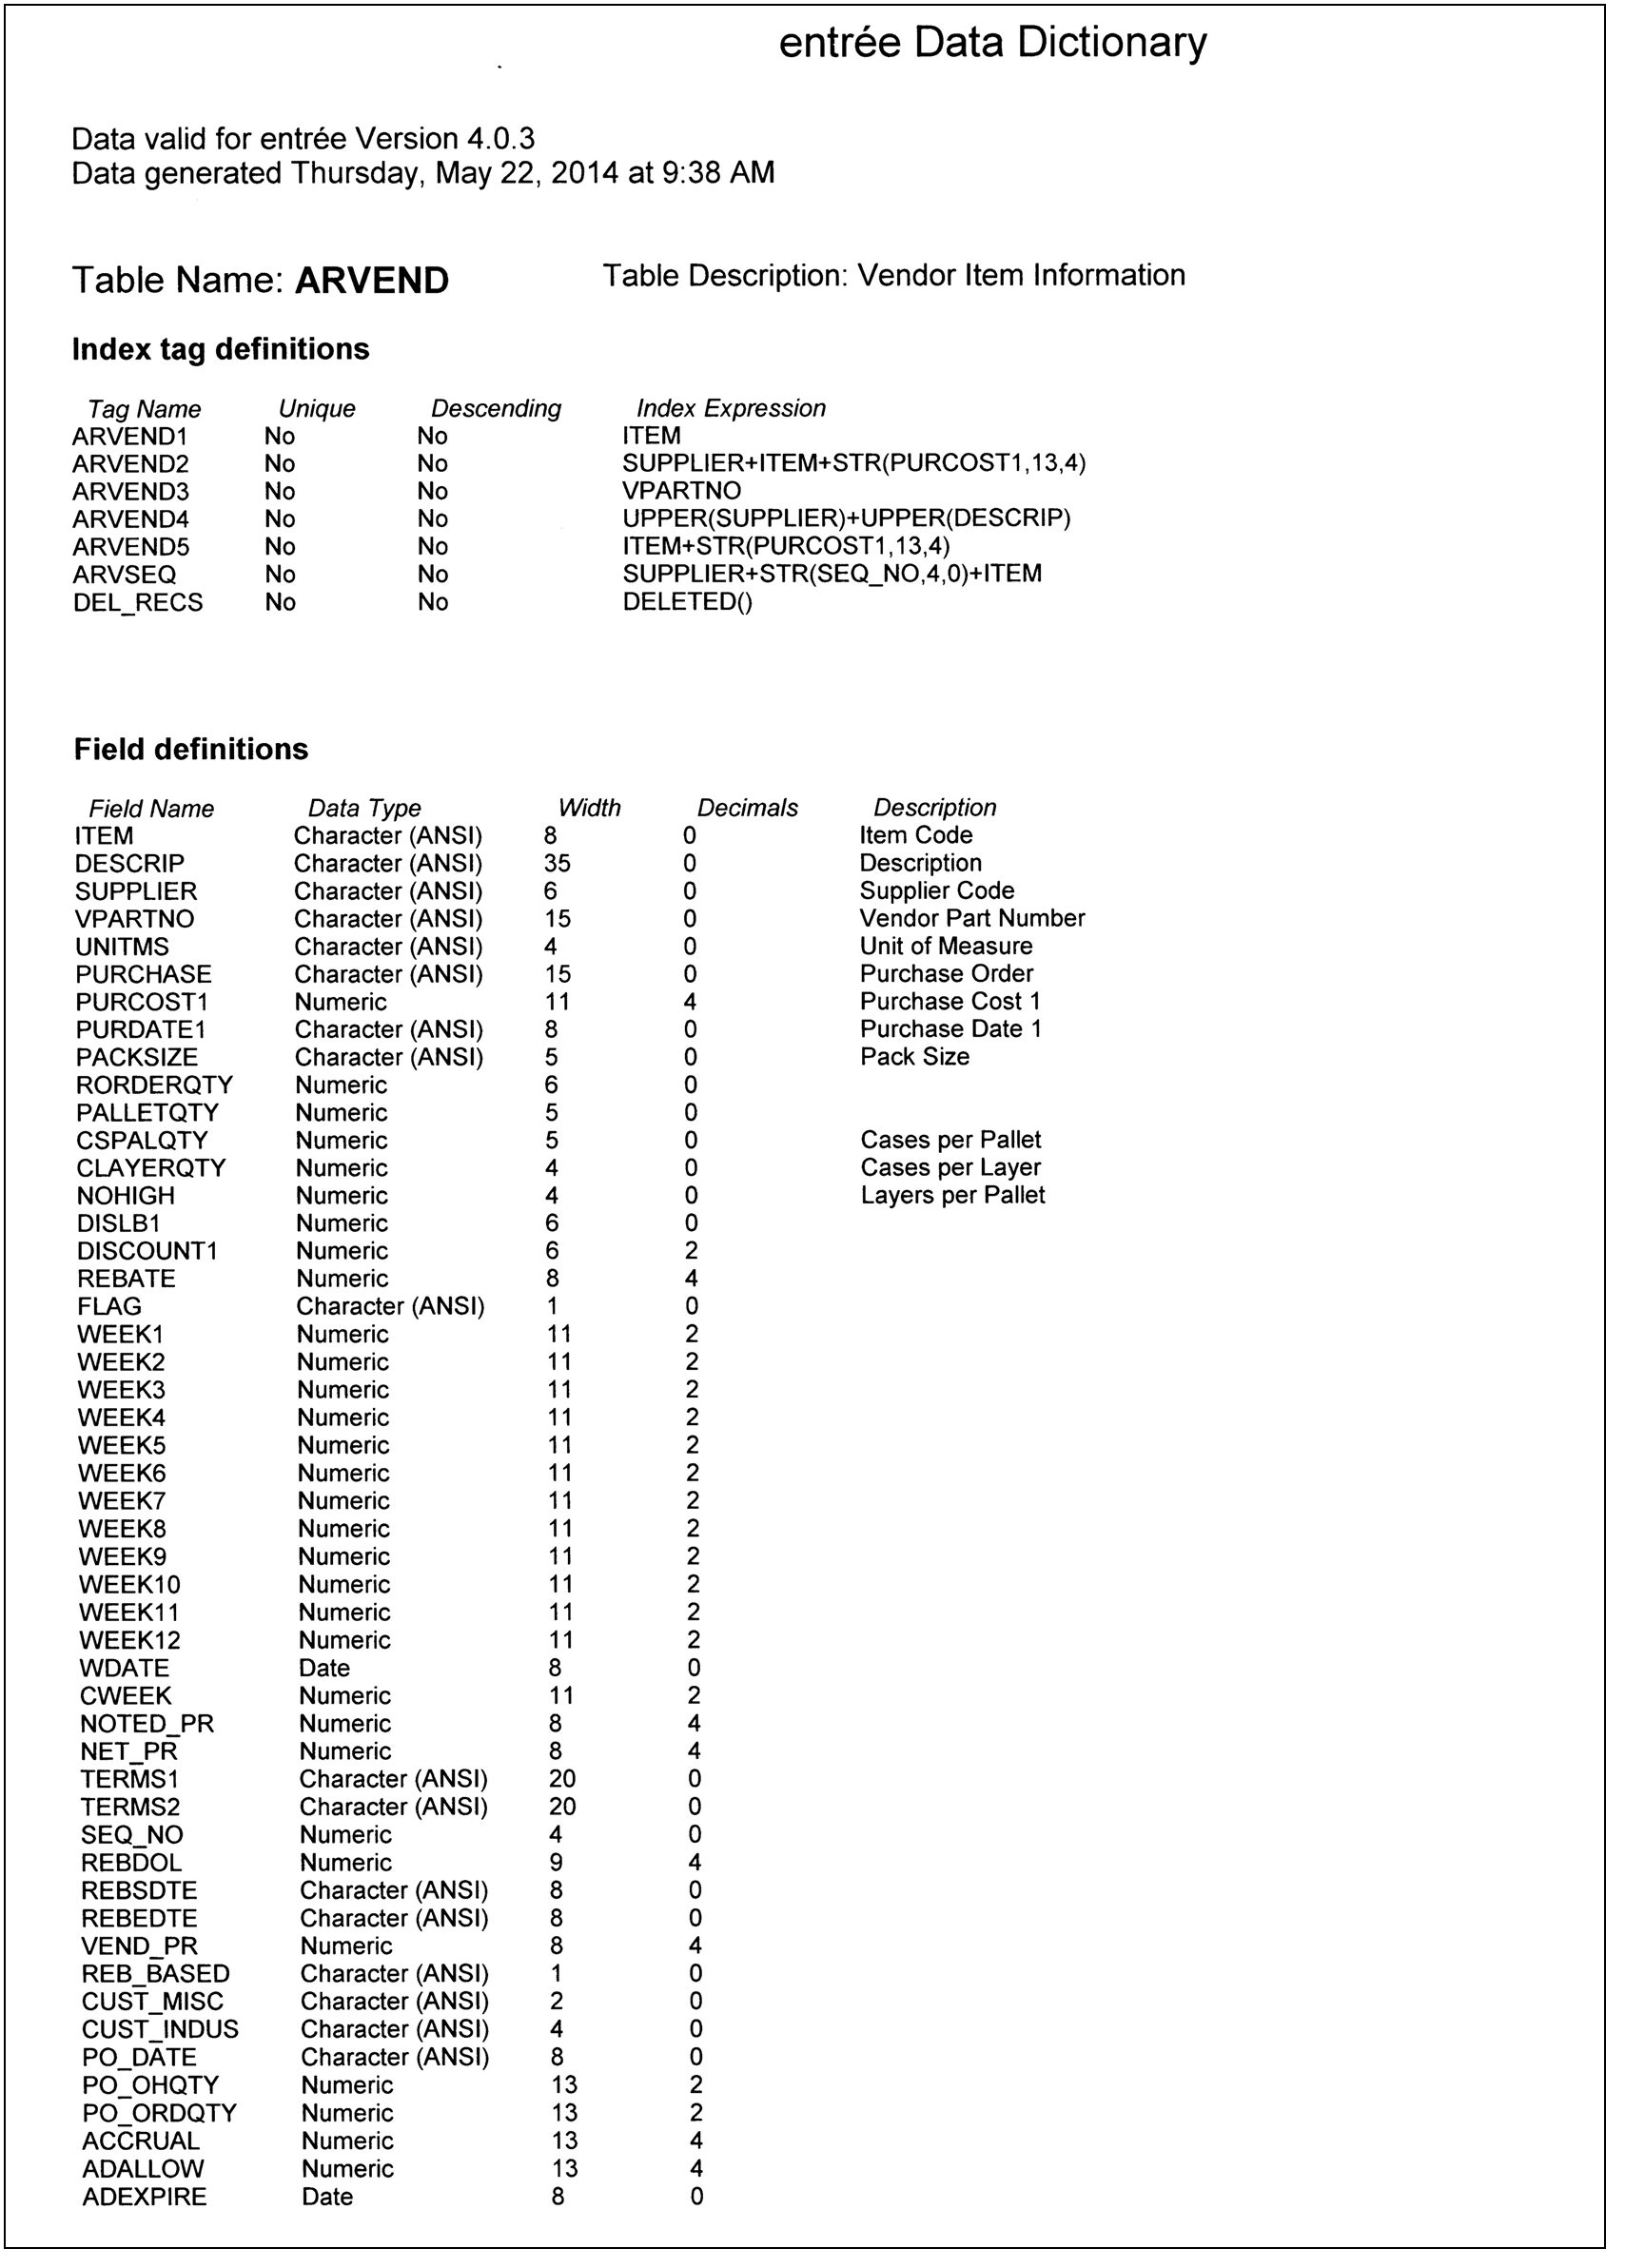
•Show Database Information - Allows you to view and print detailed information about the various data tables which comprise an entrée database. The main use for such information would be if you were using an external program like Crystal Reports to access your entrée data since you need to know the internal structure of a table in order to correctly access the information it contains.
1.To find a database enter the table name if know in the Table selection list text box or use the scroll bar on the right to scroll through the database list and make your selection.
2.Once you select the database the Field and Index information for the table will be displayed in the sections below. Here we have the Vendor Item Information database.
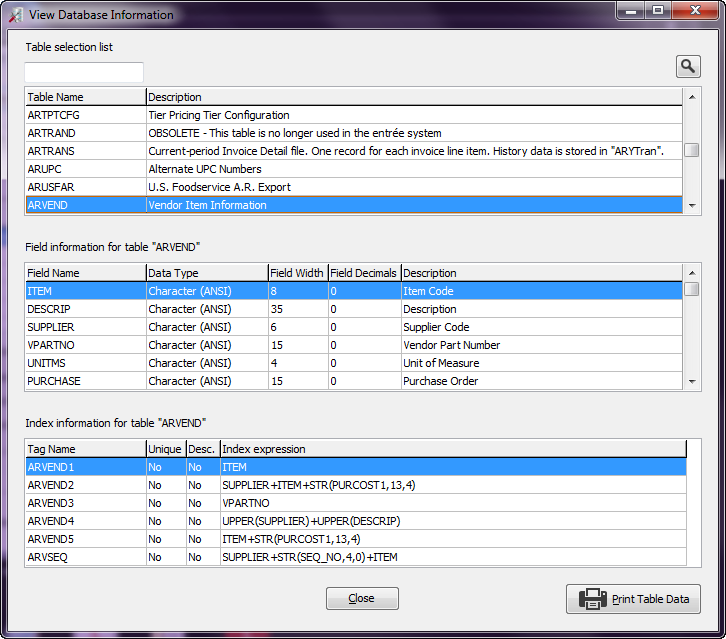
3. Printing Database Information - Click the Print Table Data button when you have the desired table displayed.
•You can currently only print table data one file at a time.
•The print process is not “dot-matrix friendly” so if you choose to print data you must use an ink jet or laser printer.
4. Click Close when done.
Here is the printed Table Description for ARVEND.
Utilities Menu Options
A.Check Databases
B.Review Database Constraints
C.Update Advantage Database Server Licenses
D.Reindex
E.Recopy Workstation support files
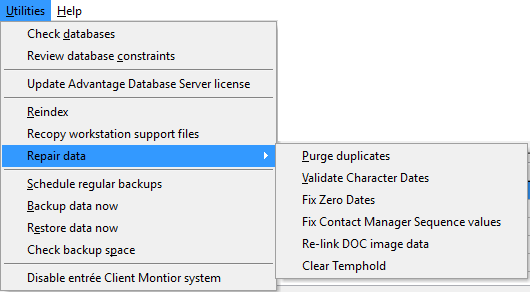
F.Repair Data ▪Purge Duplicates ▪Validate Character Dates ▪Fix Zero Dates ▪Fix Contact Manager Sequence Values ▪Re-link DOC image data ▪Clear Temphold G.Schedule Regular Backups H.Backup Data Now I.Restore Data Now J.Check Backup Space K.Disable entrée Client Monitor system |
|
Options Details
A. Check Databases - When you click the Check databases option in the utilities menu the Database Review screen below will open. It will immediately begin running a check of all the entrée databases.
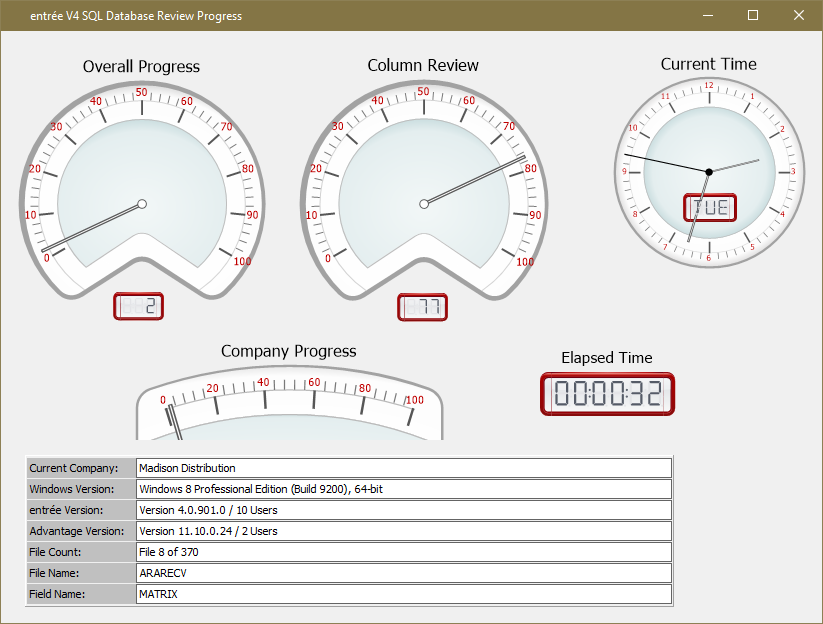
This check is similar to the one that you ran for entrée version 3 that was part of the “FPUdate Utility”. The dials will show the progress until the process has completed.
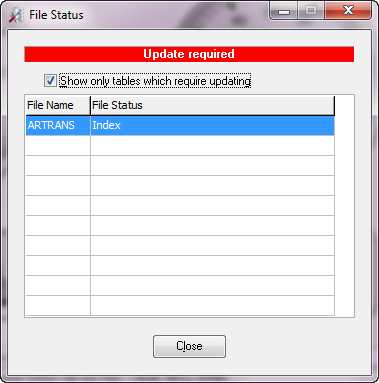
•File Status Report - Once the Check Databases process has completed the File Status dialog will display and report on all the databases. All files OK is what you want to see reported by this dialog.
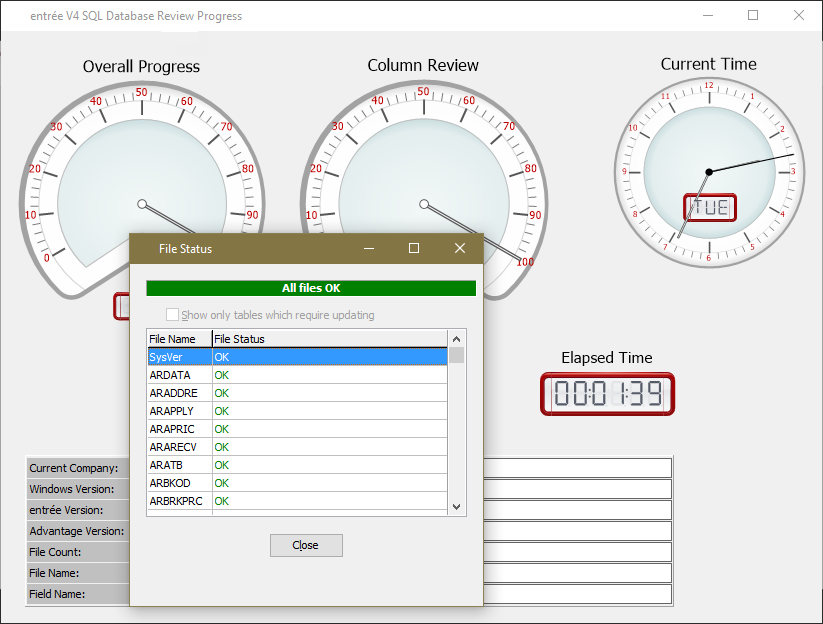
▪ If an update is needed a red bar with “Update required” will be displayed at the top of the screen.
▪The File Name column lists each database.
▪The File Status column tells you the current status of the database, either OK or Index.
•Show only tables which require updating option - Check this option to display only the list of databases that require updating |
|
B. Review Database Constraints - This process will review both the constraints as well as the data in entrée to be sure all existing data complies with the defined constraints. If not entrée errors could occur.
|
|

•When you click the Review Database Constraints option in the utilities menu the first screen that is displayed is the Confirm dialog.
•If you would like to proceed click Yes.
What are database constraints?
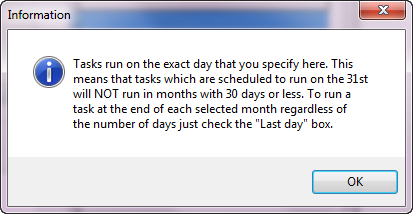
Constraints are rules applied to certain fields in a database. These rules help to keep the data compatible with applications that use the data. The dials will show the progress as the File Count and Company Processing readings increment until the process has completed. For our small testing database it took around 30 minutes to run. An Information box will display the message Database review process is complete when the processing is done. For "Numeric" fields the "not NULL" constraint and the "Default" constraint that sets uninitialized fields to zero has been applied.
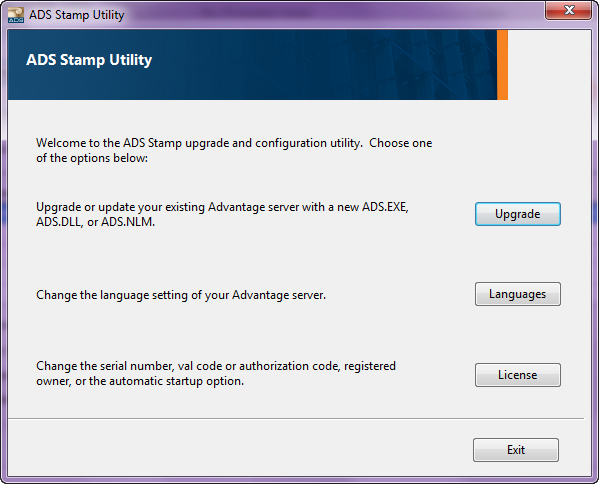
C. Update Advantage Database Server Licenses - Update your Advantage Database Server license so you can add more users.
1. Select Update Advantage Database Server Licenses from the Utilities menu.
2. Click the License button. |
|
3. Your current license Serial Number will be displayed (we blurred our info).
Enter the Validation Code provided.
|
|
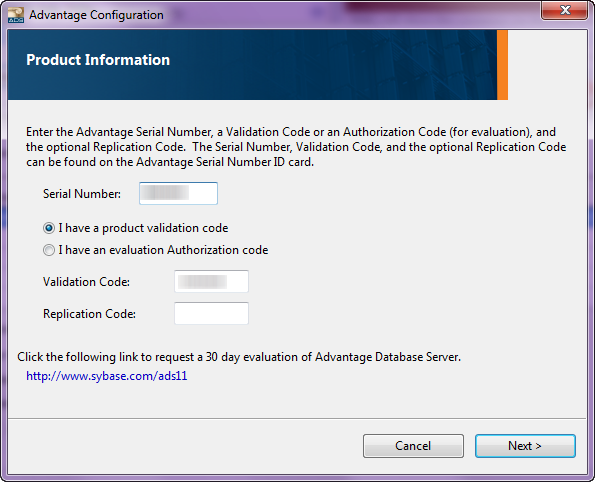
Entering a new Validation Code with the existing serial number allows for expansion of the Advantage Database Server to a higher number of users, such as from a 10-user version of the Advantage Database Server to a 25-user version.
The registered owner information and startup type (if on Windows) can be updated from this dialog as well. That ANSI Character Set and OEM/Localized Character Set dialogs may follow. Different character sets may be selected from these dialogs.
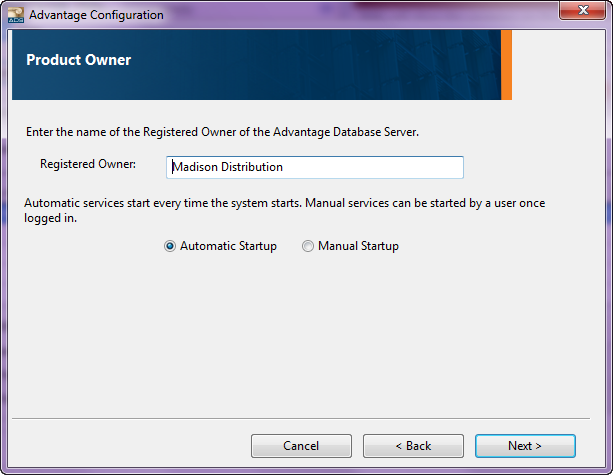
4. Click Next.
5. Verify the Registered Owner information.
6. Keep Automatic Startup checked and click Next.
You are back at the ADS Stamp Utility main dialog screen. |
|
D. Reindex Databases - Select the Company Name and the list of databases will be populated in the Available for Reindexing list.
For Table Selection choose from:
▪Reindex all tables: When this option is checked all tables are automatically selected.
•The Pack Tables option is available when you select Reindex all tables. Check the option to remove records marked for deletion to clean up the tables then a reindex is performed.
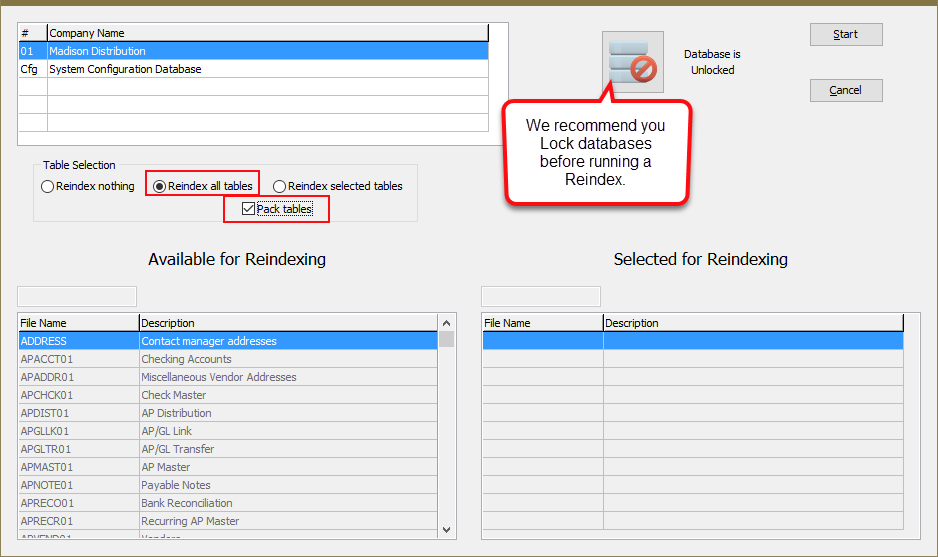
▪Reindex selected tables: Once you check this option, drag and drop the desired tables from the Available for Reindexing list to the Selected for Reindexing list.
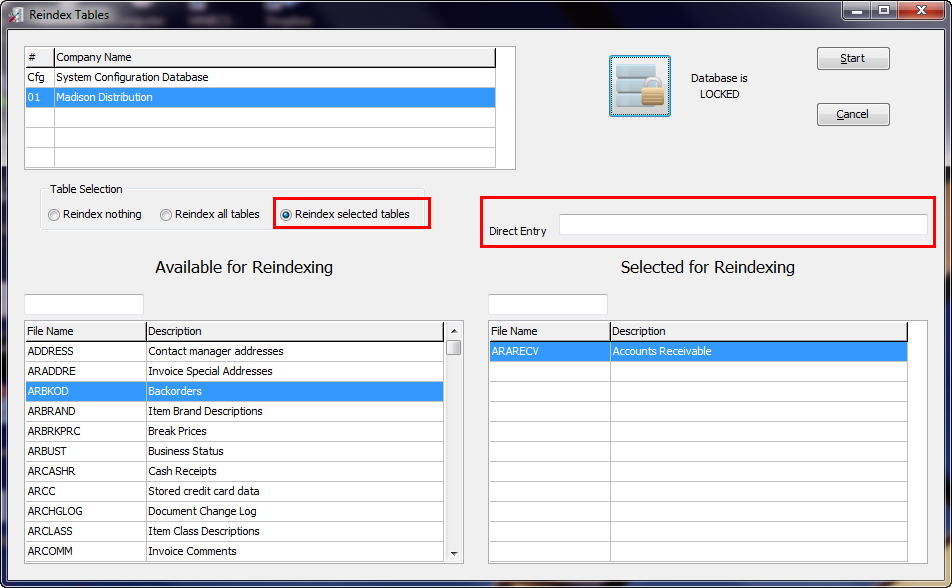
▪Direct Entry: In this text box you can enter the comma separated names of databases you would like to run reindex.

 Before you run a Reindex you should go to the View menu and use the Show Connected Users feature to see what users are in the system. Users must be out of the system before it can run.
Running a Reindex
1.Send a message to request users log out of the system prior to the Reindex.
2.Now use the Database Lock button and lock the databases before you run the Reindex utility.
3.Once you have made your Table Selection and made sure all your users are logged out of the system click the Start button to begin the reindex process.
4.When the reindex process has completed a Reindexing completed Information message box will display.
5.Send a second message to notify users it is done.
E. Recopy Workstation support files - When a new version of the Update Utility is installed on your server matching installers for the workstations are also provided. These workstation installers are placed in a "WS" folder underneath the Update Utility's folder which is not accessible to you. This utility copies the workstation update files from the private "WS" folder into the shared "WSUpdate" folder so you can access the files update your workstations. The folder is created by the installation process and should always be present. If the folder is missing then you have no way of publishing your workstation updates. Contact NECS Tech Support for assistance with creating the missing folder.
F. Repair Data menu options: Purge Duplicates, Validate Character Dates, Fix Contact Manager Sequence Values and Re-link DOC image data.
| 1. Purge Duplicates - The Purge Duplicates feature will remove duplicate records in key files like the Inventory file where you commonly have this situation. Select the correct Company Name and the list of databases will be populated in the Available for Duplicate Removal list. |
Purge Table Selection options: ▪Purge all tables: When this option is checked all tables are automatically selected.
▪Purge selected tables: Once you check this option, drag and drop the desired tables from the Available for Duplicate Removal list to the Selected for Duplicate Removal list. |
|
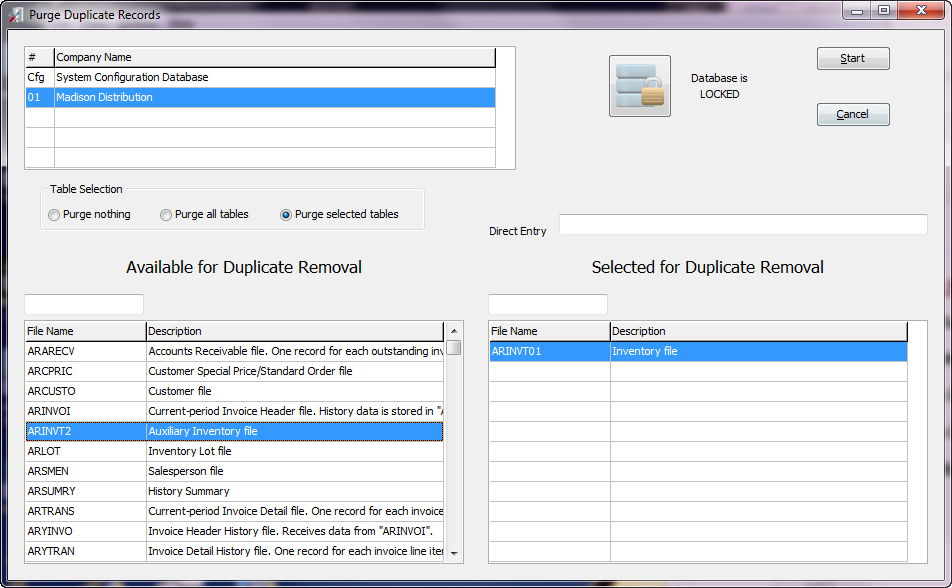
▪Direct Entry: In this text box you can enter the comma separated names of databases you would like to run the duplicate removal process against.
Before you run the purge duplicate process you should go to the View menu and use the Show Connected Users feature to see what users are in the system. Users must be out of the system before it can run.
Running Purge Duplicates
1.Send a message to request users log out of the system prior to the purge.
2.Now use the Database Lock button and lock the databases before you run the purge duplicates.
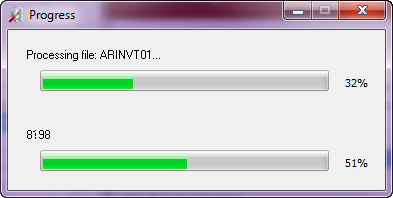
3.Once you have made your Table Selection and made sure all your users are logged out of the system click the Start button to begin the purge duplicates process.
4.Once the purge has completed a Duplicate removal completed Information message box will display.
5.Send a message to notify users the purge is done.
2. Validate Character Dates - The utility will review the “Character”- style date values and assure that they are all valid. It will also removes any date values that do not represent valid dates in Advantage so they will not produce errors and end the database operation that was in progress.
a. When you click the Validate Character Dates option in the menu the validation will automatically run and a progress dialog will display.
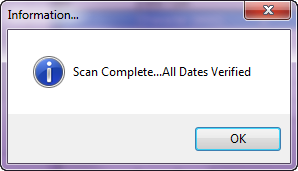
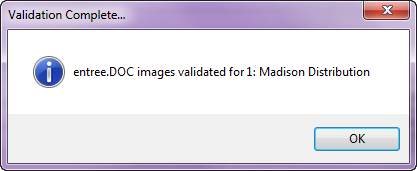
b. Once the validation is done for your 01 Company in entrée and Information dialog box will display "Scan Complete... All Dates verified". Click OK.
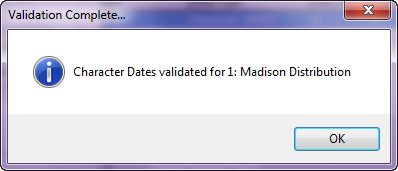
c. The Validation Complete message will display with the company name and number whose dates were validated. Click OK.
|
|
3. Fix Zero Dates - In the system “unknown” dates were being recorded in the database as “12/31/1899” but not being converted properly when added to some databases. When entrée sees one of these 1899 dates being written to the database it is supposed to save it as a “null” value. We found in a few places this was not being properly enforced and there are now entries in the database which have the 1899 date. Areas of the system causing the date problem have been updated so this date problems will no longer occur.
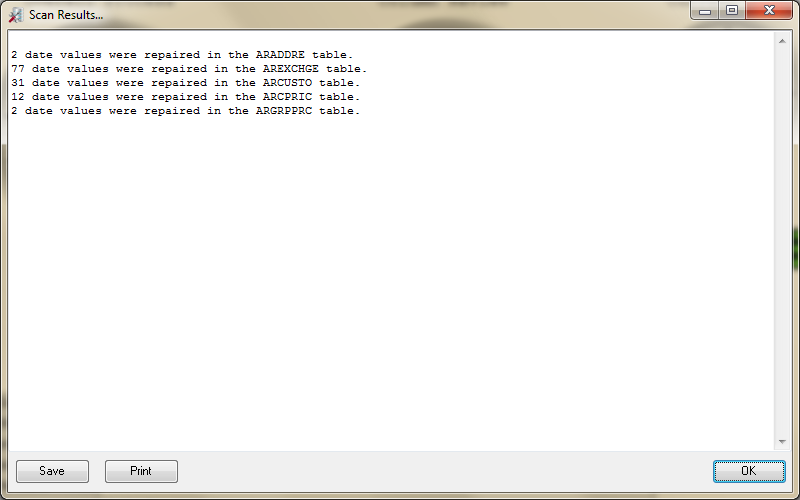
The Fix Zero Dates utility automatically runs as a part of the 14.0.18 release update. This run will find and fix all those 1899 dates and produces the Scan Results dialog (below) which you can Save or Print using the buttons. Click OK to close.
•When click Fix Zero Dates it will immediately begin to run and a progress dialog will display.
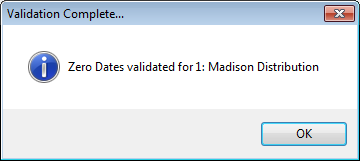
•The Validation Complete message box will display at the end. Click OK to close. |
|
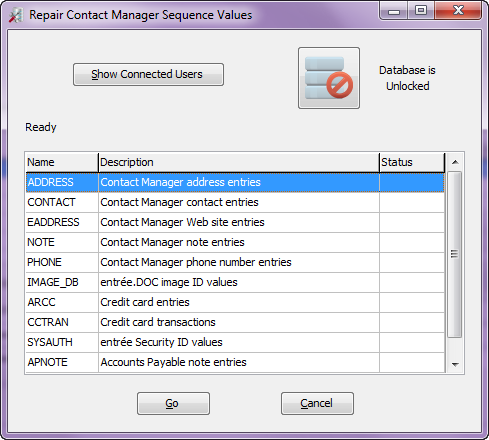
4. Fix Contact Manager Sequence Values - This resolves data issues created by the resetting counters stored in the “CMSeq” table in the “4.0.2” release. The utility will run automatically when it detects that it is updating a database from the “4.0.2” release or older.
a.In the Repair Data drop down menu click the Fix Contact Manager Sequence Values option. b.Click the unlock/lock button to lock the databases. c.Click the Go button. |
|
5. Re-link DOC image data - This repair utility will scan the entrée.DOC image database and correct data errors produced by earlier versions of the .DOC image import process which could prevent you from retrieving your document images. There is nothing wrong with the image data itself, there is just a problem in the extra data which is used to connect the entrée document with its scanned image.
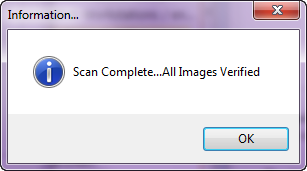
•First click the option and the scan will begin automatically and display the results.
|
•Next click OK and the Validation Complete message will display and you are done.
|
6. Clear Temphold - Sets ALL Temphold values to zero in ARLOT. (Used for Mod #1484 Update invoicing to allocate product immediately after lots are assigned).
▪Requires all users be out of entrée and the database to be locked.
▪This is a safe guard in case in inventory gets "stuck in the hold queue".
G. Schedule Regular Backups - You have already run the Check Backup Space utility and analyzed various storage devices on your network so you will know if your selected device will be able to store your SQL databases.
Once you find the best place for your database backups, taking into consideration that they will grow larger over time, you can proceed to the Schedule Regular Backups utility.
You must be sure there is enough space on the selected device to store your database backups. Be sure to run the Check Databases utility before you make a new folder on a storage device to be sure that you have enough space.
When you click the Important button the informational note here is displayed.

 Add Task: To schedule regular backups use the Add task button to create your schedule.
•You will need to decide how often you need to backup your system based on the volume of your business.
•It is strongly suggested that backup jobs be run after business hours when there is no activity in entrée.
•Then you can proceed to build your schedule of backup jobs using the Add Task button.
How to Add a Backup Task to the Scheduler
1.Once you click the Add Task button the Edit Backup Task screen will open. Here you will build the backup jobs that will be run by the Scheduler.
2.The Important button message previously shown can be used here for more information.
3.Set your Edit Backup Task screen options which are discussed next.
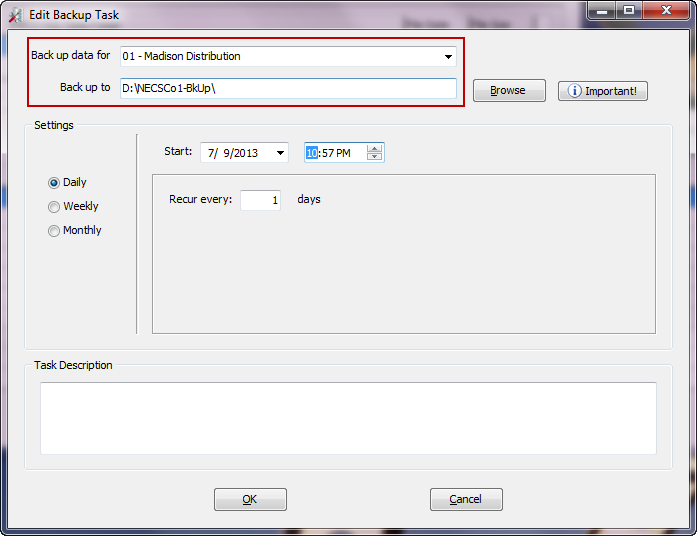
4. Make selections for the Edit Backup Task screen fields:
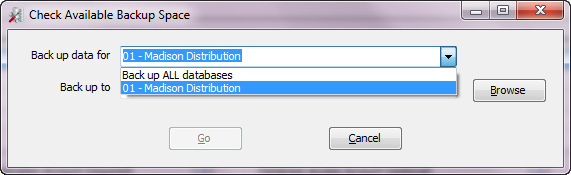
Back up data for:
▪Back up ALL databases: Select this to back up all your databases.
▪For customers with multiple companies your 01, 02… companies will be listed here. Use this drop down menu to select the desired Company Name from the list.
Back up to:
▪Use the Browse button to locate the device and select a folder to store your database backups.
▪Or use the Make New Folder button in the Browse dialog to create a folder for your backups.
Settings Section:
a. First select the frequency of your scheduled database backups:
▪Daily
▪Weekly
▪Monthly
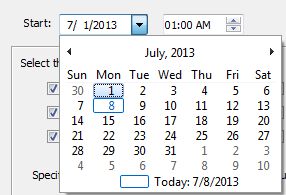
b. Enter the desired date and time in the Start section.
Date settings: ▪Click the arrow to reveal the calendar and select a start date for your task. ▪Or use your keyboard to enter the desired date. |
|
Date Information: The Information box here is part of the explanation for setting dates and how they work in the system. |
|
Time settings:
▪Click the Hour area and use the arrows to set the desired hour for the backup run.
▪Click the Minutes area and use the arrows to set the desired minutes value.
▪Click the AM / PM area to make a selection for the backup task.
Options:
▪The options information in the area below the Date and Time settings will change with your choice of backup frequency, Daily, Weekly or Monthly.
▪In the screen above you see the “Recur every” option for daily backup tasks. Click the number to change the daily recurrence frequency.
Task Description:
▪Enter a simple description for the backup task you are creating. As an example your can write "Daily backup of company 01 databases."
5. After you save your new database backup task it will be added to the list in the Schedule Backup Jobs screen.

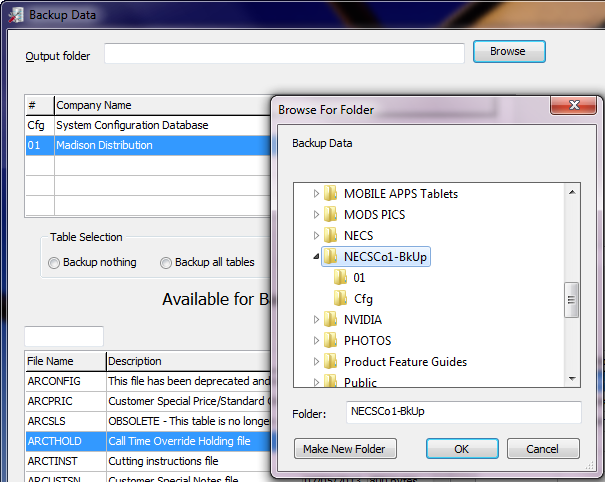
H. Backup Data Now
•Output folder: Similar to the previously mentioned database utility screens the Browse button is used to locate the storage device and select or make a folder to store your database backups.
•Company Name: Select the company and the list of databases will display in the Available for Backup list.
•Either Backup all tables or Backup selected tables and use drag and drop to the Selected for Backup list.
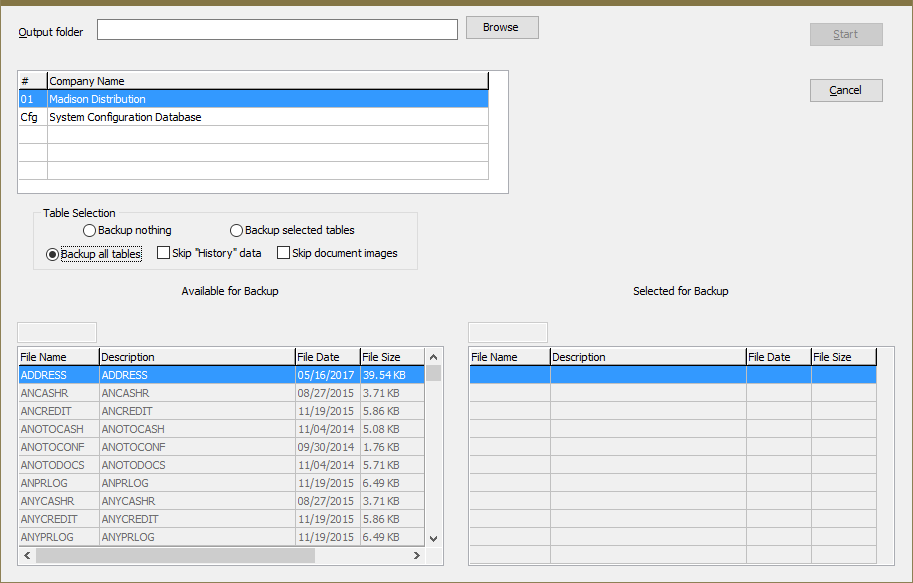
•When you select Backup all tables the Skip options become available, Skip "History" data and Skip documents images. You can choose to skip these two very large databases to run a quicker backup.
▪Skip "History" data: Archive files will be excluded from the backup.
▪Skip documents images: entrée.DOC and entrée.POD image files will be excluded from the backup.
•When you select Backup selected tables you get the Direct Entry option.
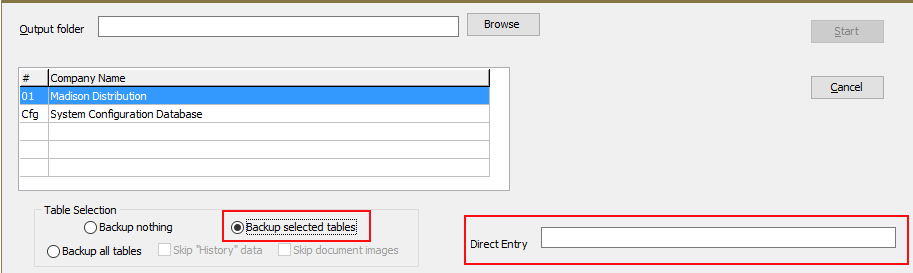
It allows you to enter comma separated database names for input to the backup as shown below.
If the network can see a device you can select it and backup your databases there.
I. Restore Data Now
•Source folder: The opposite of the Backup Data Now utility, the Restore Data Now uses a similar screen to Browse and locate the device and folder where your backup of the SQL databases are stored.
•Select the Company Name and the list of databases will display in the Available for Restore list.
•Either Restore all tables or Restore selected tables. You can use drag and drop to move databases to the Selected for Restore list.
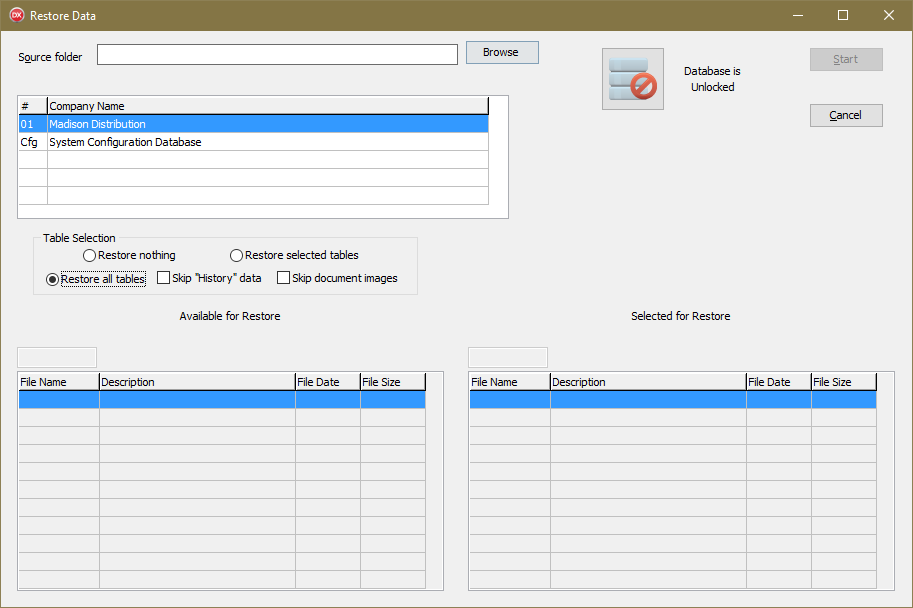
•When you select Restore all tables the Skip options become available, Skip "History" data and Skip documents images. You can choose to skip these two very large databases to run a quicker database restore.
▪Skip "History" data: Archive files will be excluded from the restore.
▪Skip documents images: entrée.DOC and entrée.POD image files will be excluded from the restore.
•When you select Restore selected tables you get the Direct Entry option. |
In this text box you can enter the comma separated database names you would like to restore the same way you use it for backups.
|
Before you restore databases you should go to the View menu and use the Show Connected Users feature to see what users are in the system. Then ask the users to sign out before you begin.
Running a Restore
1.Send a message to request users log out of the system.
2.You must lock your databases before the restore job can run. Click the Database is Unlocked button.
3.When your restore run has completed click the Database is LOCKED button to unlock the entrée databases again.
4.Send a message to notify users when the restore is done.
 Edit with Task Scheduler
On the Schedule Backup Jobs screen you will see the Edit with Task Scheduler button. Use this button to access the more advanced features of the Windows Task Scheduler. The next topic covered will be Using the Task Scheduler.
J. Check Backup Space - Before you designate a device and folder to store your company database backups you should use the Check Backup Space feature to analyze the space available in potential locations.
•Browse to select a folder for your backups. Then click GO to run the backup space check. This process should run very quickly since it is just analyzing space availability.
Back up data for:
▪Back up ALL databases: Select this to back up all your databases.
For customers with multiple companies your 01, 02… companies will be listed here.
▪Use the drop down menu to select the desired Company Name from the list.
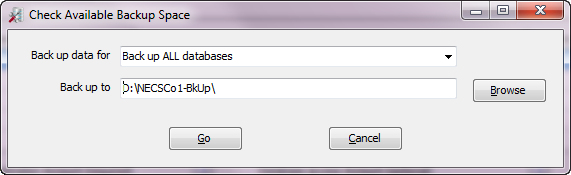
Browse: Use the Browse button to locate the device. ▪Select an existing folder.
▪Or use the Make New Folder button to create a folder for your backups.
•Here we created a folder with using NECS, the company number and letters representing the back up function called "NECS01-BkUp". |
|
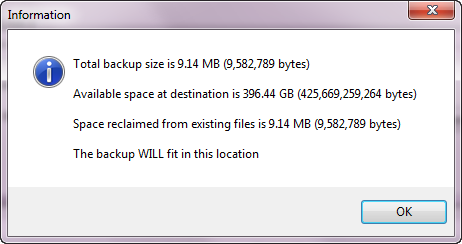
•When the space on the device has been analyzed an Information message box will display with the statistics and tell you whether you databases will fit in the location. |
|
K. Disable entrée Client Monitor system
This is a switch to disable the entrée Client Monitor System and bypass it to let entrée run. Once the option is checked any running copies of entrée will disconnect from the monitor. Instances of entrée linked to the Task Execution Application (TEA) will finish the currently started job if applicable then disconnect and terminate.
Once the monitor feature is unchecked, any running copies of entrée will plug back in without any notification to the user. The TEA will also restart its copy of entrée when it sees the client monitor is running again and without any interaction with the users other than turning the monitor back on.
This option should only be used if NECS Tech Support advices you to disable the Client Monitor.
•With the Client Monitor disabled, the Task Execution Application (TEA) shuts down completely because without the Client Monitor there is no way to control the execution of tasks on remote machines (Mainly an issue during updates to the database).
•With the Client Monitor shut down the Update Utility can no longer remotely notify running instances of entrée that they need to shut down for an update, so the distributor is back to running around the building telling people to close entrée.