Customer Setup
When you click on the Customer Setup tab your entrée customer file is displayed. You can sort the customer file using any of the underlined column headings in ascending or descending order. In the image below the customer file was sorted by Login Name to view all the customers that have access to entrée.NET.
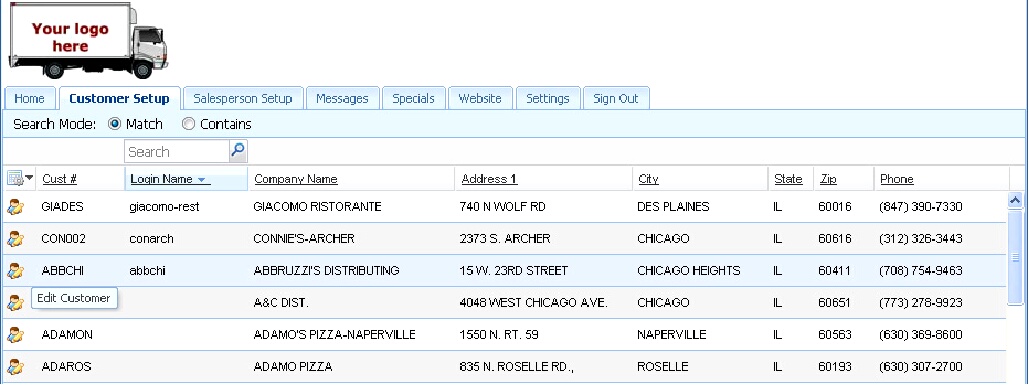
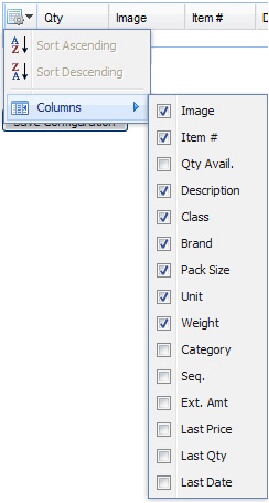
•Click the tools icon ![]() to view the drop down menu to add or remove columns from your display. Check the box to add a column and remove the check to delete a column from the grid.
to view the drop down menu to add or remove columns from your display. Check the box to add a column and remove the check to delete a column from the grid.
•Column width can be modified by clicking and dragging the right or left column border in the headings section.
•Search for a specific customer by typing a word or letters in the Search box. Then select your Search Mode either Match or Contains. Click the search icon  to get your search results.
•Click the edit customer icon  to view the customer’s account information.
•To add new customers or update existing customer information use Customer File Maintenance in the main entrée system. Follow the menu path for your version of entrée. Then the next export to entrée.NET will update the customer information.
entrée V4 SQL - Go to the Customer ribbon menu > select the Customer option > click Add and enter your new customer's information.
entrée V3 - Go to the File menu > select Customer File Maintenance > click Add and enter your new customer's information.
•Support for "One Ship" Customer Configurations - Addresses for customers setup with a "One Ship" address on the "Bill To / Ship" tab of Customer File Maintenance will now show the correct shipping address in entrée.NET. This feature requires entrée version 3.6.9 or later.
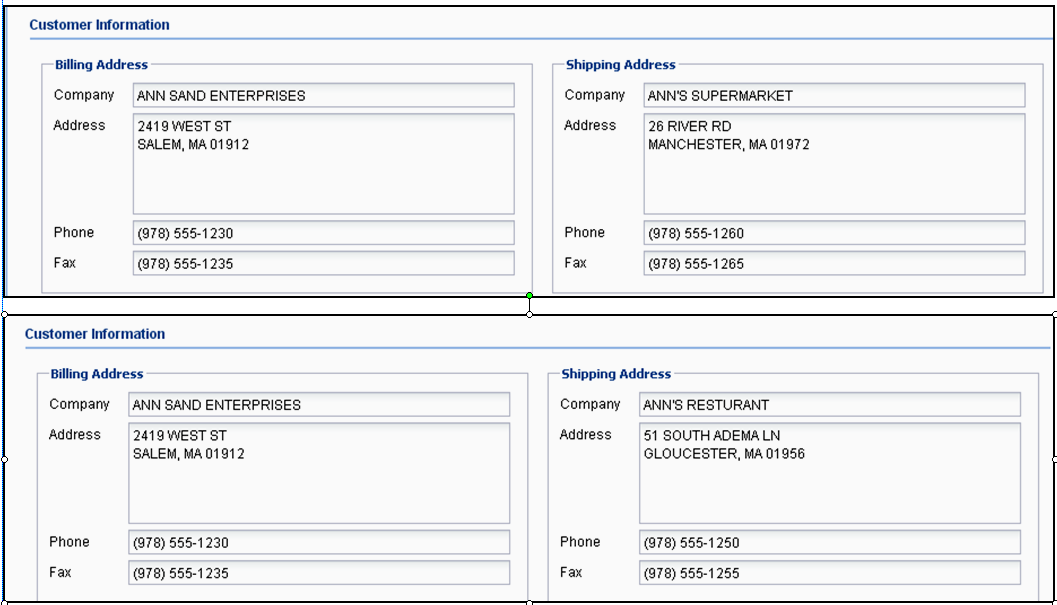
"One Ship" Customer
The two images here the entrée.NET Customer Setup tab shows the same central office used for the Billing Address for their multiple businesses and locations in the Shipping Address. This information is maintained in Customer File Maintenance and exported from the main entrée system.
Creating a Customer Account
When a customer requests access to your entrée.NET system you will need to create an account and assign a username and initial password. Once they have this information your customers can sign in and submit orders at their convenience. Follow these simple steps to create your customer accounts:
1.Click on the Customer Setup tab.
2.Use the Search tool to find the customer requesting an entrée.NET account.
3.Click the edit customer icon  to view the customer’s account information.
4.Click the Create Account button. 
 The Customer Information and Configuration sections are view only in entrée.NET. This information must be edited in your main entrée system.
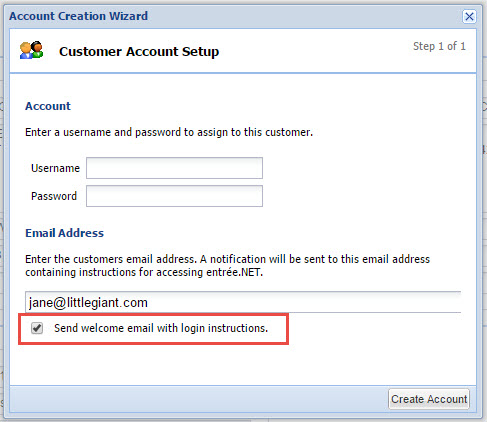
5.The Account Creation Wizard displays the Customer Account Setup dialog box.
6. Enter a Username and Password for your customer in the Account section.
7. Email Address section
•Enter the email addresses where your customer wants to receive their account setup information and order confirmation emails.
•Send welcome email with login instructions
Leave this option unchecked if you do not want an email sent to the customer.
Salespeople must have Settings tab, Salespeople Option #14, Allow Salespeople to setup entree.NET accounts for customers, checked to be able to use this feature. |
|
8. Click the second Create Account button.
9. Now a Customer Account Setup email will be sent, if the Send welcome email option was checked, to your customer’s email address. Multiple email addresses can be entered for the customer by separating the email addresses with a semi colon (;).
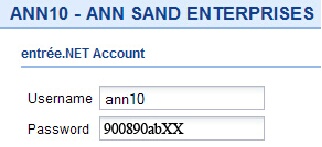
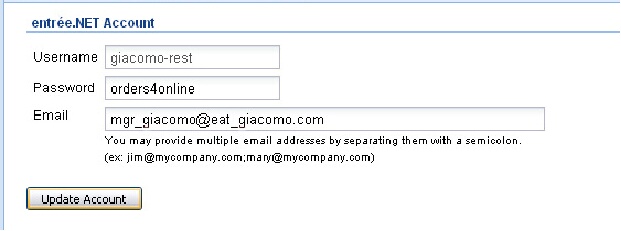
10. The customer’s entrée.NET Account section will look like the image below with a blank Password field after account creation. |
|
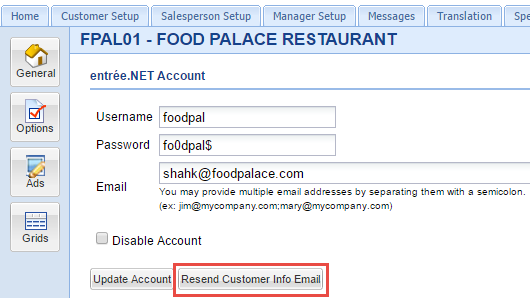
Resend Customer Info Email
The Resend Customer Info Email button has been added to Customer Setup page. This feature gives distributors the ability to re-send a customer their account information including their username and password via email.
Forgotten Password
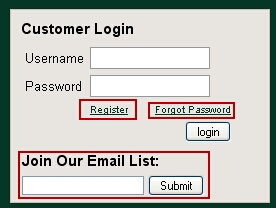
Your customers will have the ability to use an automated process to reset their password through your website. The customer will go to your website or login screen and enter their username in the password reset section.
This action will trigger an email sent to their account email address. This email will contain a temporary password and link to the password reset page.
The customer will enter their username, temporary password and their new password here. If all the information has been entered correctly, their password will be reset in the entrée.NET system.
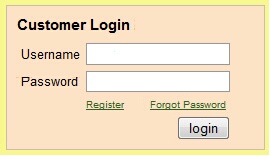
Website customer login area and Forgot Password link.
|
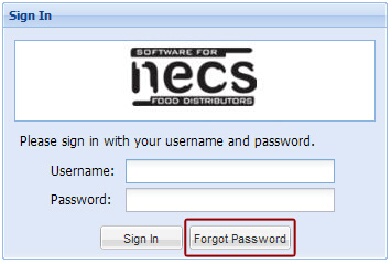
Login screen for distributors who do not have the entrée.NET website module with the "Forgot Password" button.
|
Password Automatic Reset Process
For distributors who do not have the entree.NET website module a "Forgot Password" button has been added to the login screen which allows customers and salespeople to initiate an automatic password reset procedure. See the Login screen image above on the right.
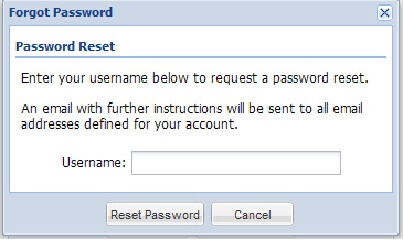
1.The user will enter their username in the password reset dialog box and click the Reset Password button. |
|
2. This action will trigger the Password Reset confirmation dialog box, click OK.

3. Now an email will be sent to their account email address. This email will contain a temporary password and link to the password reset page. The customer will enter their username, temporary password and their new password here. If all the information has been entered correctly, their password will be reset in the entrée.NET system.
Sample email message text:
You have requested to reset your account password. In order to do so we have provided you with temporary password for your account.
Your temporary password is: rm4zuth2
Please follow the link below to complete the password reset: http://yourNET.com.
Viewing / Resetting a Customer Password
There will be occasions when your customer has lost their password and the password reset procedure did not work for them for some reason.
The new password storage system installed with entrée.NET release 3.2.1 will allow you to view customer and salesperson account passwords.
The new system uses a key based encryption system to maintain a level of security but still allow for viewing the passwords. |
|
A process has been put in place to convert the passwords as customers and sales people login. So there will be some delay before all passwords are viewable.
•To create a new temporary password follow these steps:
1.Click on the Customer Setup tab.
2.Use the Search tool to find your customer.
3.Click the edit customer icon  to view the customer’s account information.
4.Go to the entrée.NET Account section. Once you have created the customer’s account the Password field will be blank.
5.Type a new password in the blank Password field.
6.Click the Update Account button. 
7.Now contact your customer by email or phone with their new temporary password.
Customer Configuration Settings
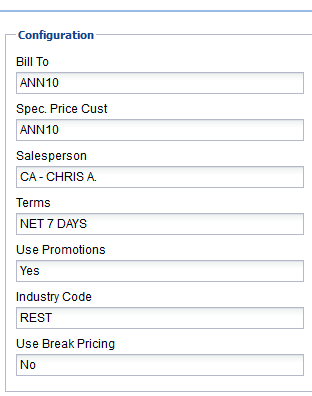
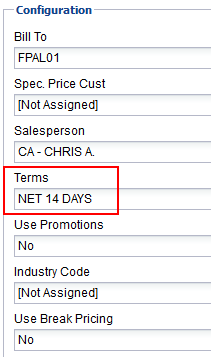
The customer's account Configuration information from the main entrée system can be found below the Billing Address area.
Configuration information includes:
▪Bill To ▪Spec. Price Cust ▪Salesperson ▪Terms ▪Use Promotions ▪Industry Code ▪Use Break Pricing |
|
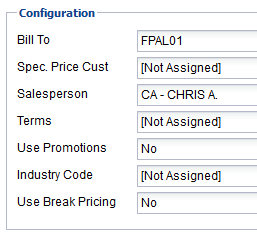
When the Customer file is updated with Terms in entrée and the export to .NET is run you see the results on the right. |
|
 Setting Options for Customers
The next step in account creation requires you to set the system options for your customer in entrée.NET. These are similar to the system options in the main entrée system. For information about all the Options see the entrée.NET Settings chapter in this guide.
1.Click on the Options icon in the menu on the left.
2.Option Descriptions and Current Setting columns are displayed for each option.
3.Click in the Current Setting column to select the new setting from the drop down list.
4.Option changes will update automatically.
Customer Options
See the entree.NET Settings chapter Options section of this guide for the current Promotions and Order Entry options lists.
 Grids
Grids
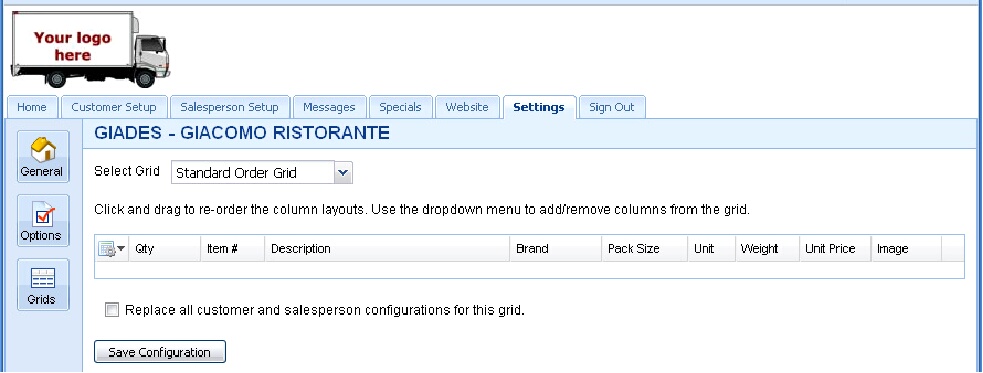
entrée.NET allows you to customize the display of column information in the Standard Order, Search and Quick Entry Grids for your customers.
Columns available for customer grids include: Item, Description, Class, Brand, Pack Size, Unit, Weight, Qty Avail., Category, Seq., Ext. Amt, Image, Last Price, Last Qty and Last Date. |
|
1.Use the Select Grid drop down menu to choose the grid to customize.
2.Click and drag column names to reorder and move columns to their new locations.
3.Click the tools icon
4.Check the box to add a column and remove the check to delete a column from the grid.
5.If you want to remove all the custom grids your customers and salespeople have defined, the click the box to “Replace all customer and salesperson configurations for this grid. “ Leaving this box unchecked will only affect new customers and salespeople added after you save this configuration.
|
|
 It is advised that you NOT CHECK this box if your entrée.NET system has been in use for a while, as customers and salespeople will lose the grid settings they took time to customize.
6.When all your changes are complete click the Save Configuration button to save your changes.
Updating the grid configuration for a specific customer.
Customer Registration
If you have a website or the order entry login page on the internet for entrée.NET there will be a Register link in the customer login area. This link can be used by existing customers who would like to begin ordering online or for new customers wanting to place orders with you.
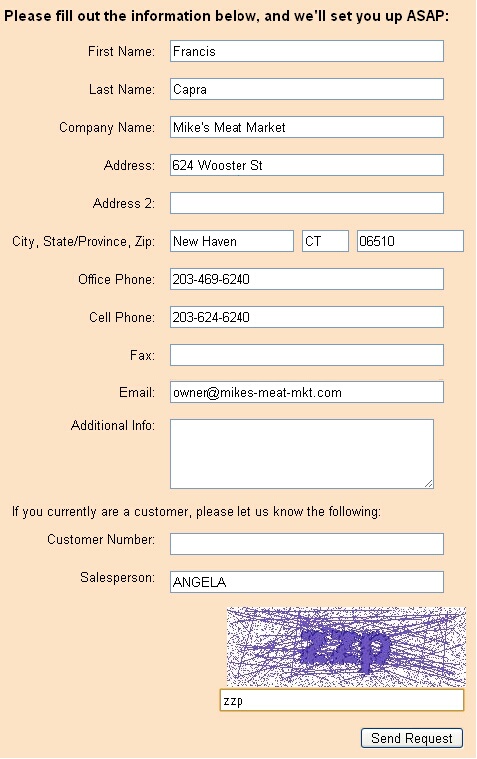
•Customers click the Register link and will be presented with an online registration form.
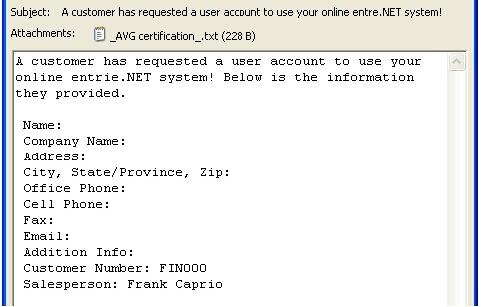
•Current customers will just fill in their customer number and Salesperson name, if applicable.
•New customers will provide all the contact information required for you to create their new account. |
|
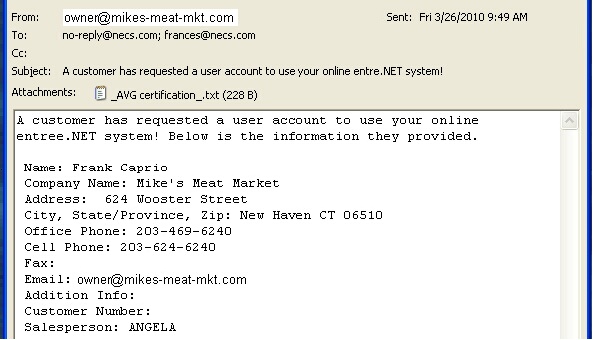
•When the customer hits Send Request an email is generated and sent to you containing all their registration information.
•Examples of a new customer request and a current customer request emails follow. |
|
•Since current customers are already in the main entrée system, just follow the steps in the Creating a Customer Account section of this chapter to complete their request. As soon as they receive the automatically generated welcome email with their username and password they can begin ordering in entrée.NET.
•New customers need to have an account created in the main entrée system in Customer File Maintenance first. Then when you export to entrée.NET the new customer record will be listed in the Customer Setup tab. Finally follow the steps in the Creating a Customer Account section of this chapter to finish the process.
Email message samples
 A new customer requesting an account.
 Current customer requesting an account.
Disabling a Customer Account
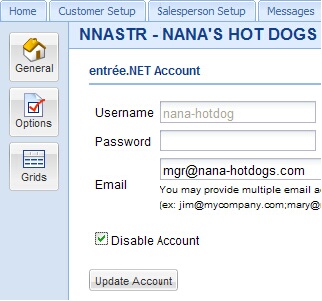
System Administrators have the ability to disable access to their entrée.NET system. Once an account has been disabled the Customer will no longer be able to login to entrée.NET.
1.Click on the Customer Setup tab.
2.Use the Search tool to find the customer. 3.Click the edit customer icon
4.Click in the Disable Account check box.
5.Click the Update Account button.
6.A "This account has been disabled" pop-up message will display when a customer with a disabled account tries to login.
|
|
Removing Account Disable
Once an account has been disabled to allow access to entrée.NET again:
1.Remove the check mark from the Disable Account check box.
2.Click the Update Account button.
3.Now your customer will be able to login to entrée.NET and place orders again.

