Salesperson Setup
Your sales force can take full advantage of entrée.NET when managing their customer orders. They can access entrée.NET anywhere an Internet connection is available, whether from the office, at home or on the road.
Once a salesperson logs on, they are greeted with a bar graph that shows the breakdown of their sales on either a daily, weekly or yearly basis. If they are allowed access to Gross Profit information, this will be displayed on the graph as well. NECS plans to expand our “dashboard” tools and graphs to provide your sales force additional tools to monitor and drive sales.
•When you click on the Salesperson Setup tab your entrée salesperson file is displayed. You can sort the salesperson file using any of the underlined column headings in ascending or descending order. In the image below the salesperson file was sorted by Login Name to view all the salespersons that have access to entrée.NET.

•Click the tools icon ![]() to view the drop down menu to add or remove columns from your display. Check the box to add a column and remove the check to delete a column from the grid.
to view the drop down menu to add or remove columns from your display. Check the box to add a column and remove the check to delete a column from the grid.
•Column width can be modified by clicking and dragging the right or left column border in the headings section.
•Search for a specific salesperson by typing a word or letters in the Search box. Then select your Search Mode either Match or Contains. Click the search icon  to get your search results.
•Click the edit salesperson icon  to view the salesperson’s account information.
•To add new salespeople or update existing information use Salesperson File Maintenance in the main entrée system.
Creating a Salesperson Account
To give your sales force access to the entrée.NET system you will need to create accounts for each salesperson assigning them a username and initial password. Once they have this information your salespersons can sign in and manage their customer accounts. Follow these simple steps to create your salesperson accounts:
1.Click on the Salesperson Setup tab.
2.Use the Search tool to find the specific salesperson you need to give access to entrée.NET.
3.Click the edit salesperson icon  to view the salesperson’s account information.
4.Click the Create Account button. 
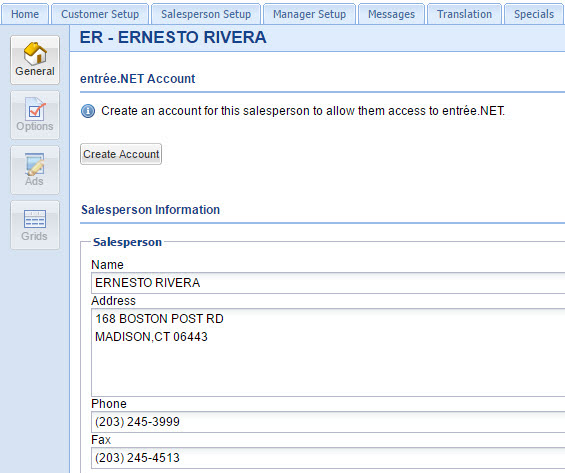
 a. The Salesperson Information section is view only in entrée.NET.
b. The account setup process will allow you to change an account Username. This authorization has also been provided to salespeople who have been given the ability to create accounts for customers.
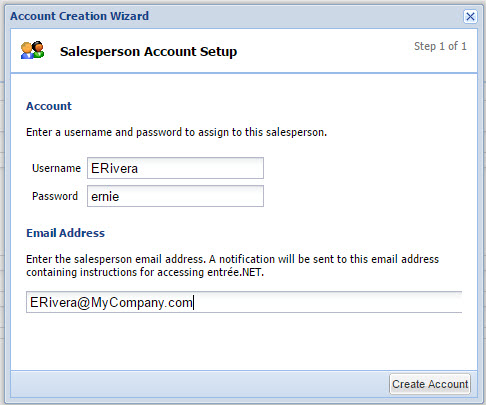
5.The Account Creation Wizard displays the Salesperson Account Setup dialog box.
6.Enter a Username and Password for your salesperson in the Account section.
7.In the Email Address section enter the email address where your salesperson wants to receive their account setup information and emails.
8.Click the second Create Account button. |
|
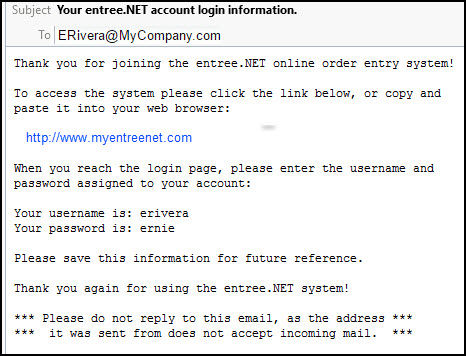
9.Now your Salesperson Account Setup email will be automatically sent to your salesperson’s email address.
Forgotten Password
Your salespeople will have the ability to use an automated process to reset their password through your website. They will go to your website or login screen and enter their username in the password reset section.
This action will trigger an email sent to their account email address. This email will contain a temporary password and link to the password reset page.
They will enter their username, temporary password and their new password here. If all the information has been entered correctly, their password will be reset in the entrée.NET system.
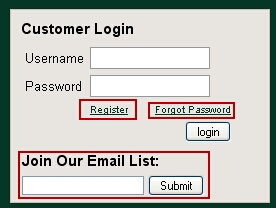
Website customer login area and Forgot Password link.
|
|
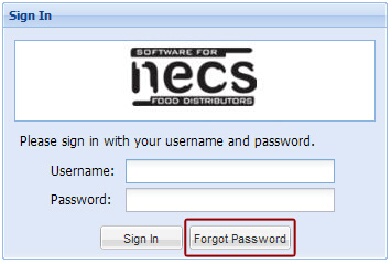
Login screen for distributors who do not have the entree.NET website module with the "Forgot Password" button.
|
Viewing / Resetting a Salesperson Password
There will be occasions when a salesperson has lost their password and the password reset procedure did not work for them for some reason. A new password storage system installed with entrée.NET release 3.2.1 will allow you to view customer and salesperson account passwords. The new system uses a key based encryption system to maintain a level of security but still allow for viewing the passwords.
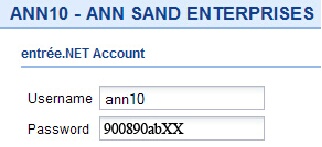
 Passwords will NOT be visible until they have been converted to the new storage format. A process has been put in place to convert the passwords as customers and salespeople login. So there will be some delay before all passwords are viewable.
 Salespeople Options
The next step in account creation requires you to set the system options for your salespeople in entrée.NET. Your salespeople can view and enter orders for their assigned customers. They will see a list of their customers, and simply need to click on the customer they would like to work with.
▪A feature of entrée.NET is the ability for a Salesperson to enable a new customer account. In the past, only the “Admin” (System Administrator) was allowed to create new customer accounts. Now your salespeople can setup their own customers with Usernames and Passwords, freeing your System Administrator to focus on other tasks. See the Settings chapter of this guide for complete information on this topic.
▪Other pricing options include: modifying prices on customer orders and entering prices below minimum sell price.
▪The new Prospects feature will give Salespeople the ability to provide prospective customers with price quotes on orders that can easily be converted to regular customer accounts later.
▪The option to Display “Gross Profit” is used to control salesperson access to this information.
Updating Salespeople Options
1.Click the Settings tab
2.Click the Options icon in the menu on the left.
3.Option Descriptions and Current Settings columns are displayed for each option.
4.Click in the Current Setting column to select the new setting from the drop down list.
5.At the bottom of the page is the Salespeople option section (shown in the image below).
6.Changes to Options will update automatically.
Set Options for Salespeople
•See the entree.NET Settings chapter Options section of this guide for the current options list and explanations.
•See the entrée Options section for a complete explanation of how to use the new Salesperson / Broker File Maintenance Remote Order Entry options for salespeople.
Disabling an Account
System Administrators have the ability to disable access to their entrée.NET system. Once an account has been disabled the Salesperson will no longer be able to login to entrée.NET.
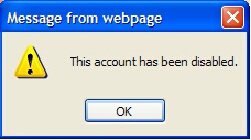
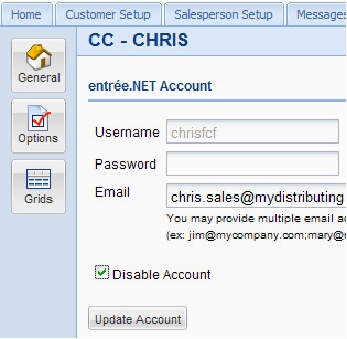
1.Click on the Salesperson Setup tab. 2.Use the Search tool to find the salesperson. 3.Click the edit salesperson icon 4.Click in the Disable Account check box. 5.Click the Update Account button. 6.This pop-up message box will display when a salesperson with a disabled account tries to login.
|
|
Turning On a Disabled Account
Once an account has been disabled to allow access to entrée.NET again:
1.Click on the Salesperson Setup tab.
2.Use the Search tool to find the salesperson with the disabled account.
3.Click the edit salesperson icon  to view the salesperson’s account.
4.Remove the check mark from the Disable Account check box.
5.Click the Update Account button.
The Salesperson Price Modification Option
When a salesperson has the Allow salesperson to modify pricing option turned on they have the ability to view the item’s pricing information in addition to making price changes in an order. This is how it works:
1.The Salesperson must have the Allow salesperson to modify pricing option set to Yes.
2.Items must be in an open order or in the shopping cart to modify their prices and view the Item Price Information.
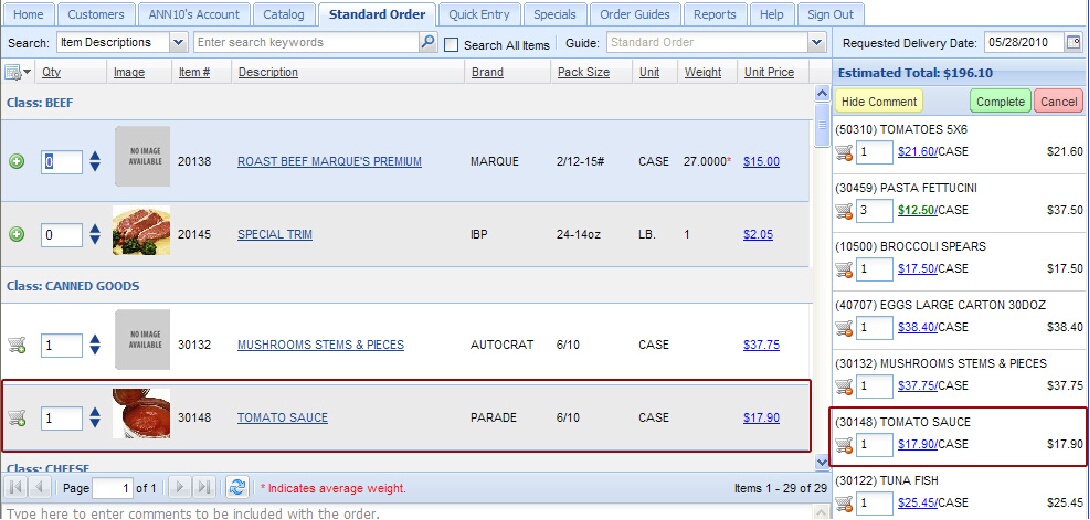
3.The Salesperson clicks once on the Unit Price field and the edit price dialog box displays in the Unit Price field. A green dollar sign and the edit price dialog box will be displayed with the current price.

4.Clicking on the green dollar sign triggers the display of the Item Price Information. All the pricing information your salespeople need for that item will be presented so they can make an informed pricing decision.
5.Salespeople can then edit the item’s price and click off the price field to exit the edit price dialog.
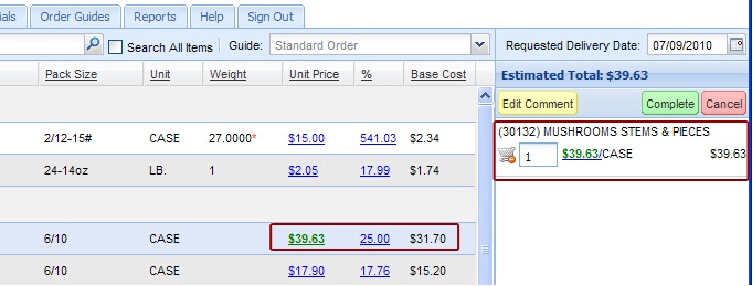
6.The price change will automatically be saved in the open order and in the shopping cart. The price will now be displayed in green indicating that the price has been changed.

Price Modifications Using % and Base Cost
If you have the “Allow salesperson to adjust prices by specifying a percentage over “Base Cost” option set to “Yes”, then you will see the % and Base Cost columns in your item details as shown in the image below. You can adjust prices by entering a percentage of base cost. The price calculation will follow the rules defined for the "Customer Special Price Formula" in the Pricing Setup tab. In entrée V3 go to System > Preferences and in entrée V4 SQL go to the System ribbon menu > select the System Preferences option.
 These calculations are made using the values available to entrée.NET at the time the order is placed and will only lock the price on the invoice. If any cost changes take place in entrée as a result of receiving new product or a manual cost change there is no guarantee that the margins used to create the order in entrée.NET will reflect the final margins of the invoice.
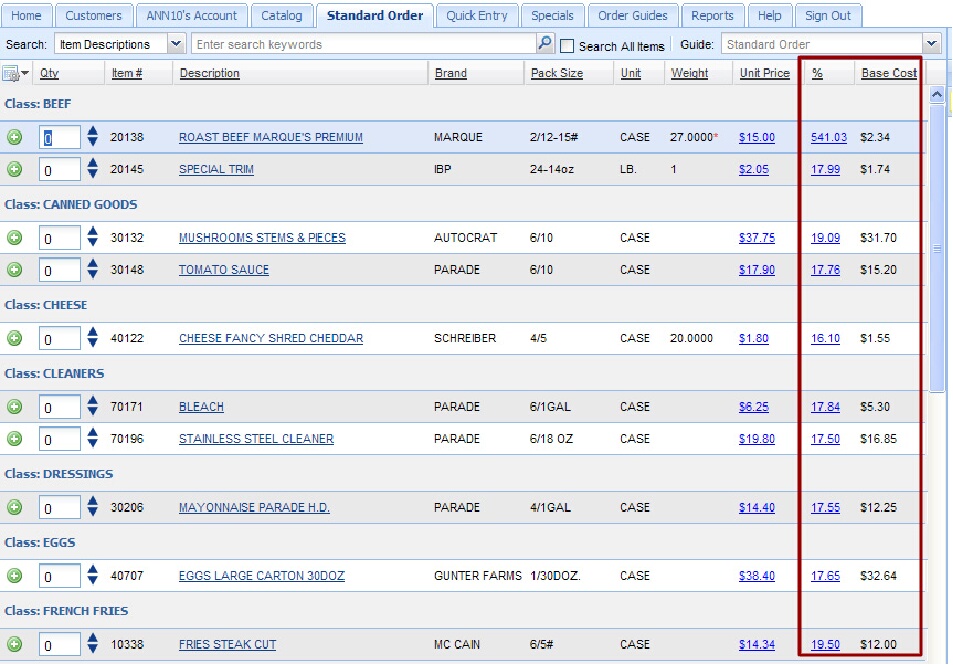
Editing Prices Using % Column
1.Items must be in an open order and in the shopping cart to modify their prices using %.
2.Click in the % column for the desired item and the edit percentage dialog box displays.

3. Enter a new number for the percentage value and hit the Enter key.

4. The Unit Price column will update and turn green displaying the new price in the shopping cart and item details.
