Updating Blocks Content

Contents
The website blocks that are covered in this section of the chapter are: Blog, News, Featured Brands and Featured Item.
The Blog Block
The Blog feature allow distributors to post multiple articles or news posts on their website. Blog content is managed by the administrator or by a designated website manager. The content entered into the Blog block will be displayed in the Blog page of your website. To activate the Blog feature:
1.Click the Settings tab
2.Click the Options icon.
3.Scroll down to the Website section.
4.Find "Display Website Blog" and select "Yes".
5.The Blog link will now be displayed in the main menu of your website as seen in the image below.
6.Now you are ready to add content to your Blog.
Adding Content to your Blog:
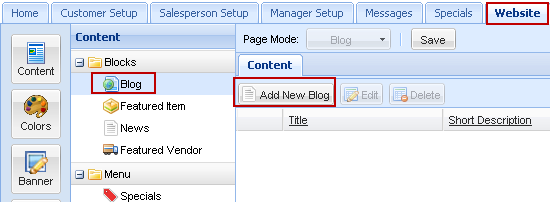
1.Click the Website tab.
2.In the Content menu under the Blocks section click Blog.
3.Click the Add New Blog button. |
|
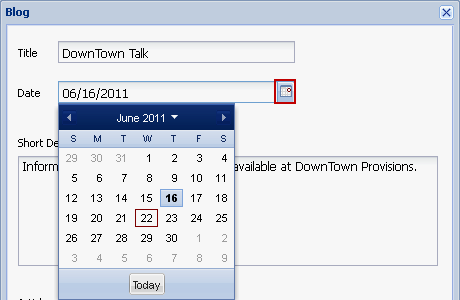
4.The Blog Edit dialog box will be displayed.
5.Enter a Title for the blog entry. This title will be displayed in the Blog page of the website.
6.Enter a Date for the blog entry. You can either click the calendar icon (as seen in the image below) to select a date or type a date in the text box.
7.Enter a Short Description. This description text will be displayed in the blog entry of your the website.
8.Use the website editing tools to add an image and format the content.
9.The Article section is where you will enter the complete blog entry. You can include whatever information you would like to share with your customers. |
|
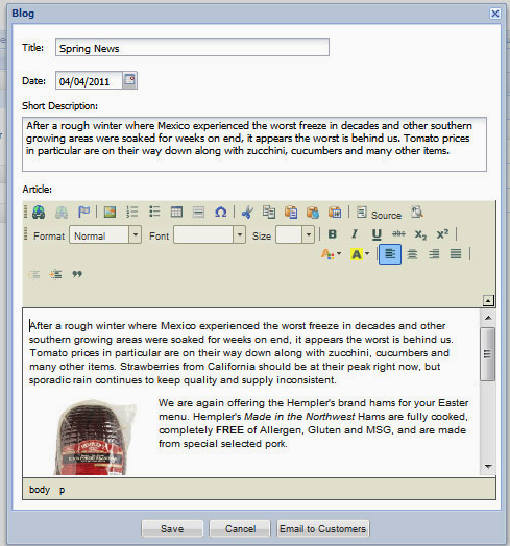
10. When you have finished editing your blog entry click the Save button. Now it will be added to the Blog page of your website.
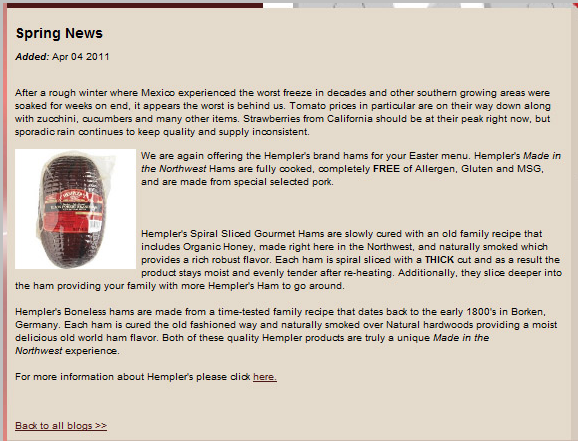
 A Blog article posted in the website.
Managing your Blog Entries
•Use the Edit button to change the text in an existing blog entry.
•Use the Delete button to remove a blog entry from the website.

Email Blog Entry to All Customers
1.Click the Website tab.
2.In the Content menu under the Blocks section click Blog.
3.Select the desired blog entry and click the Edit button.
4.When the Blog edit dialog box opens click the "Email to Customers" button at the bottom of the window.
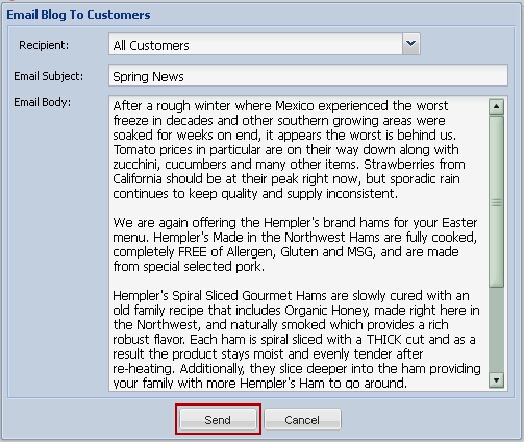
5.The Email Blog to Customers dialog box will display. The default Recipient value is All Customers.
6.Edit the Email Subject and Email Body text if required.
7.Click the Send button. All your customers with email addresses in their entrée.NET accounts will be sent the email.
The News Block
The content entered into the News block will be displayed on all the pages of your website in the Latest News section. Use the News block to supplement company communications with your customers. Topics concerning time sensitive ordering dates, product announcements, news about your company can be shared. Once the News block has been updated it will be displayed in your website instantaneously. To update the News block follow these steps:
1.Click the Website tab
2.Click on the News block in the Content list on the left.
3.The information currently in the block will display under the Content tab.
4.Add your new information and remove any obsolete information.
5.Use the tools discussed previously in this chapter to change the text color, font, highlight text, change text size or whatever you wish.
6.When your changes are complete, click the Save button to save your changes and update the Latest News your website.
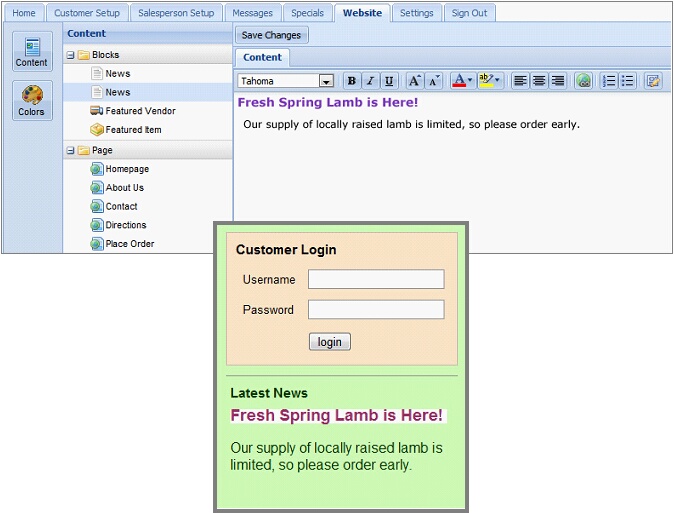
Back: The News block as it looks in the Content tab when you are editing your news.
Front: The Latest News section as seen on all the web pages in your website. The purple headline has been highlighted with white to make it more prominent.
Updating Featured Brands
The "Featured Brands" website feature (formerly called "Featured Vendors") is located in the entrée.NET Website tab now allows you to define multiple brands to be highlight in the Featured Brands block of your website home page in a rotating slide show and in the bottom of the customer's shopping cart if you choose to enable that option in the Settings tab. You can add text, a picture or logo representing the brand or their products to the block information.
 The Website tab in entrée.NET is now enabled for those distributors who have not purchased the website option. This will provide you with access to the Featured Brands editor so you can use this feature for marketing. All the other Website options will still be disabled.
You must first define your Brands in Brand Maintenance in the main entrée system and run the data export to get the information in entrée.NET.
•Follow these steps to control the content in the Featured Brands block:
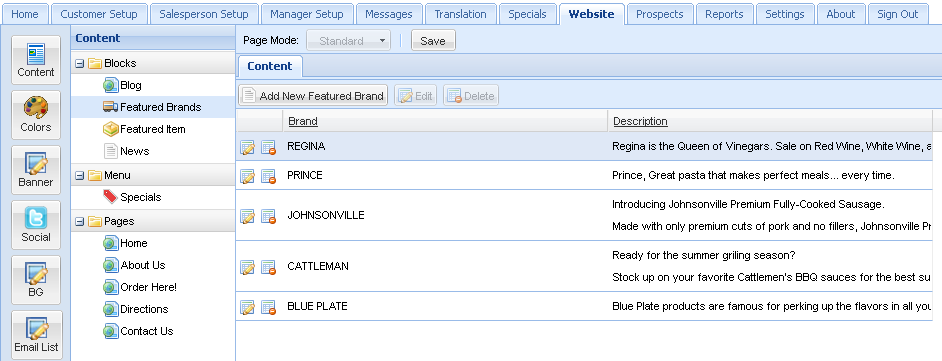
1.Click the Website tab. In the Content list click on Featured Brands.
2.The Featured Brands screen will display all the brands currently in the block. Use the Edit and Delete buttons to manage your brands.
3.Click the Add New Featured Brand button to open the Featured Brands dialog box.
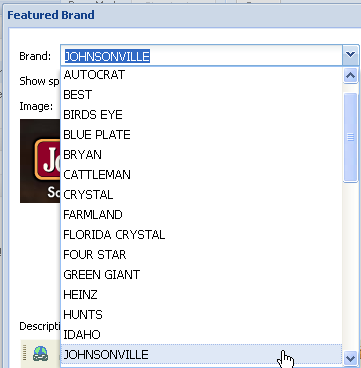
4. Select a Brand from the drop down list of from all the brands defined in your main entrée system.
|
|
5. Enter Brand information and use the following options:
•Show specials only – Check this option to only display the brand’s specials when the brand image is clicked on the Home page. If not checked all the brand’s products in your catalog will be listed. |
|
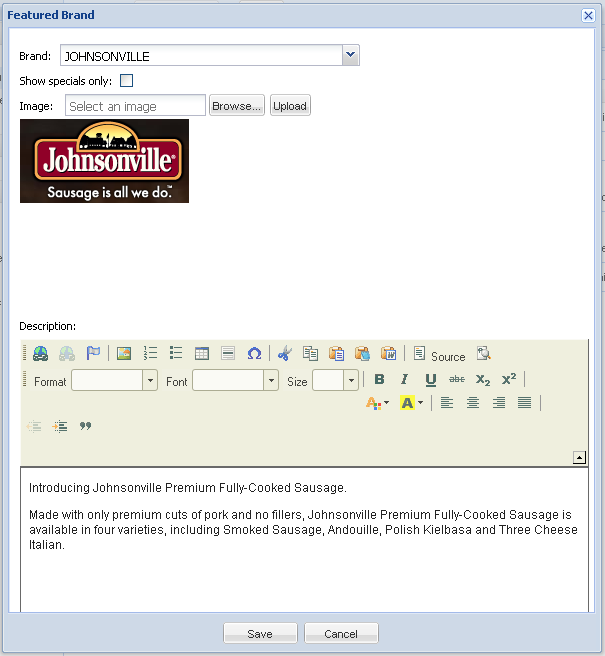
•Image:
▪Use Browse to select an image file on your computer and Upload a brand image that will be displayed in the Home page slide show and used as the link.
▪Upload – To upload an image follow steps 15 – 22 in Updating the Featured Item Block section on the last page of this chapter.
•Description: Enter product or specials information. This text will be used for Website SEO and will not be displayed.
6. Click the Save button and your website Featured Brands block will be updated.
These are examples of the Featured Brands block as the slides change to show different brands.
•When your customers mouse over the Featured Brands area the slide controls (outlined in red) will display so they can view all your Featured Brands at their own pace.
•When the customer clicks the Shop Now link in the shopping cart area they will be brought to the Catalog with a list of all the products for that brand. |
|
|
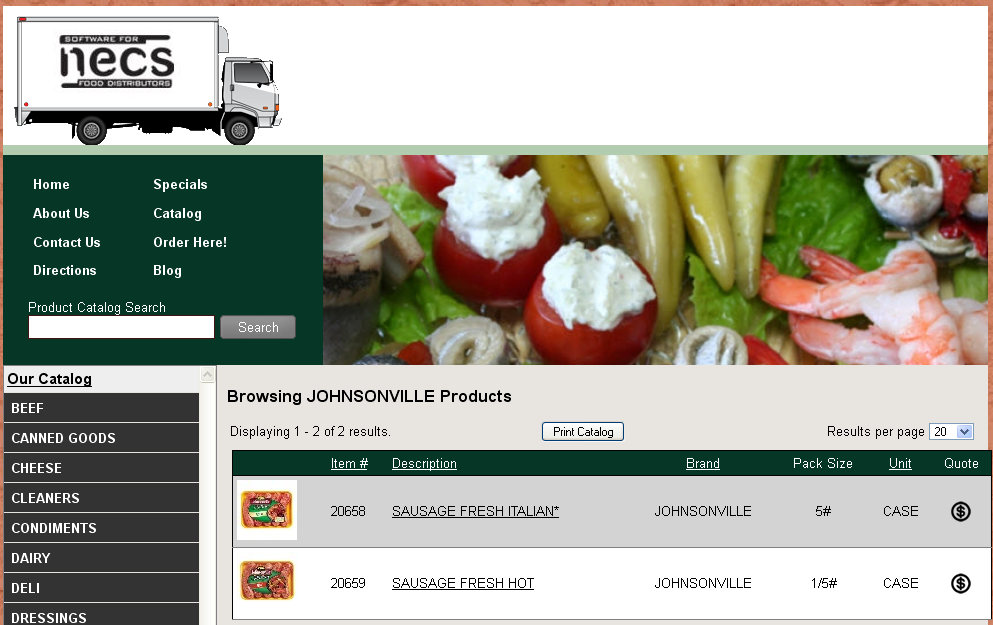
When a brand logo is clicked in the Featured Brands block on the Home page the customer is brought to the Catalog page with a listing of their products as shown in the image below. |

Displaying Featured Brands in the Shopping Cart
In the Settings tab Options section you have the option to showcase your Featured Brands in the shopping cart area using the "Display featured brand advertisements in shopping cart" option.

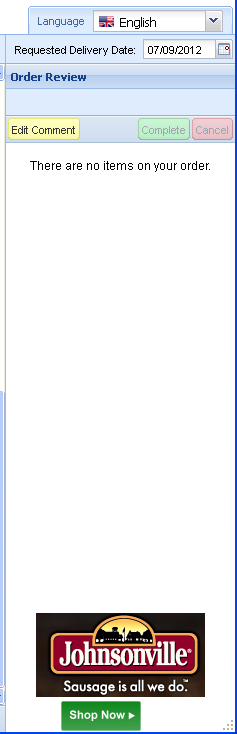
•When this option is set to “Yes” the information you define in the Featured Brands section of the Website tab will be displayed in the bottom of the shopping cart.
•When the customer clicks the Shop Now link in the shopping cart area they will be brought to the Catalog with a list of all the products for that brand.
•When your customer mouses over the Featured Brands area the slide controls (outlined in red below) will display so they can view all your Featured Brands at their own pace.
|
|
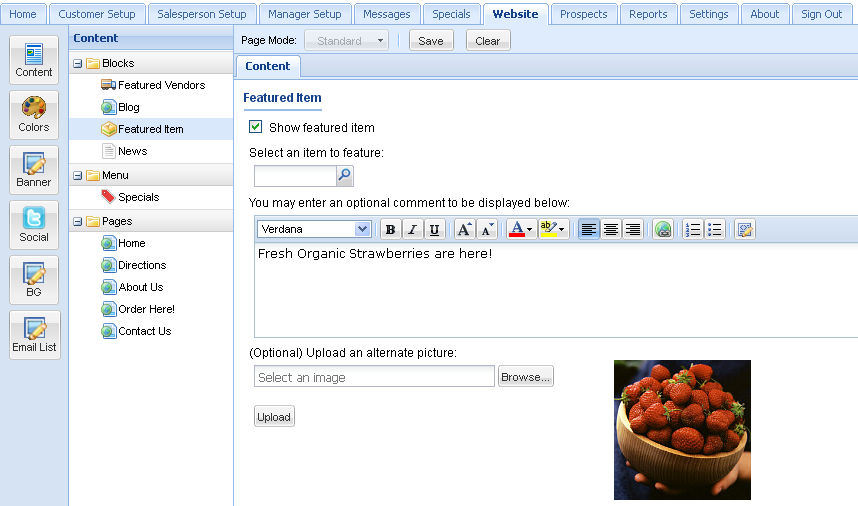
Updating the Featured Item Block
You have the ability to select an item to be your “featured special” in the Featured Item block of the website home page. You can add text and a picture of the item to the block. Follow these steps to edit the Featured Item block:
1.Click the Website tab.
2.Click on the Featured Item block in the Content list on the left.
3.The featured item dialog will display with the information currently in the block.
4.Click the Clear button to remove the current Featured Item content.
5.Click to check the Show featured item box to display it on the Home page of your website.
6.Click Select an item to feature.
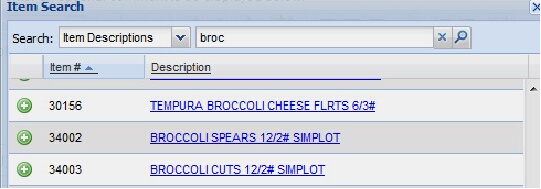
7.The Item Search dialog box displays. In the Search drop down list select a search option: Item Descriptions, Class and Item Number.
8.Enter text in the box and click to search.
9.The Item Search box displays the search results.
10.Find the item and click the Plus icon ![]() to select it.
to select it.
11.Click the blue Description link to view the Product information.
12.The item # will now display in the Select an item to feature box.
13.You now have the option to add a comment in the comment text box.
14.Use the tools discussed previously in this chapter to change the text color, font, highlight text, and change text size of the comment.
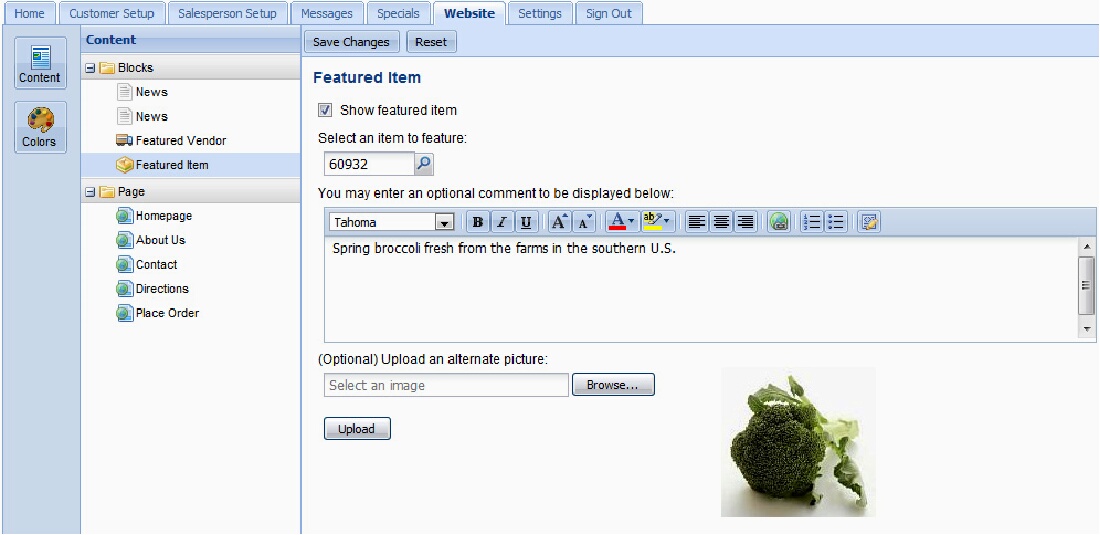
15.You have the option to upload an image or alternate image for the item. The supported image formats are JPG, JPEG, GIF and PNG.
16.To upload an image for the item: Click the Browse  button.
17.The Open dialog box will display.
18.Locate the desired image file on your computer. Click on the image file to select it.
19.Click the Open  button.
20.Click the Upload  button.
21.The image file will now be uploaded and display in the image area.
22.Click the Save button and your website will be updated.
|
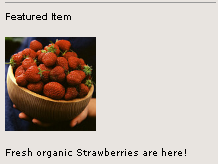
The Featured Item block as seen on the Home page of the website.
|