Contact List
Contact List Overview
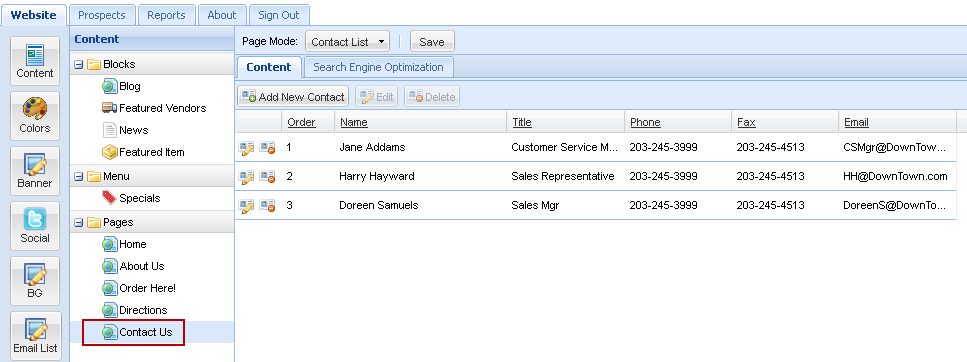
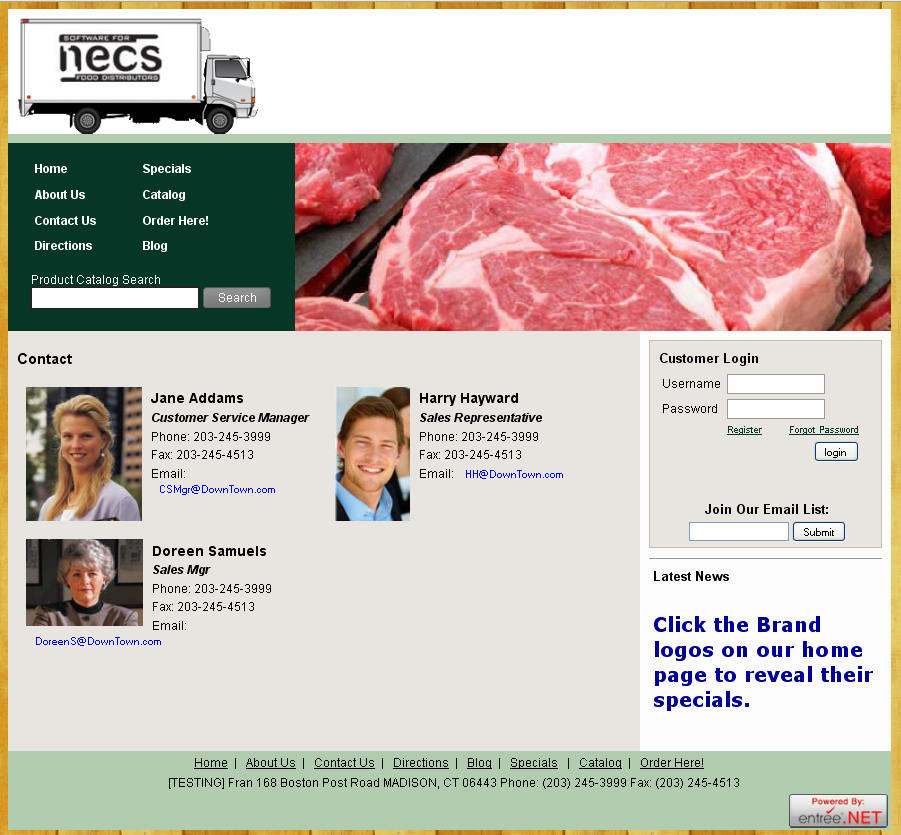
The Contact List page mode allows you to populate the contact information to be presented in a two column list on the Contact Us page of your website. Enter your company contacts with their specific information, such as a picture and biography.
Tools:
•Add New Contact
•Edit Contact
•Delete Contact
Columns:
•Order - Sets the order contacts are displayed in the list. Blank defaults to last.
•Name - Contact's name.
•Title - Contact's job title.
•Phone - Contact's phone number.
•Fax - Contact's fax number.
•Email - Contact's email address.
Creating a Contact List
1.Click the Website tab, and then click the Content button.
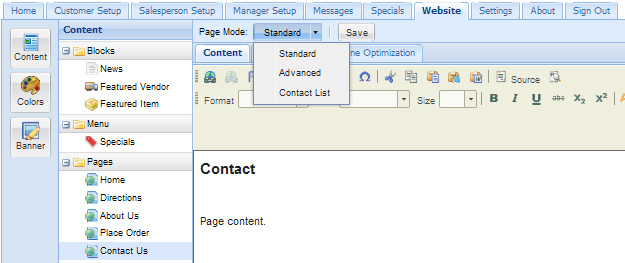
2.Click on Contact Us in the Pages list.
3.In the Page Mode drop down menu select Contact List.

4.The Contact List page will display with your current contact list information.

5.To add to your contact list click the Add New Contact button.
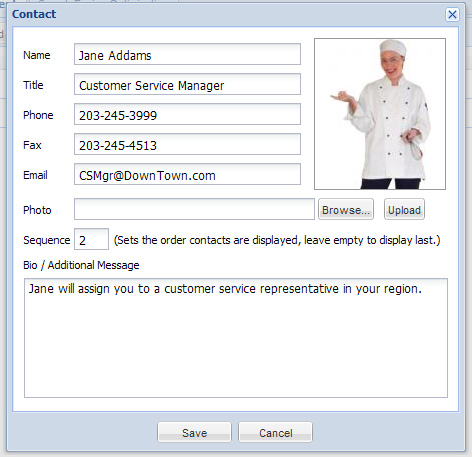
6.The Contact dialog box will display.
7.Enter the following information: a.Name - contact name. b.Title - contact title. c.Phone - contact phone number. d.Fax - contact fax number. e.Email - contact email address. f.Add a photo to the contact card if you desire. Click Browse, select the file then click Upload. g.Sequence - an assigned numerical value representing the order of the contact in the list. h.Bio / Additional Message - Add any information here to assist with communications with your customers.
8.Once all the information is entered click Save.
9.Repeat steps 5 - 8 until all your contacts have been entered into the system. |
|
The Contact List information above as it looks in the website Contact Us page.

Editing a Contact
1.When the Contact List page is displayed click on the desired contact name in the list.
2.Click on the Edit button in the menu bar or click the Edit icon in the tools column on the far left.
3.Click Save in the Contact dialog box when your updates are done.
Deleting a Contact
1.When the Contact List page is displayed click on the desired contact name in the list.
2.Click on the Delete button in the menu bar or click the Delete icon in the tools column on the far left.
3.Click OK in the delete confirmation dialog box.

