Using the Task Scheduler

Contents
The Task Scheduler is used to maintain the backup jobs scheduled Using the Update Utility. The Task Scheduler, which is a more advanced tool in Windows, will schedule and run many jobs including Microsoft software updates and updates to other software packages installed on your computer.
You can use the Task Scheduler to create and manage common tasks that your computer will carry out automatically at the times you specify.
Tasks are stored in folders in the Task Scheduler Library. To view or perform an operation on an individual task, select the task in the library and click on a command in the Action menu.
 Be sure to go to the Client Monitor & Task Execution Application chapter of this guide to learn about scheduling tasks using this option in the entrée System ribbon menu.
1.To access the Task Scheduler run the Update Utility > select Schedule Regular Backups window.
2.In the Schedule Backup Jobs window click and select the job you would like to edit.
3.Click the  Edit with Task Scheduler button.
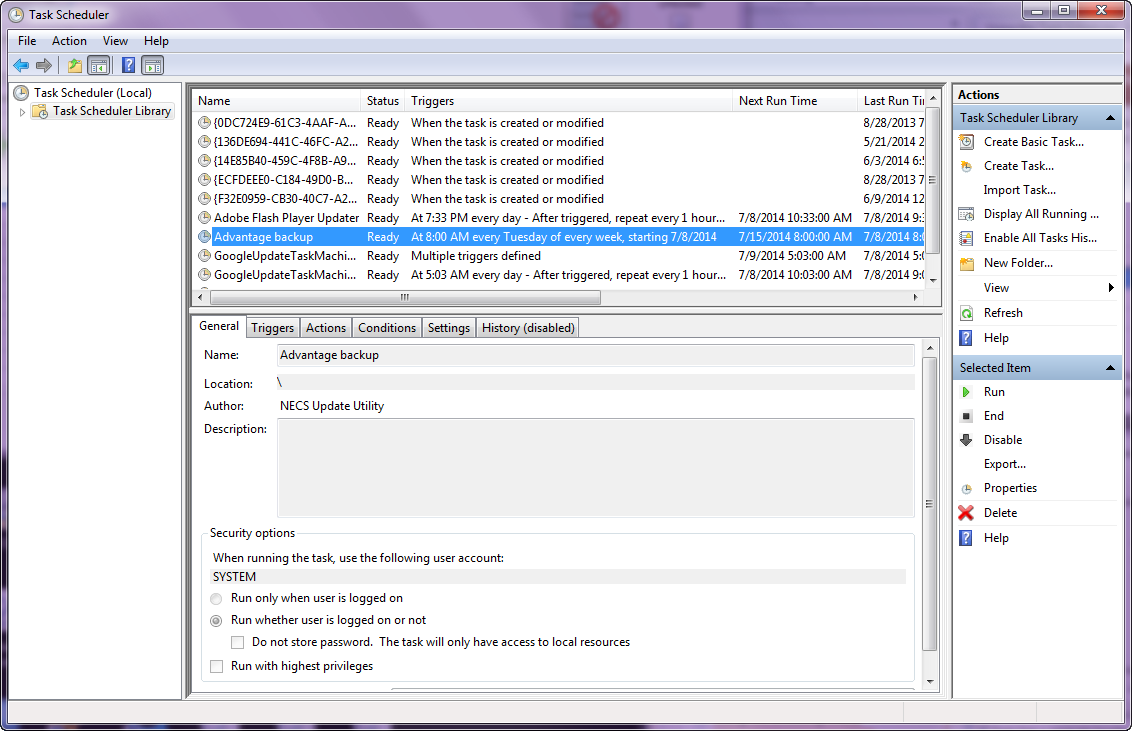
•Task Scheduler Main Menu File, Action, View, Help
•Tool Bar (from left to right) Back arrow, Forward arrow, Up One Level, Show/Hide Console Tree, Help, Show/Hide Actions Pane.
•Task Scheduler Library: Click it to see all scheduled tasks and the menus. The Advantage backup that is highlighted above is the task that will back up your entrée databases. |
|
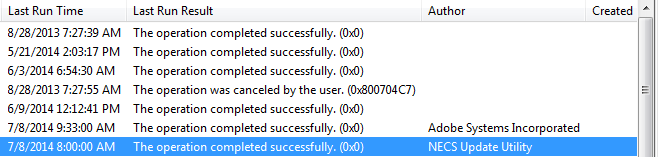
•Scroll to the right to see the rest of the columns for the tasks (below).
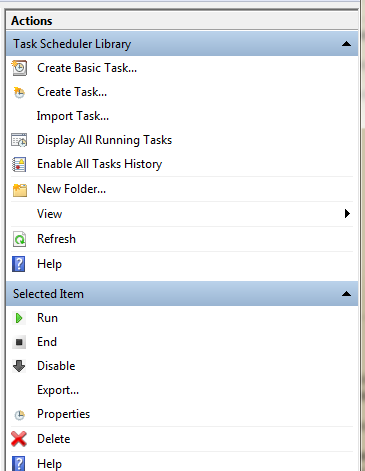
•Task Scheduler Action Menu |
|

•Task Scheduler Help Menu:
For more information about using the Task Scheduler use the Help menu > Help Topics option. |
|

•Create a basic task using the wizard 1.In the Actions pane, click Create Basic Task. 2.Follow the instructions in the Create Basic Task Wizard.
•Actions Pane - When you click on a task the options in the pane will expand to include what is seen on the right. |
|
•Create a Task
1.Find and click the task folder in the console tree that you want to create the task in. If you want to create the task in a new task folder, see Create a New Task Folder to create the folder.
2.In the Actions Pane, click Create Task.
3.On the General tab of the Create Task dialog box, enter a name for the task. Fill in or change any of the other properties on the General tab. For more information about these properties, see General Task Properties.
4.On the Triggers tab of the Create Task dialog box, click the New… button to create a trigger for the task, and supply information about the trigger in the New Trigger dialog box. For more information about triggers, see Triggers.
5.On the Actions tab of the Create Task dialog box, click the New… button to create an action for the task, and supply information about the action in the New Action dialog box. For more information about actions, see Actions.
6.(Optional) On the Conditions tab of the Create Task dialog box, supply conditions for the task. For more information about the conditions, see Task Conditions.
7.(Optional) On the Settings tab of the Create Task dialog box, change the settings for the task. For more information about the settings, see Task Settings.
8.Click the OK button on the Create Task dialog box.
•View a Task's Properties
1.Find and click the task folder in the console tree that contains the task you want to view.
2.In the console window, click the task that you want to view.
3.Click Properties in the Action pane. The Task Properties dialog box will appear.
4.In the Task Properties dialog box, the task's properties are located on the General, Triggers, Actions, Conditions, and Settings tabs. Click a tab to view the properties.
5.Click the History tab to view the task's history.
▪Task history can be enabled or disabled. In the Action pane, click Disable All Tasks History or Enable All Tasks History to change the Task History display.
▪Click an event in the list of events on the History tab to view the description of the event.
•Display All Running Tasks
1.In the Actions pane, click Display All Running Tasks…. The Running Task dialog box will appear.
•Disable a Task from Running
1.Find and click the task folder in the console tree that contains the task you want to disable.
2.In the console window, click the task that you want to disable.
3.In the Actions pane, click Disable. The Disable command will only be available in the Actions pane if the task is enabled.
•Enable a Task to Run
1.Find and click the task folder in the console tree that contains the task you want to enable.
2.In the console window, click the task that you want to enable.
3.In the Actions pane, click Enable. The Enable command will only be available in the Actions pane if the task is disabled.
•Delete a Task
1.Find and click the task folder in the console tree that contains the task to delete.
2.In the console window, click the task to delete.
3.In the Actions pane, click Delete.
4.In the Confirm delete dialog box, click Yes.
•Delete a Task Folder
1.Find and click the task folder in the console tree that you want to delete.
2.In the Actions pane, click Delete Folder.
3.In the Confirm delete dialog box, click Yes.