Create Credit Memo

Contents
entrée.NET Settings
Before you can use the Create Credit Memos feature in the EOP main menu the System Administrator must first enable it in the entrée.NET system. The Create Credit Memo feature is enabled when the entrée.NET Settings tab Options Electronic Order Pad section "Allow Salesperson to Create Credit Memos" option to is set to "Yes".
When enabled Electronic Order Pad app will add the Create Credit Memos option to the main menu which provides a trimmed down version of the current order entry process that only allows for the entry of credit items.
•The Create Credit Memo feature will allow your salespeople to only create a Credit Memo, but very quickly.
•This feature will save them time because they do not have to access the main entrée system on a computer in the office to submit a credit memo.
•This feature uses the new Credits Tab screen to capture the credit item information, and create, complete and confirm the new Credit Memo.
•Two existing rules that apply to orders have been adjusted for Credit Memos to more closely match the rules used by the entrée system as follows:
1.No delivery date restrictions are applied to the selection of a Credit Memo Date. The only requirement enforced is that the date is not in the past.
2.Credit Memos can be created for customers on credit hold.

Create Credit Memo Process Overview
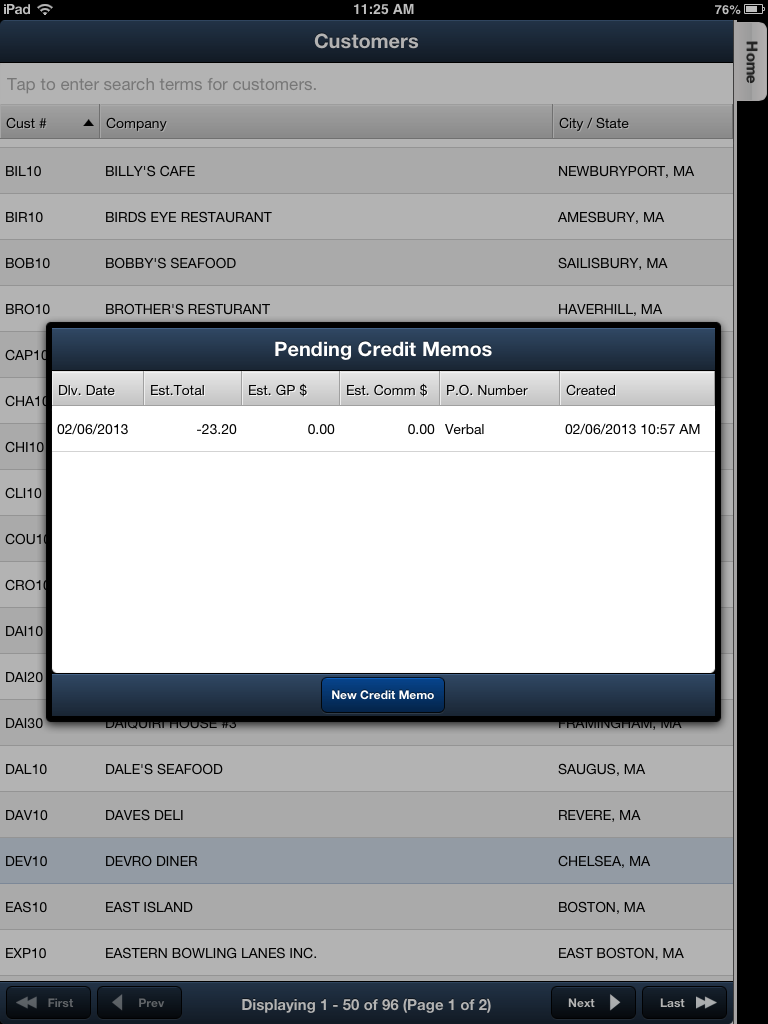
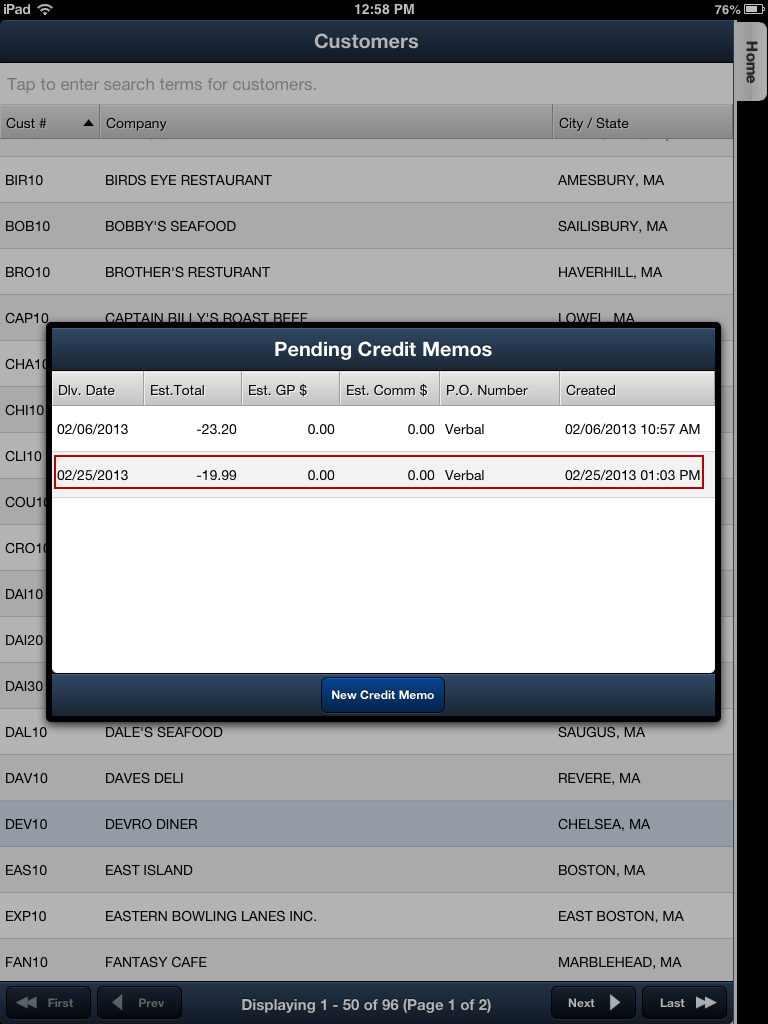
1. When you first tap the Create Credit Memo option in the main menu you will be brought to the Customers screen. Here you will find and tap the customer that you need to create the credit memo for.
2. If you previously created a credit memo for that customer and put it on hold, when you tap that customer the Pending Credit Memos dialog box will be displayed.
3. You have the option to tap the pending credit memo in the list and continue processing it. Or you can tap the New Credit Memo button below and being again. Once you make your selection your will be brought to the Credits tab screen. |
|
See the Credits Tab section of this guide for details about using this screen.
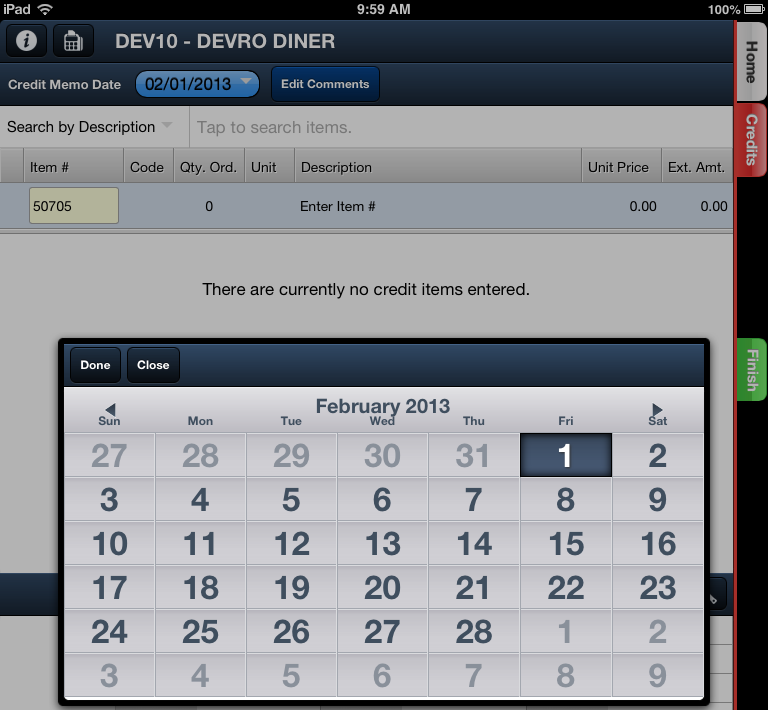
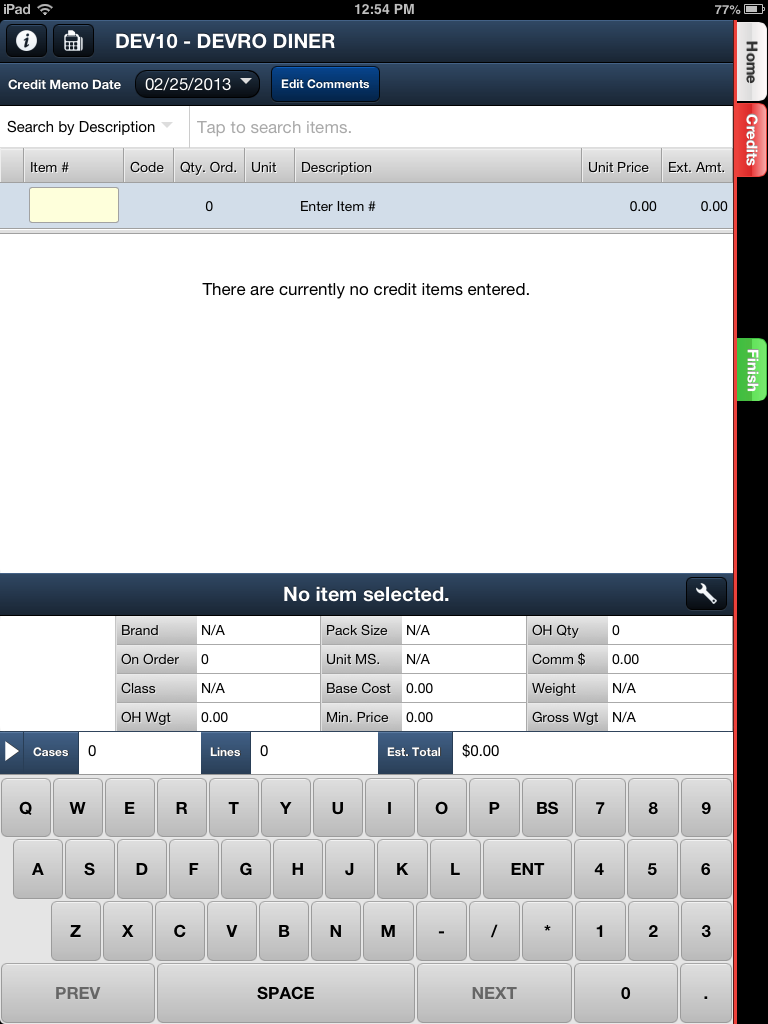
4. Tap the Credit Memo Date field at the top to open the calendar and tap a date to select the date for your credit memo.
|
|
There are two ways to find the desired item for the credit.
5a. Find the item by entering the item number in the yellow Item # field shown here and tap the ENT key. |
|
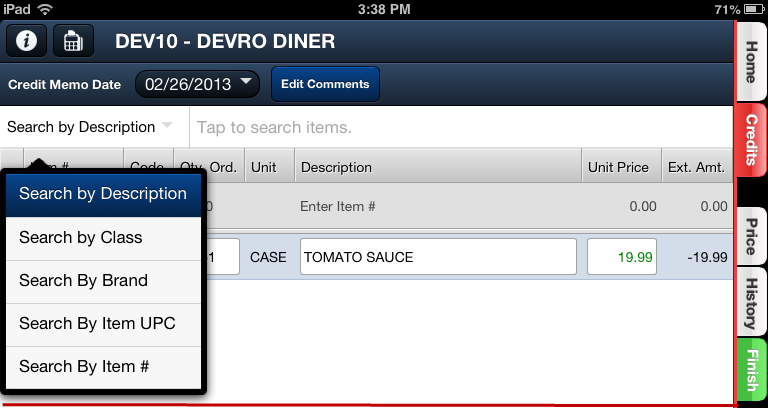
5b. Or find the item using the Search By tool.
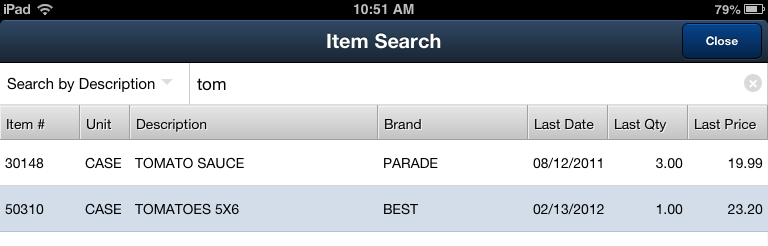
Here you see the results for Search By Description using "tom". Now tap and select the desired item in the search results screen. |
|
6. Tap and edit the item Qty. Ord. field. Enter the quantity of the item to be credited.
You will notice that the item has been converted into the correct transaction for updating the system with a negative Qty. Ord. number and Ext. Amt. |
|
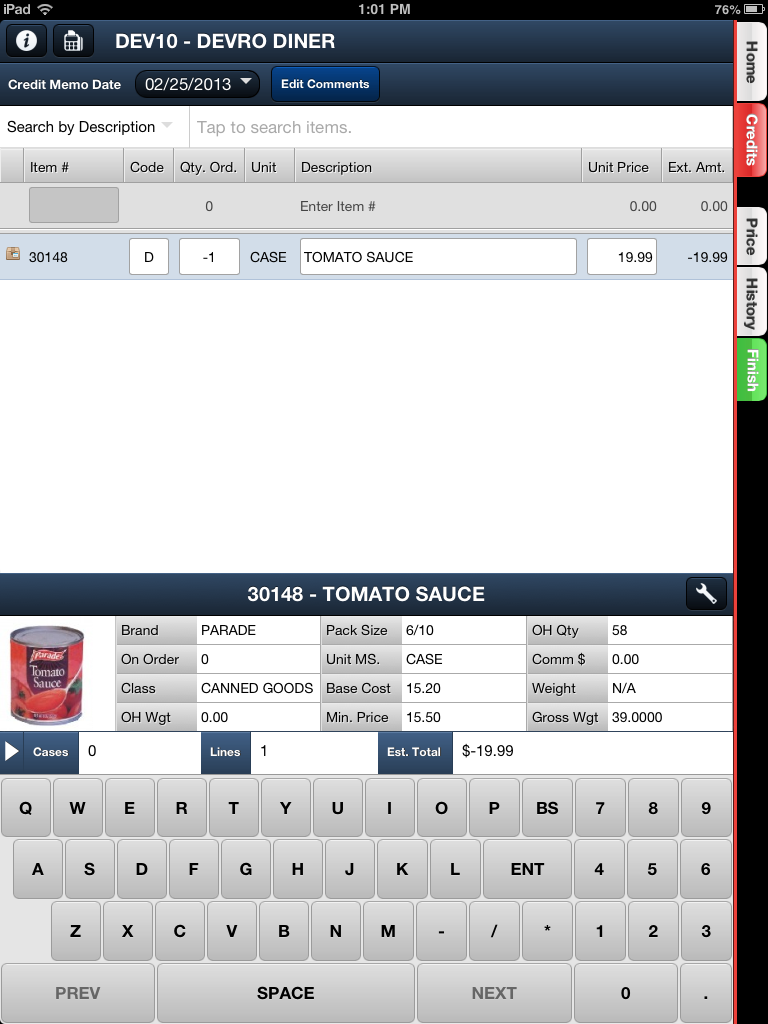
7. Once you have the correct item select a Code for your return code.
Return Codes include: ▪A - Spoilage ▪B - Shortage ▪C - Damage ▪D - Not Truck
|
|

8. Now check for the correct credit item Price by tapping the History Tab in the menu on the right.
Here you will see the Item Sales History information and can find the correct credit price by date or invoice number.
▪The Item Sales History displays a graph of the customer’s buying pattern for the item with a list of customer transactions related to that item below.
▪Item Sales History will also indicate any item price changes in the “Chg $” column with red / green arrows and the amount of the price change for each invoice in the list.
▪This feature will provide you with the information needed to determine the correct credit price for the item when it was sold.
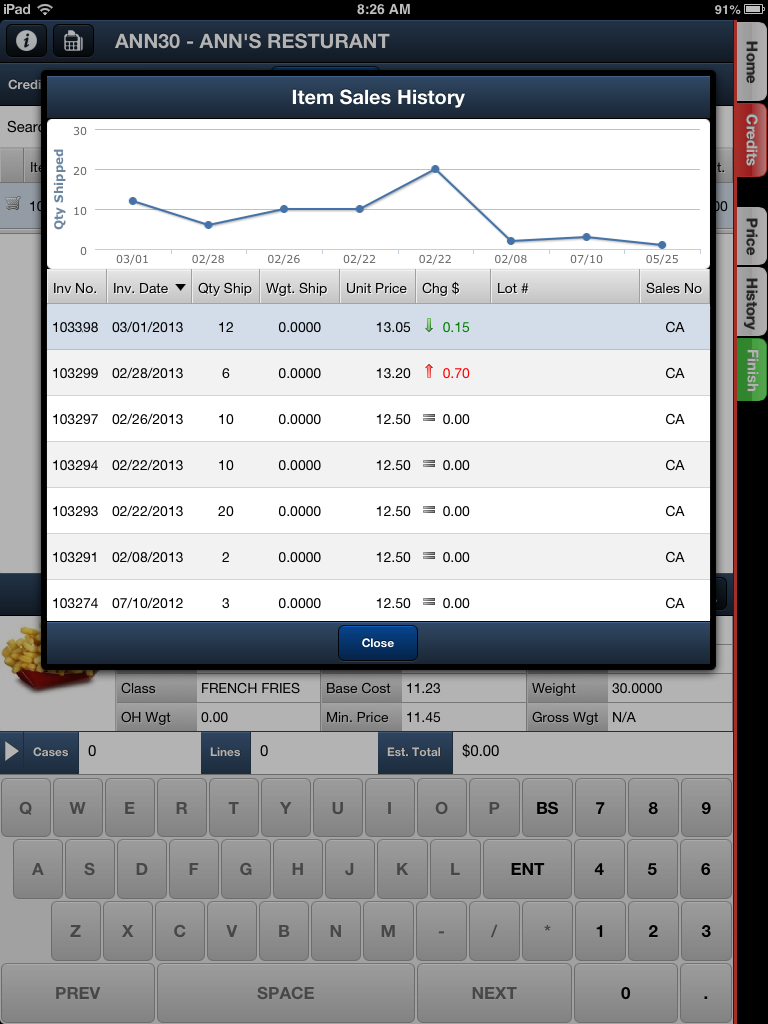
▪Tap the Close button to return to the Credits tab.
9. Tap the Finish tab when all the information has been entered and updated for the Credit Memo.
You have another opportunity to Import or Edit Comments by double tapping in the Comment area.
See the Edit / Import Comments chapter of this guide for more information. |
|
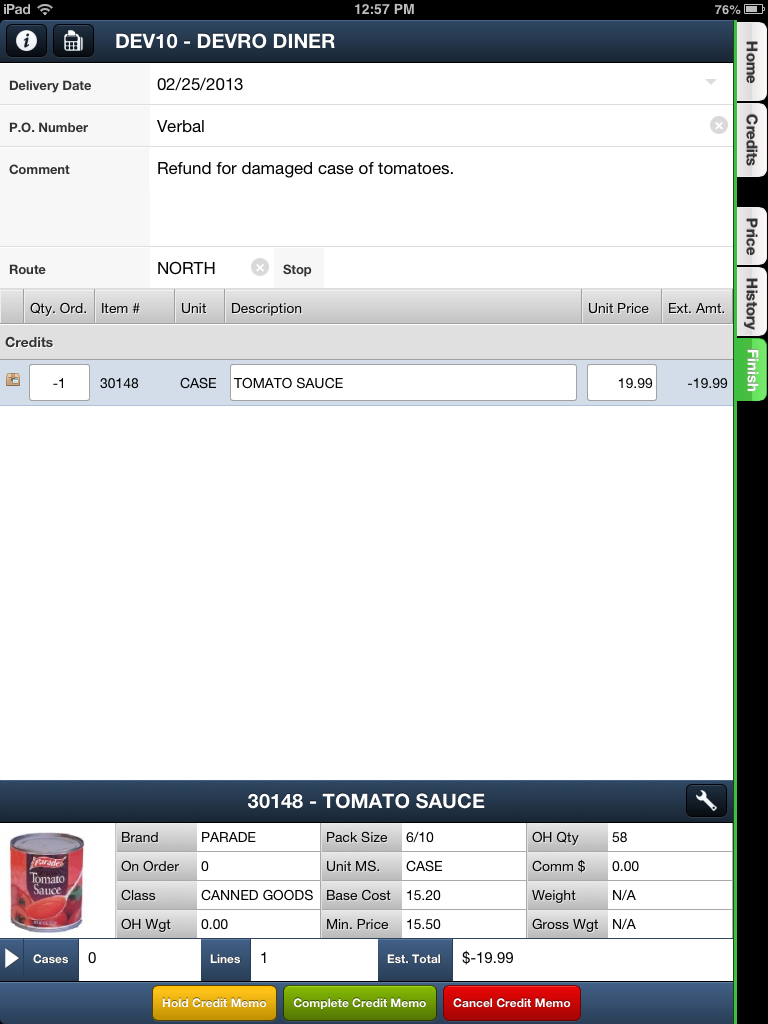
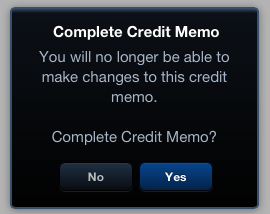
10. In the Finish tab you have option buttons to Hold, Complete, or Cancel the Credit Memo.
▪Hold Credit Memo will save the Credit Memo when you tap Yes.
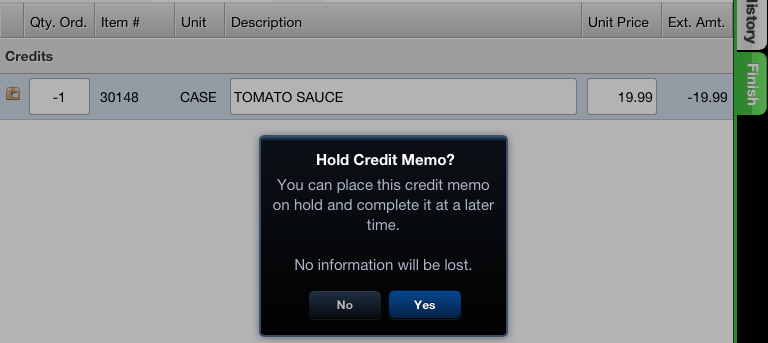
▪It will then be sent to Pending Credit Memo which will display it when the customer is selected again.
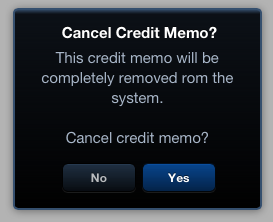
▪Cancel Credit Memo will erase the Credit Memo from EOP when you tap Yes.
▪Complete Credit Memo will send the Credit Memo to your entrée server for processing when you tap Yes.
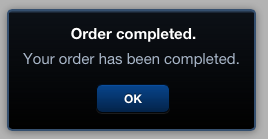
▪Next the Order completed message will be displayed. Tap OK to close the message and return to the main menu.
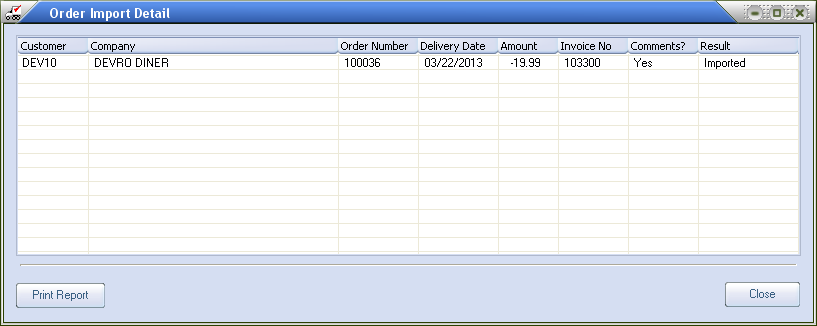
11. The memo will now be imported into entrée for further processing the next time the entrée.NET Scheduler application runs the import. If you run the import manually as detailed in the Manual Export / Import chapter of this guide you will see the credit memo in the Order Import Details screen as shown below.
▪Once the Credit Memo has been imported by the entrée.NET Scheduler you can access it in the main entrée system via the Change or Cancel menu paths here:
•Invoicing > Invoices > Change Invoice / Credit Memo
•Invoicing > Invoices > Cancel Invoice / Credit Memo
 For more information about the use of entrée Change Invoice / Credit Memo and Cancel Invoice / Credit Memo review these topics in Chapter IV Using the Invoicing Menu of the NECS entrée System Guide. All system information can be viewed on the Internet via our website NECS entrée Knowledgebase at http://www.necs.com/knowledgebase/.
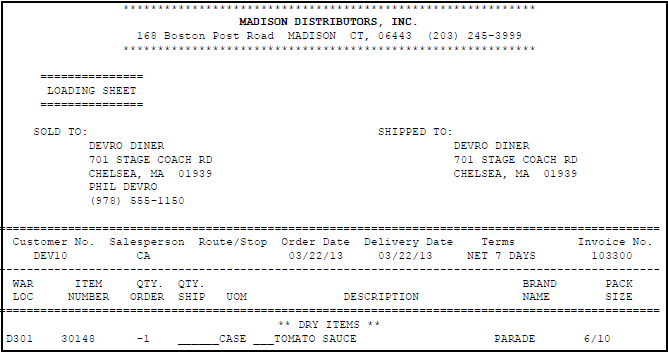
 This is an example of the Credit Memo above for Tomato Sauce printed on the Loading Sheet.