Credits Tab

Contents
entrée.NET Settings
Before you can use the Credits feature in EOP the System Administrator must first enable it in the entrée.NET system. The Credits feature is enabled in the entrée.NET Settings tab Options button Electronic Order Pad section by setting the "Allow Salesperson to enter credits on orders" option to "Yes".
Credits Tab Overview
When enabled the Electronic Order Pad app will add the Credits tab to the Create Order menu which allows for the entry of credit items to be included on the invoice when the order is imported into the main entrée system.
•The Credits Tab allows salespeople to easily enter credits for spoiled or damaged items that will be included on the current Invoice when the order is imported into entrée.
•It works similar to Quick Entry and requires the selection of an item return code.
•The feature will restrict the item search to only items that have been previously purchased by that customer.
•The Credits Tab screen is also used by the Create Credit Memos main menu feature.
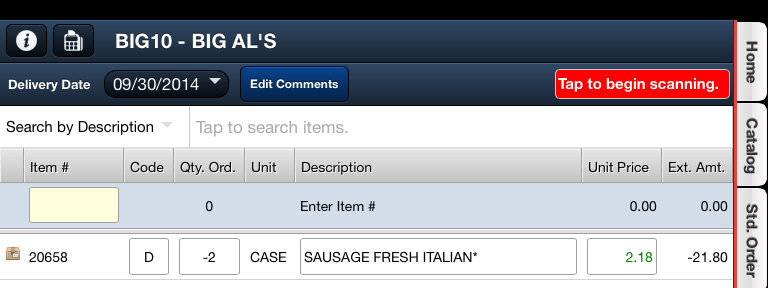
•The Tap to enable scanning button allows fast, real-time scanning of an item's UPC code with a Bluetooth scanner for items to be added to the customer's order. This method is ideal if you are at a customers location and have access to the item and/or shelf labels (such as at a grocery store). Barcode symbologies UPC-A, EAN-13 and EAN-8 can readily be scanned into a customer order.
 The entrée.NET Electronic Order Pad section option # 76 Allow Salesperson to Enter Credits on Orders must be enabled by the System Administrator to enable the Tap top enable scanning button. See the entrée.NET Setup & Options chapter for more information.
When this option is enabled items will be added to the order with an order quantity of 1 and with each additional scan it will increment the quantity until a new item is scanned or manually entered. This feature only applies when first adding an item through "Quick Entry". Changes to an item previously entered must still be done manually.
Using the Credits Tab
When you are in an open order and have to issue a credit to that customer, tap the Credits Tab on the right to add the credit item to the invoice. Then follow these steps to add your credit.
•First you must find the previously purchased item to be credited for the customer.
There are two ways to find the your credit item in the Credits Tab:
A. Tap in the yellow Item # field in the column. Enter the item number using the keyboard below and tap the ENT key.
B. Use the Search by feature drop down menu to select the search by option. Class, Brand Item UPC, Item # and Description (default) are available.
C. Then enter your search text in the Tap to search items area and tap the ENT key. |
|

•Next follow these steps to add the credit item to the current invoice.
1. When the item is found the item Information Panel below will be populated along with the item’s Description, Unit, Unit Price and Ext. Amt. fields.
2. Tap in the yellow Qty. Ord. box and adjust the quantity number.
3. Tap the ENT key in the keyboard and the extended amount will update.
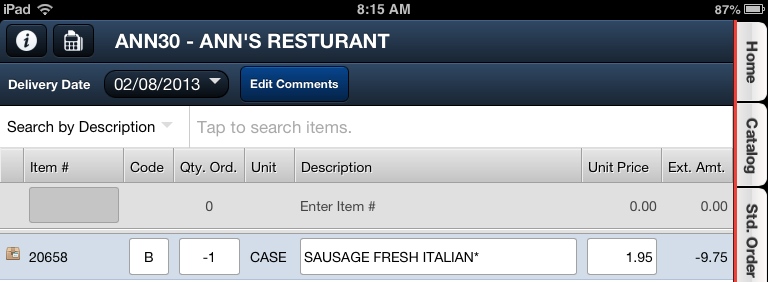
4. Now tap the ENT key again and EOP will convert the entered credit item information into the transaction that will be sent to the entrée system as shown in the image here.
5. Tap the yellow Code area and select the correct return code from the drop down menu.
Return Codes include:
▪A - Spoilage ▪B - Shortage ▪C - Damage ▪D - Not Truck
|
|

6. Use the Edit Comments button to add, edit or import pre-defined comments from the main entrée system. The Edit Comments and Import Order Comments features are discussed in the Edit / Import Comments chapter of this guide.
7. If you have completed entering the credits for this customer tap the green Finish tab on the right.
8. In the Finish screen on the left the Invoice now has both an Ordered and Credits areas.
You can see the credit transaction is displayed at the bottom of the Invoice in the Credits area.
•See the Finish chapter for more information about this screen. |
|
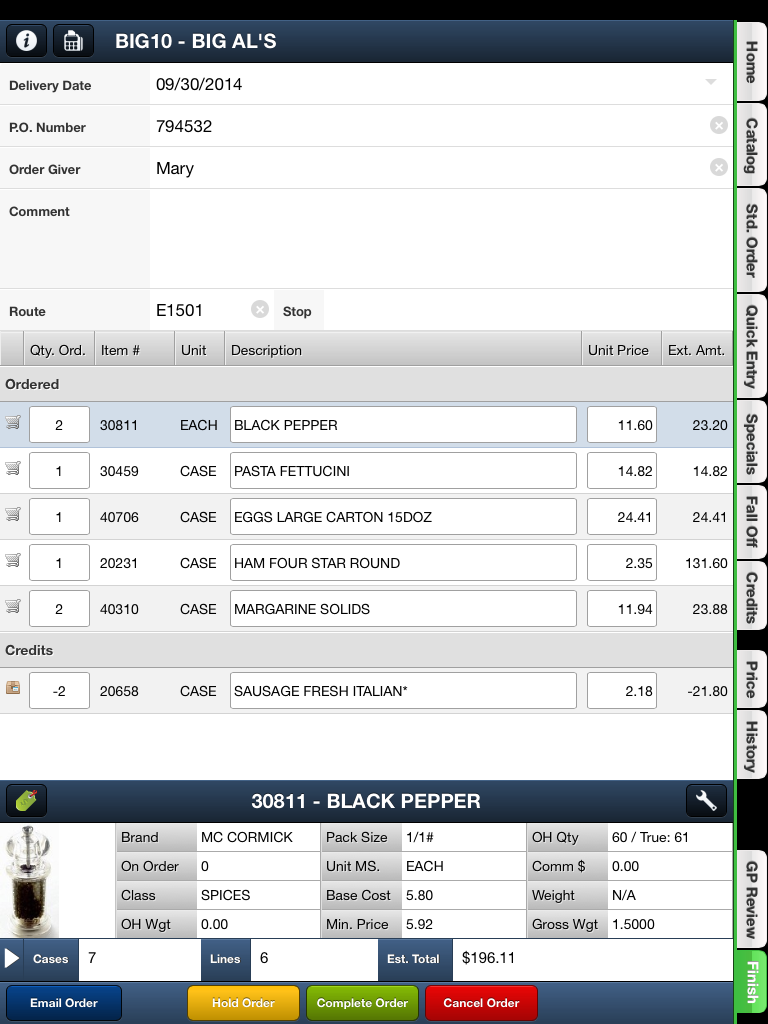
9. In the Finish screen you have a second opportunity to Import or Edit Comments by double tapping in the Comment area. See the Edit / Import Comments chapter of this guide for more information.
10. When the Invoice is ready to be sent to entrée tap the Complete Order button at the bottom of the screen. The order will be imported into entrée the next time the entrée.NET Scheduler application runs the import.
Credits on Invoices
When an order has been completed an email of the pending order is sent out and the order will be imported into entrée the next time the Scheduler application runs the import.
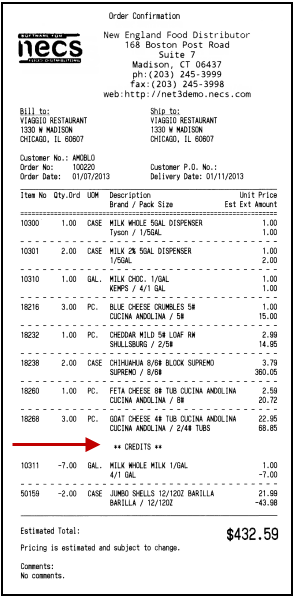
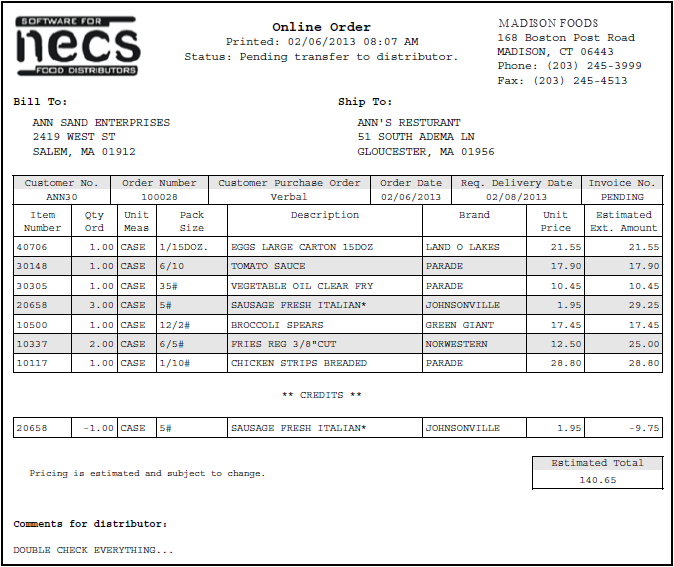
 In the example below you can see the credits processed while creating the customer order using the Credits Tab. This document will become the invoice with credits once it is imported into the main entrée system.
Notice at the bottom of this order the comment "Double Check Everything" was imported from the main entrée system and added to this order using the Edit Comments new Import Order Comments feature. See the Edit / Import Comments chapter of this guide for more information.
Credits on Order Confirmations
If you are running the EOP app on the Google Nexus 7 Android tablet with the optional Bluetooth printer you will see the “CREDITS” title on the order confirmation followed by their item credits printed for your customers.
•See the Android Bluetooth Printing chapter of this guide for more information. |
|