P.O. Receiving Processing

Contents
When a purchase order is tapped it opens and displays all the items in the purchase order for processing receiving.
In this screen you can process receivables by:
▪Manually entering the Quantity Received and Weight Received values for each item using the number touch keypad.
▪Scan the barcode of the items being received to capture the information about the item.
The values entered will then update the main entrée system Inventory File.
The 3 Sections of the P.O. Receiving Processing Screen
•The top section has the Purchase Order / Vendor information with the Item Display Control buttons below.
▪Back - This button at the top of the screen takes you back to the previous screen.
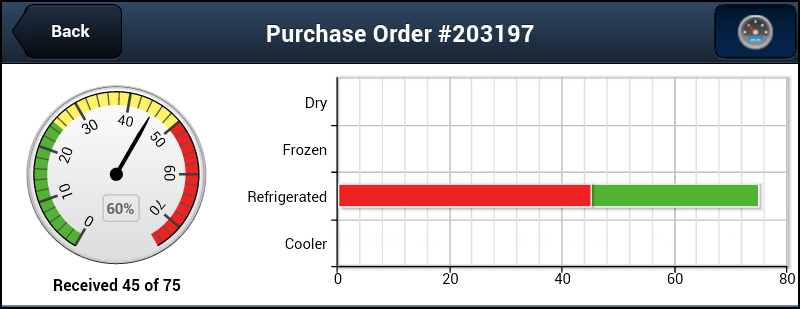
 The Progress Dashboard button will quickly get you information about the status of the Purchase Order Receiving in EWM during the day. See the Progress Dashboards topic in Common Features for more information.
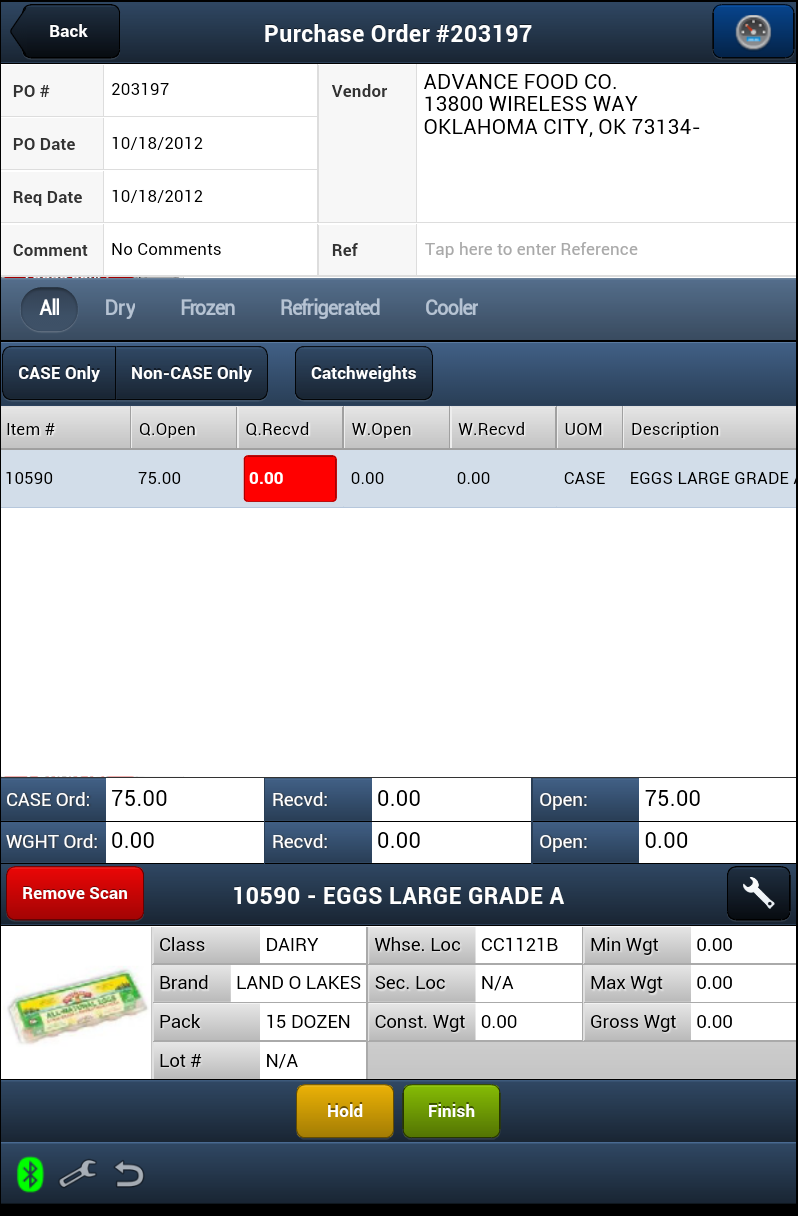
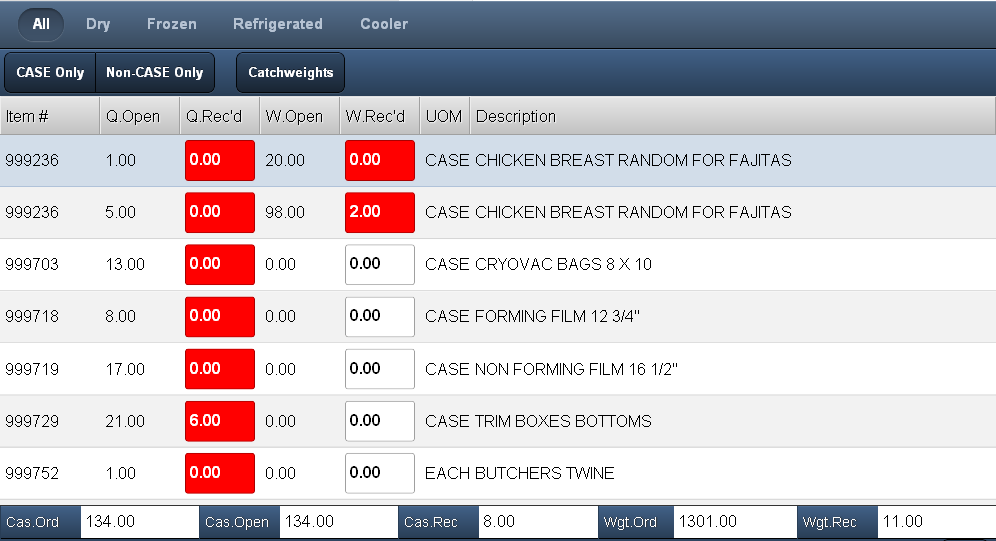
•In the middle section of the screen is the Purchase Order Item Detail section which lists all the items ordered on the selected purchase order. Tap the screen and drag up to scroll down to view the complete list of items purchased. In the bottom of this section the Case Ordered, Case Open, Case Received, Weight Ordered and Weight Received values are displayed.
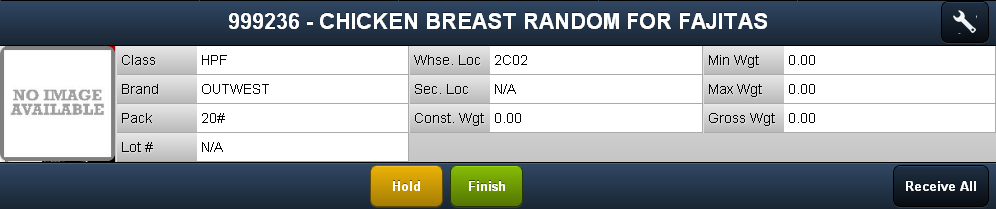
•The Item Information Panel is in the bottom section of the screen and displays the details about the currently selected line item.
To get instructions on how to customized it to suit your needs see the Item Information Panel Setup section of the Common Features chapter this guide.
•At the very bottom of the screen are the buttons you will use to process the purchase order, Hold, Finish and Receive All.
Purchase Order / Vendor Section
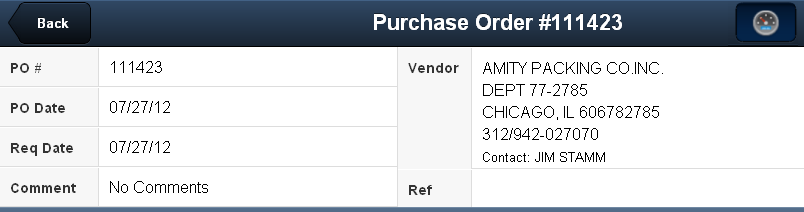
The Purchase Order / Vendor section includes:
▪Vendor - The vendor company name, address and contact information as defined in the main entrée system in Vendor File Maintenance.
▪P.O. # - The P.O. numbers assigned in the main entree system when the purchase order was created.
▪P.O. Date - The date the purchase order was created.
▪Req Date - Required date is the date the product should be received.
▪Comments - The comment added to the purchase order to be sent to the vendor. Tap View Comment when it is in this field to open the comment display box. It works the same as the Loading Sheet comment display.
▪Ref - The Reference field is used to a brief description of the transaction, users initials or an invoice number.
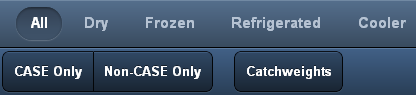
Item Display Controls
These buttons control what items are displayed on the screen. So if you need to receive Frozen foods just tap it and only those items will display.
•See the Buttons section of the Common Features chapter for details about the use of these buttons. |
|
Purchase Order Item Detail Section
This section of the screen will list all the items on the purchase order. The columns in this section: #, Item Number, Quantity Open, Quantity Received, Weight Open, Weight Received, UOM, and Item Description.
▪Here you will enter the Quantity Received and Weight Received values per item using the number touch keypad. You can also view the item details and view purchase history in this section.
Sorting Line Items
Tap any column header in the Purchase Order Receiving screen and the up/down arrow will display in the header column and reveal the sort direction. Tap the column header again to change the sort direction.
Viewing Item Details & Purchase History
It works the same way you would use it in the loading sheets screen. Double tap a line item listed in the loading sheet the item details screen will be displayed.
▪Tap the Back button here to return to the Purchase Order Receiving screen.
 At the bottom of the Item Details screen is the Purchases button. When you tap the Purchases button in the Item Details screen the purchase order history data for that line item is displayed.
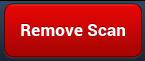 The primary reason for the Remove Scan feature is to allow workers to remove the scanned quantity and weight to correct errors during the scanning process. This button can also be used to remove scanned data on the item in the screen to allow for manual data entry.
▪Tap the scanned item to select it.
▪Tap the Remove Scan button.
▪The "Scan the item to be removed." dialog box will display waiting for you to scan the item.
▪Once the item has been scanned you can re-scan the item or manually enter the item's data.
Enter the Quantity Received Values
The Q.Rec'd column will be highlighted in red so you can enter the Quantity Received value for that item on the purchase order.
1. Tap the red Q.Rec'd data entry box.
2. Use the pop-up number touch keypad to tap in the value for the Q.Rec'd column. |
|
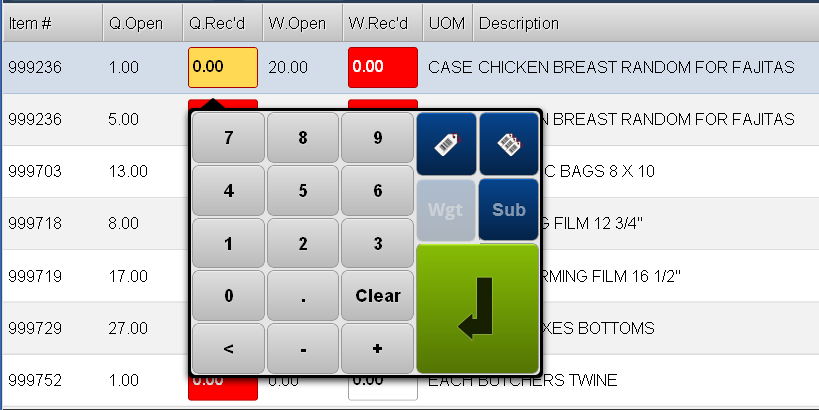
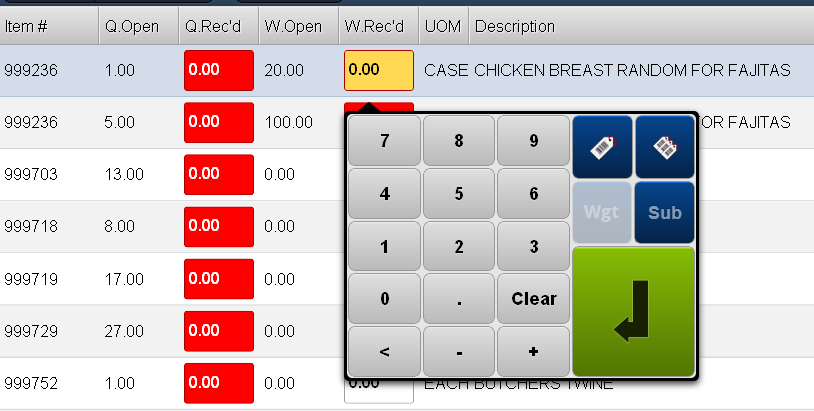
Enter the Weight Received Values
The W.Rec'd column will be highlighted in red so you can enter the total Weight Received value for that item on the purchase order.
1. Tap the red W.Rec'd data entry box.
2. Use the pop-up number touch keypad to tap in the value for the total W.Rec'd for the item in the column.
Weight & Case Section
In the bottom of this section of the Purchase Order Receiving screen the Case Ordered, Case Open, Case Received, Weight Ordered and Weight Received values are displayed. As each line item in the selected purchase order is updated the Wgt.Rec and Case.Rec values will change.
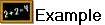 In the example below the W.Rec'd value of 20 entered is reflected in the Wgt.Rec value below.
P.O. Receiving Processing Buttons
▪Hold: Tap to release the current purchase order and return to the main Purchase Order Receiving screen. You can come back later to complete the work on the purchase order.
▪Finish: Tap to save any changes in the main entrée system and move the purchase order to the next step in processing.
▪Receive All: Tap to receive all items on the purchase order.