Website Manager

Contents
Website Manager Overview
If our System Administrator has designated you as a “Website Manager” you will be responsible for the day to day updates and overall design of our company’s entrée.NET website. A login account has been created with a new username and password assigned specifically for this role. The Website tab will be displayed in the menu upon log into the system. This chapter is written for companies who purchased the Website Only option featuring a website with just the “Catalog” and “Specials” pages, and the Website and all entrée.NET features option.
If we have the Website Only option our customers can only view your website and do not have the other functions that entrée.NET offers, such as entering orders.
You now have the ability to make website changes as required for our business. You can change images, update the content on our “Welcome,” “About Us,” “Contact,” and “Directions” pages. You will be able to automatically post our inventory list and specials, from our NECS entrée software, directly to our website, as often as you’d like.
The Website tab is composed of two sections which run along the left side of the screen. These include Content, Banner and Colors. Each of these will be described next.
 Content Overview
Updating the information in your website is a critical part of keeping your customers current with products, specials, and services provided by your business. If your customers know you frequently post your specials then they will make sure to check your website often to find those deals.
The content of your website is divided into Blocks, Menu and Pages which can contain text, hyperlinks and images. The image below shows color coded arrows indicating these areas of the web page.
Blocks are specific sections of various web pages within your website. The Blocks content areas of your website are:
•Blog – Allows distributors to post multiple articles or news posts on their website. This feature must be activated in the Settings tab by selecting "Yes" for the "Display Website Blog" option.
•Featured Vendors – Posted on your website home page this block allows you to highlight multiple vendors and their products.
•Latest News – This block is posted on all of your website’s pages in the lower right corner.
•Featured Item – Posted on your website home page this block allows you to highlight specials as “featured items”.
The Menu section of your website currently includes:
•Specials – When you check the “Display on website” box for an item in the Specials page, it will display the item on the Specials web page.
The Pages section of your website can include:
•Home – The main page of your website and the first page a customer visits.
•About Us – Use this page to tell your customers about your company.
•Contact – Provides website visitors with contact information for your company including phone numbers for various department and email links.
•Directions – Written directions to your office and/or business location(s). Google maps can be embedded into this page.
•Place Order – Customers will use this page to place online order using entrée.NET.
 The Place Order page is not included in the website for distributors who purchased the website only option.
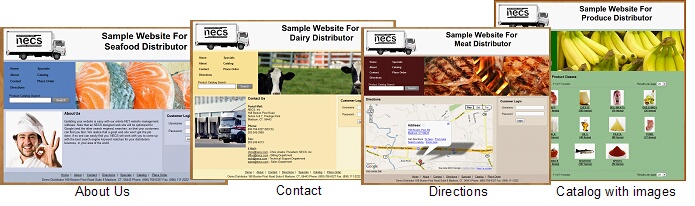
Website Examples
Home Page A "Join Our Email List" option has been added the website Home page Customer Login sidebar. Clicking the submit button opens a form for the website visitor to fill out.
The form information is then emailed to you and a new Prospect is created and assigned to a salesperson.
The information received from this form will help you generate more leads through your website Home page.
|
|
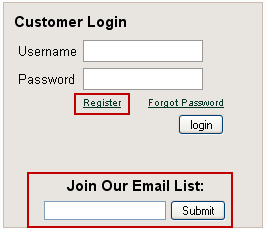
•Or you can add the “Join Our Email List” widget for your Constant Contact account to the Home page using the Email List button.
Please visit www.constantcomtact.com for more information about Constant Contact and creating email marketing campaigns.
* Constant Contact is a registered trademark of CONSTANT CONTACT,INC. Corporation
 A website Home page displaying entrée.NET features.
•Company Logo.
•Website Banner Feature for photo slide show.
•Website Background feature.
•Menu with Blog link.
•Product Catalog Search feature.
•Register feature (information follows).
•Forgot Password feature.
•Join Our Email List feature.
•Featured Brands which supports multiple vendors and their logos images that link the customer to the vendor's products in your catalog.
•Featured Item with photo.
•Social Networking links for Twitter and Facebook.
|
|
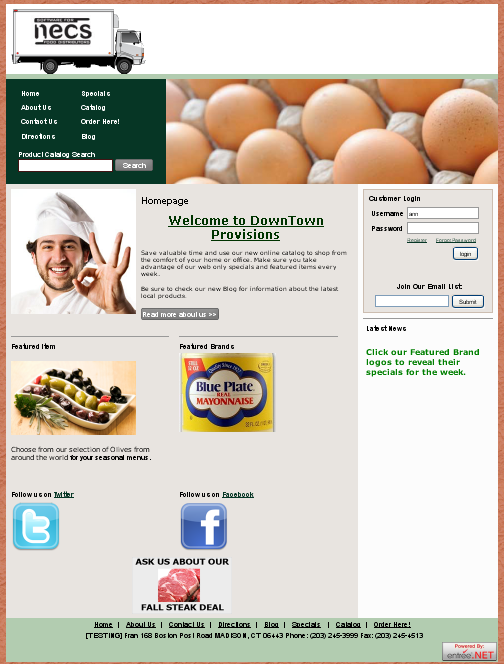
•Ads feature with links to Specials web page, Item Tags, Brand or Class. This content can be positioned at the top or bottom of the website Home page.
In the example above the Ad is the image of steak with the "Ask us about our Fall Steak Deal" text at the bottom of the page. The System Administrator will use the Settings tab to set up these Ads.
How Website Registration Requests Work
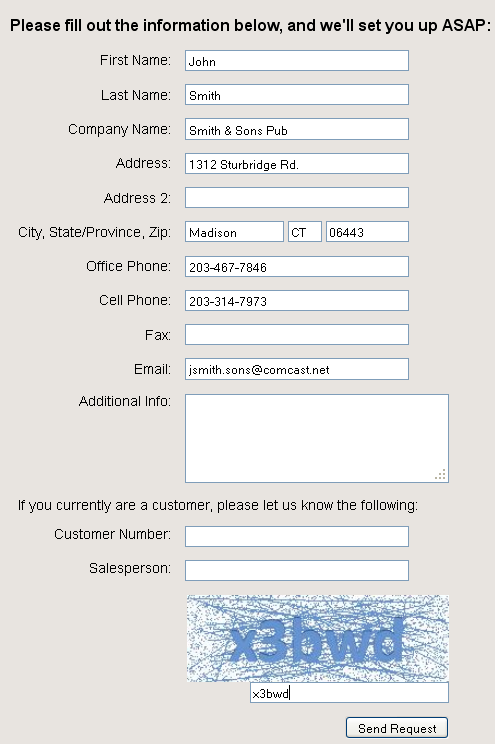
The Register button will allow customers to access this online registration form to request an entrée.NET account.
You must manually approve and setup any new customer accounts. See Creating an Account. |
|
•When the customer clicks the Register button they will have an online form to fill out (right).
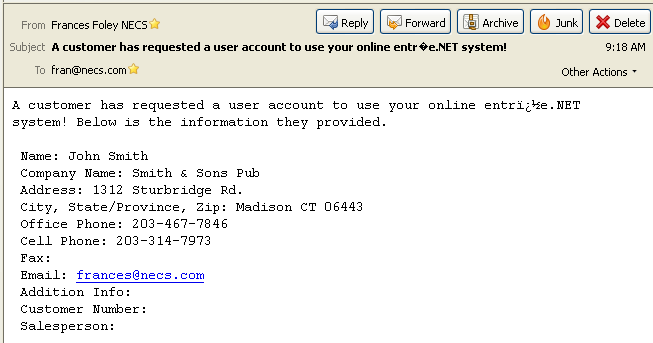
•Once the customer fills in the form, enters the security code displayed and clicks the Send Request button the information collected from the registration form is sent to you via an email.
|
|
•The customer will see this confirmation message displayed in your website.

•Once the email (see image below) is received from the website Register button you can review and process the requests for customer accounts.
Other Website Pages