Loading Sheet Processing
When a loading sheet is tapped it opens and displays all the items in the invoice. In this screen you can:
▪Enter Shipped Quantities
▪Enter Weights
▪View Comments
▪Substitute Items
▪Sort Line Items
▪Remove Pckd to organize your work and keep track of unpicked versus picked items.
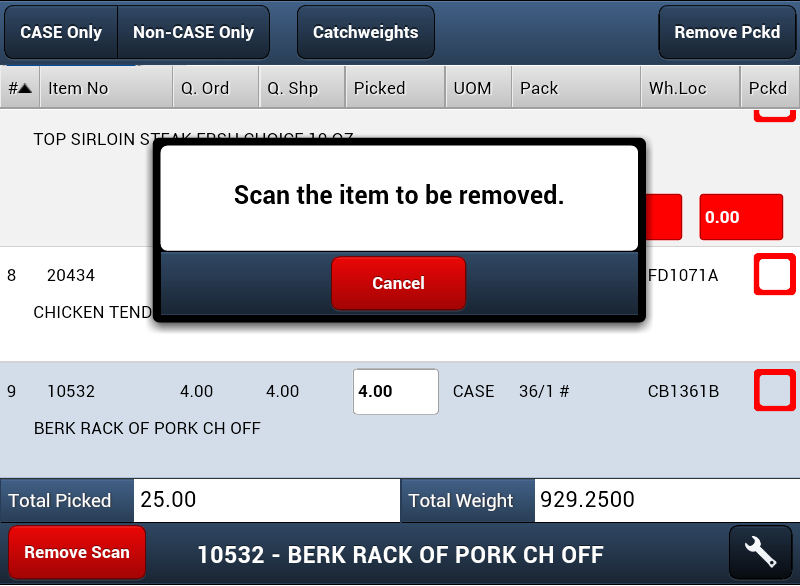
▪Remove Scan Tap to remove the scanned quantity and weight from an item for a re-scan or to allow for manual data entry.
▪Immediately Print Labels Per Line Item:
•One label for the current case.
•One label for each case of the line item.
▪Print Labels for the entire loading sheet in one tap or by Temperature Zone or just Add-Ons.
▪Finish
Non-Inventory Items
Loading Sheets that contain non-inventory items can be opened so you can manually enter the quantities to be entered for the non-inventory item.
 Due to the nature of non-inventory items it is not possible to support scanning entry for these items.
The 3 Sections of the Loading Sheet Screen
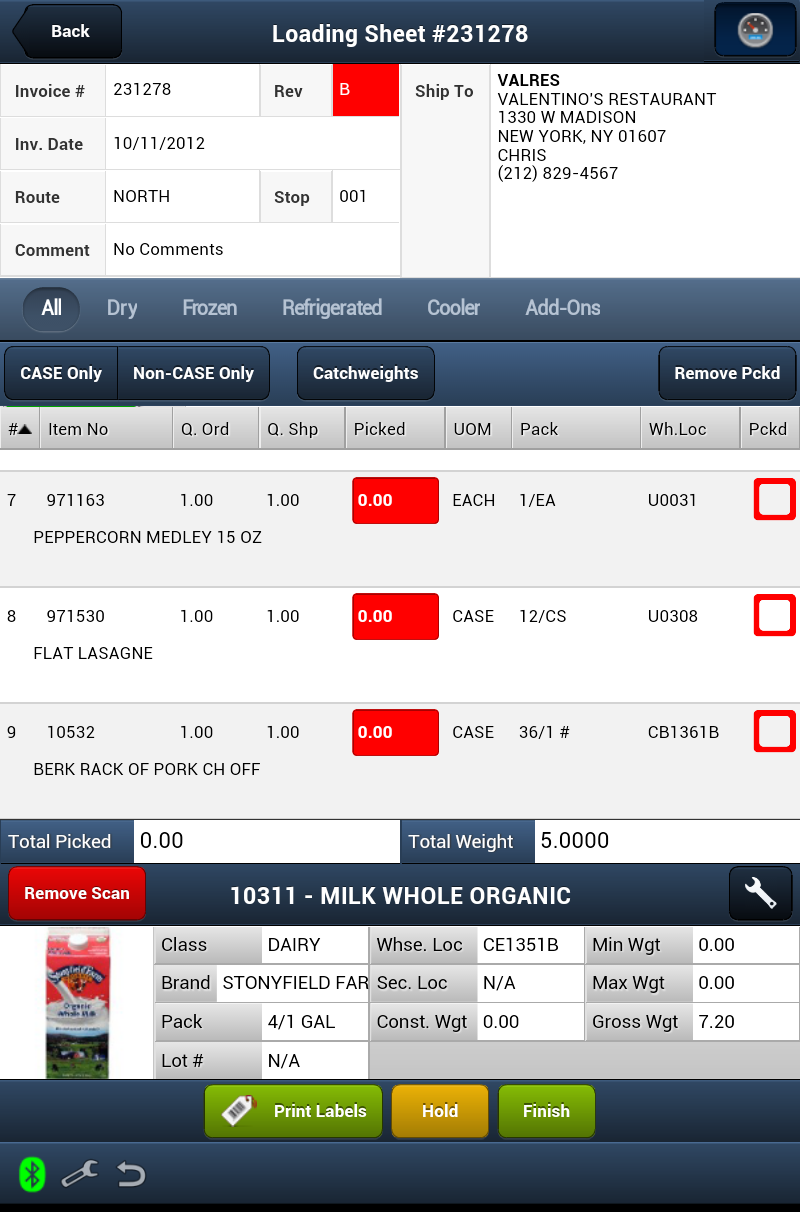
•The top section is the Invoice / Account information, below that section are the Item Display Control buttons.
▪Back - This button takes you back to the previous screen.
 The Progress Dashboard button will quickly get you information about the status of the Loading Sheets in EWM during the day. See the Progress Dashboards topic in Common Features for more information.
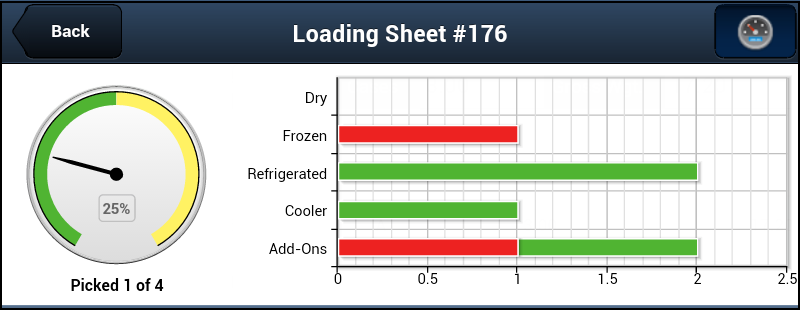
•In the middle of the screen is the Invoice Items section which lists all the items ordered on the Invoice. Tap the screen and drag up to scroll down to view the complete list of items.
▪Tap any column heading to sort the line items by that column. Tap the same column a second time to change the sort order from ascending to descending.
▪At the bottom are the Total Picked and Total Weight values for the loading sheet.
•The bottom section of the loading sheet screen has the Item Information Panel which displays the details about the currently selected item.
To get instructions on how to customized it to suit your needs see the Item Information Panel Setup section of this guide.
•At the very bottom of the screen are the buttons you will use to process the loading sheet, Print Labels, Hold and Finish. |
|
Invoice / Account Section
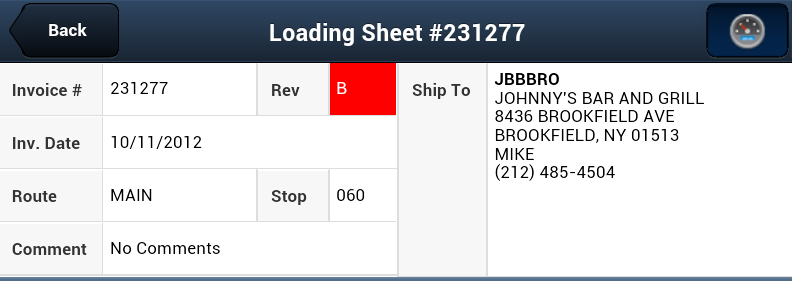
The top of the screen shows the account information for the invoice. This information includes: Invoice #, Revision number, Invoice Date, Route, Stop, Comments, Ship To, Contact and Phone number.
Viewing Comments
•If there is a comment on the order View Comment will be displayed in the Comment field.

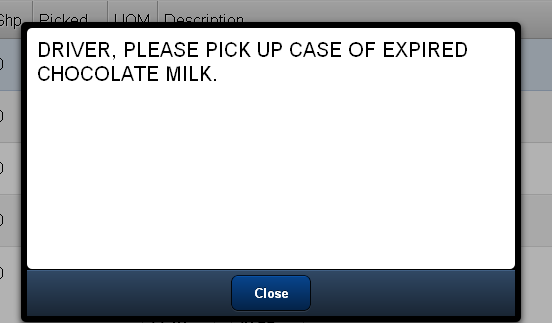
•Tap View Comment to open the comment display box seen in the image below. Tap Close in the display box to return to the loading sheet.
Item Display Controls
See the Buttons section of Common Features, for details about the use of these buttons. These button control what items are displayed on the screen. So if you need to work with Frozen foods just tap it and only those items will display.

Invoice Items Section
This section of the screen will list all the items on the invoice, in the default order your printed Loading Sheets normally sort by.
The columns in the Invoice Details section: #, Item Number, Quantity Ordered, Quantity Shipped, Picked, UOM, Item Description, Pack, and Warehouse Location.
▪Tap any column heading to sort the line items by that column.
▪Tap the same column a second time to change the sort order from ascending to descending.
▪Here you will enter weights for Catchweight / LB. items, update the value for the Picked field. |
|
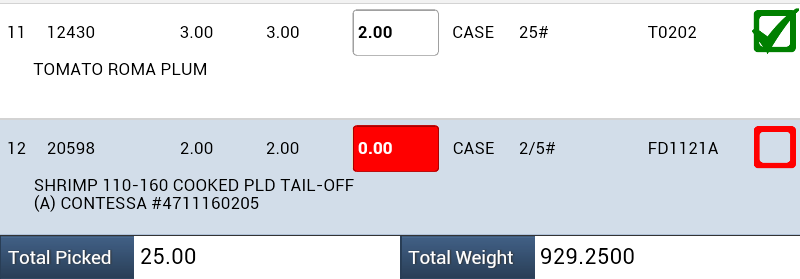
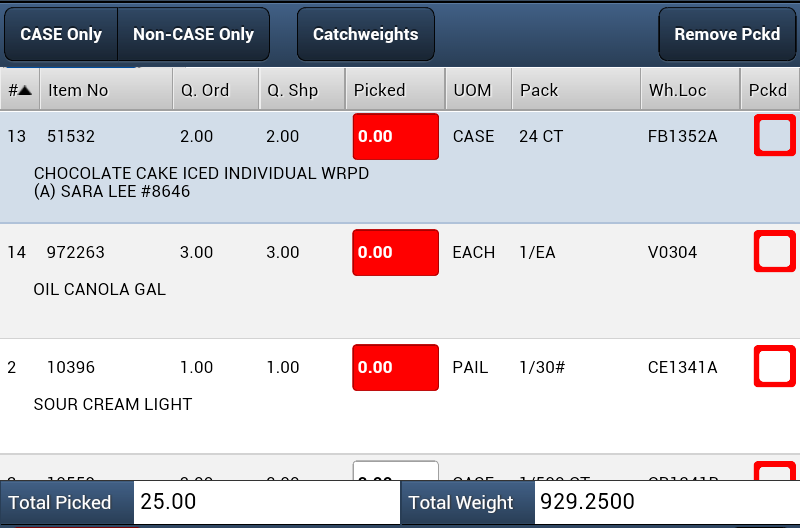
•Check the Pckd column box once an item has been picked and it turns green with a green check mark (image on next page).
 Use the Remove Pckd features to organize your work and keep track of unpicked versus picked items on the loading sheet.
▪ Tap the Remove Pckd button to remove all the picked items with a green check from the loading sheet screen.
▪Tap the Remove Pckd button again and the picked items will return to the screen.
 The primary reason for the Remove Scan feature is to allow workers to remove the scanned quantity and weight to correct errors during the scanning process. This button can also be used to remove scanned data on the item in the screen to allow for manual data entry.
▪Tap the scanned item to select it. ▪Tap the Remove Scan button. ▪The "Scan the item to be removed." dialog box will display waiting for you to scan the item. ▪Once the item has been scanned you can re-scan the item or manually enter the item's data. |
|
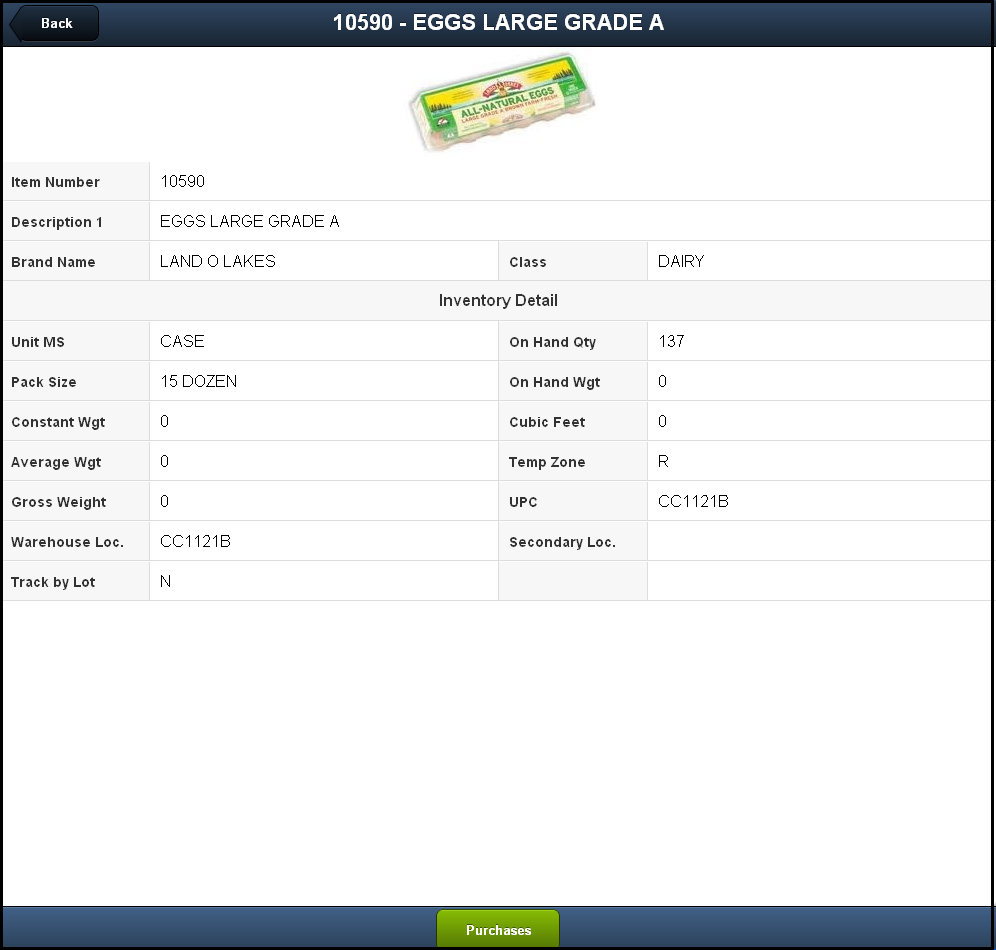
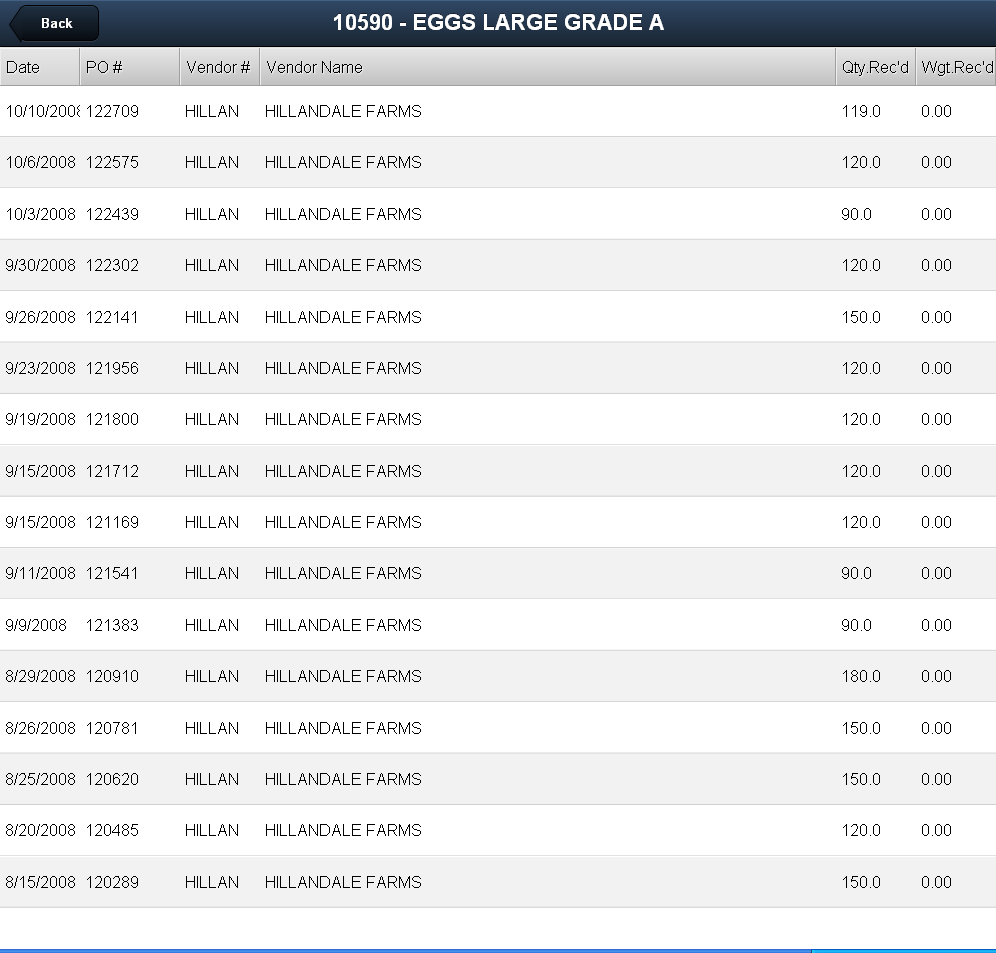
•You can also view the item details and purchase history as well as perform item substitutions.
▪Item Substitutions
You can also perform an Item Substitution which is used to replace an item in the loading sheet with another item from Inventory. The use of Item Substitution is covered in the next section of this chapter.
▪Sorting Line Items
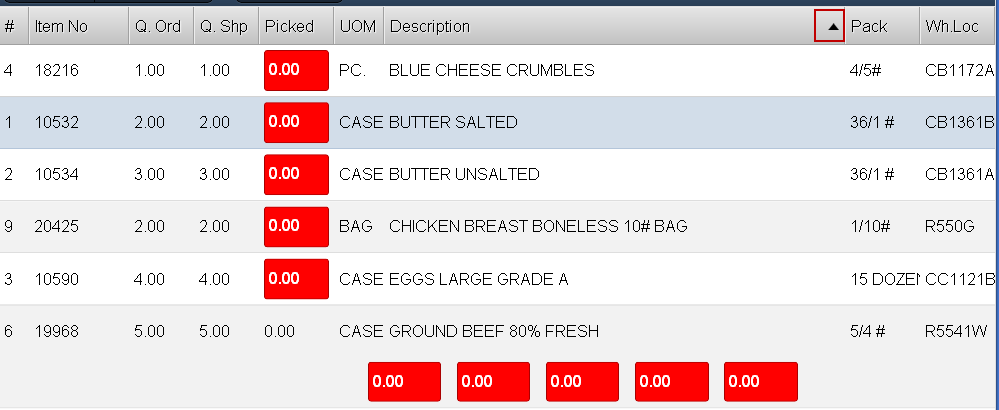
Tap any column header in the Loading Sheet screen and the up/down arrow will display in the header column and reveal the sort direction. Tap the column header again to change the sort direction. In this example we are sorting by Description. The sort direction arrow is outlined in red.
Viewing Item Details & Purchase History
If you double tap a line item listed in the loading sheet the item details screen will be displayed.
Tap the Back button to return to the Loading Sheet screen.
▪At the bottom of the Item Details screen is the Purchases button.
|
|

•When you tap the Purchases button in the Item Details screen the purchase order history data for that line item is displayed. |
|
Enter Catchweight Values
In the example here there are 2 cases to enter weight values for. Here is how it works:
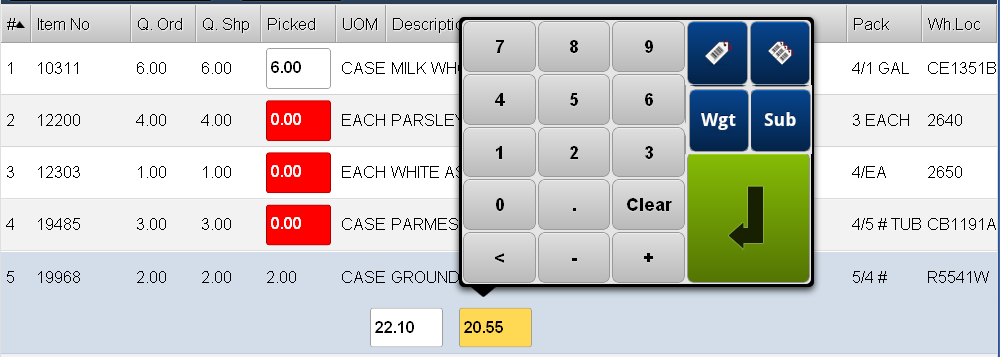
1. Tap the red weight entry box and the number touch keypad will open.
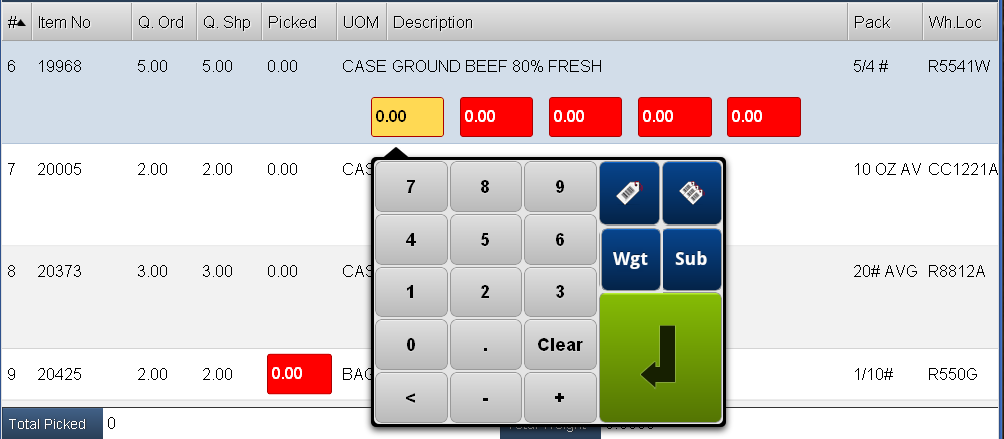
Highlighted in red are the weight entry boxes and Picked column that need values.
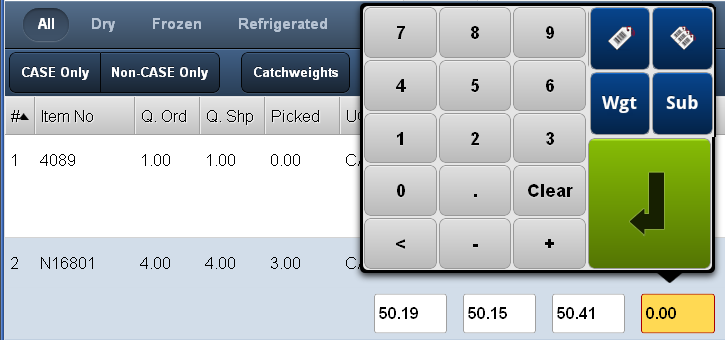
Data entry boxes will turn yellow when they are being edited and white once the data is entered.
The black arrowhead on the touch keypad above will point to the data entry area being edited.
2. Use the number touch keypad to enter the weight values using either the Tap & Enter Method for each case or capture the values from a Bluetooth Scale using the Scale Method.
 Both weight entry methods including label printing options are described below in the Catchweight / LB. Entry Methods section below.
See the Number Touch Keypad Tools section of Common Features, to learn more about the use of the number touch keypad tools pictured below.
3. To immediately print your label use the number touch keypad tools:
a.Tap
b.Or tap |
|
Catchweight / LB. Data Entry Methods
Tap & Enter Method
a. Tap the red weight entry box and use the number touch keypad to tap in the value.
b. Then tap the green Enter key to move to the next red weight box and tap in the numbers to enter the next weight value.
c. Continue this process until all the weight values are entered for the item. |
|
Scale Method
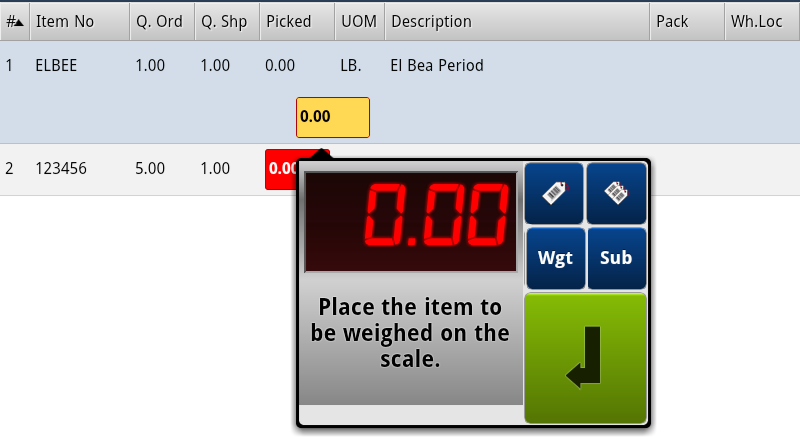
a.Tap the red weight entry box. Put the item case to be weighed on your Bluetooth Scale.
b.Then tap the Scale button  to begin the weight capture from the Bluetooth Scale.
c. The scale weight will now display on your tablet in a pop-up window with number touch keypad tools.
d. Follow the message displayed and "Place the item to be weighted on the scale." e. Once the weight value is displayed tap the green Enter key to accept the scale value. |
|
f. Tap the next red weight entry box.
g. To immediately print your labels use the number touch keypad tools.
h. Continue this process until all the weight values are captured from the Bluetooth Scale.
Enter Item Picked Values
Once weights have been entered for all your Catchweight / LB. items then the Picked column will outlined in red so you can enter / update the Picked value.
•Items that do not require weight values will have just aPicked data entry box with a red fill so you know to enter the number picked.
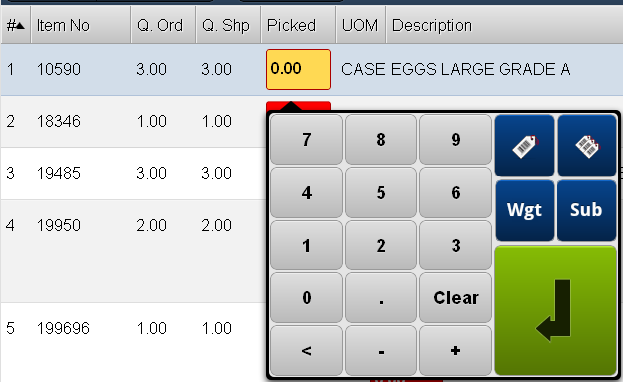
1. Tap the red Picked data entry box.
2. Use the pop-up number touch keypad to tap in the value for the Picked column.
3. To immediately print your label use the touch keypad tools:
a. Tap
b. Or tap |
|
c. The print feature will only print unprinted labels by default. You will be prompted to reprint if all labels have been printed.
 If you want to quickly see the items that have not been picked yet, tap the "Picked" column header. This will sort the items by picked quantity bringing all the zero quantity items to the top. Otherwise you must scroll through all the line items on the screen to find any red boxes in the picked column.
Loading Sheet Processing Buttons

▪Print Labels: Tap to print all the labels associated with the loading sheet.
▪Hold: Tap to save all data entered and release the current loading sheet. You will return to the Route Loading Sheets screen. You can come back later to complete the work on the loading sheet.
▪Finish: Tap to save any changes, update the main entrée system and normally you will print the final invoice.
The next topic is an overview of the Finish Process for Loading Sheets.
Finish Process for Loading Sheets
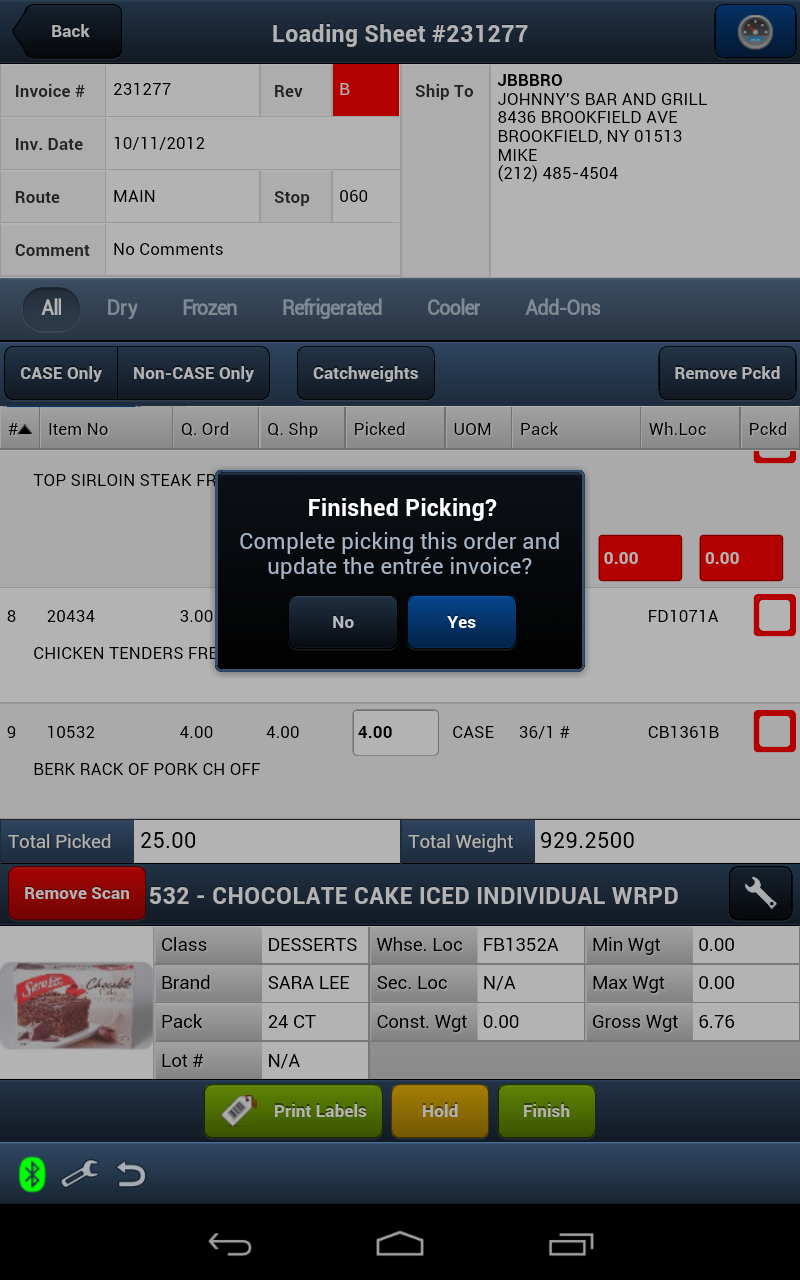
1.Once you have completed the process of entering values for all the catchweights and picked columns you will see the final Total Picked and Total Weight values for the invoice displayed.
2.Tap the Finish button at the bottom of the Loading Sheet screen and the Finished Picking? dialog box will display.
3.Tap No to return to the loading sheet screen or tap Yes to proceed with the Finish process. |
|
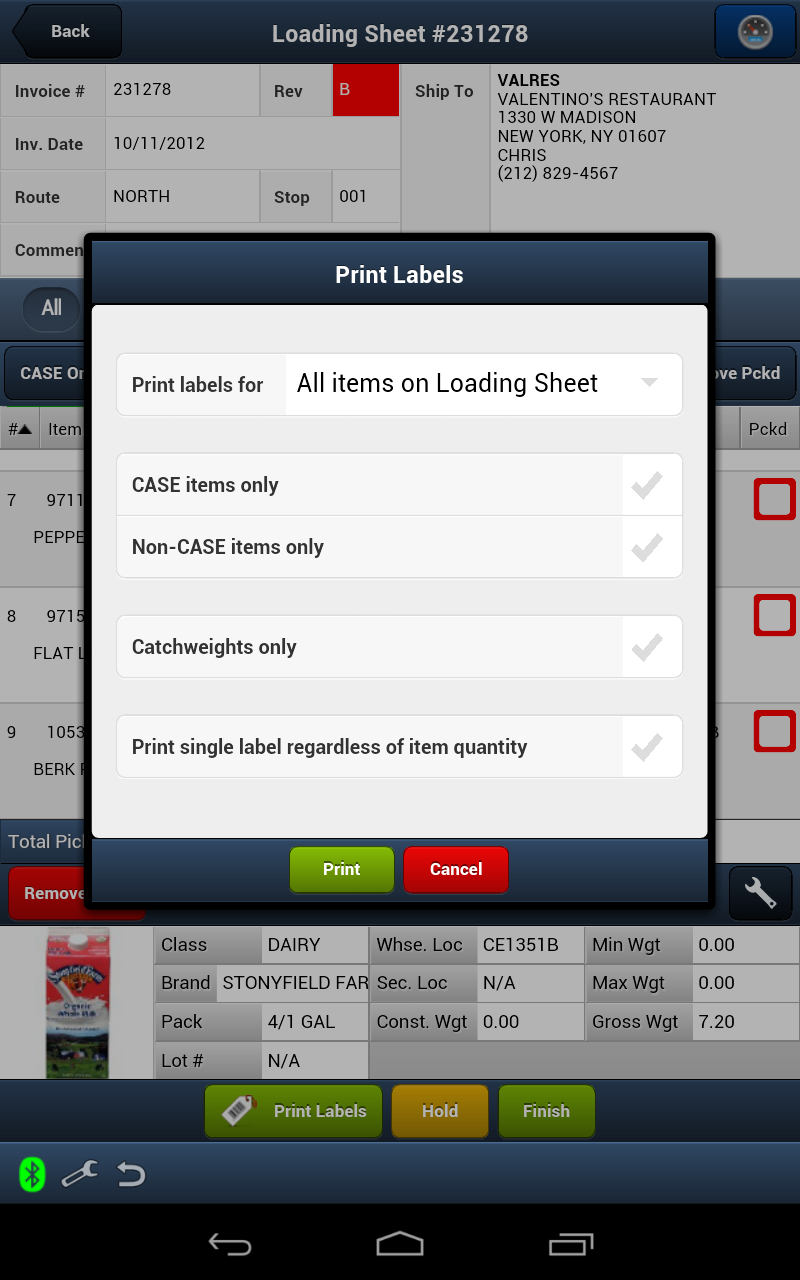
4. If you tap Yes the Print Labels dialog box will display. If you tap No the label print process will be aborted.
Label print options are:
▪Print Labels for (see options below)
▪Case items only
▪Non-Case items only
▪Catchweights only
▪Print single label regardless of item quantity
Tap the gray check marks to select what you would like printed.
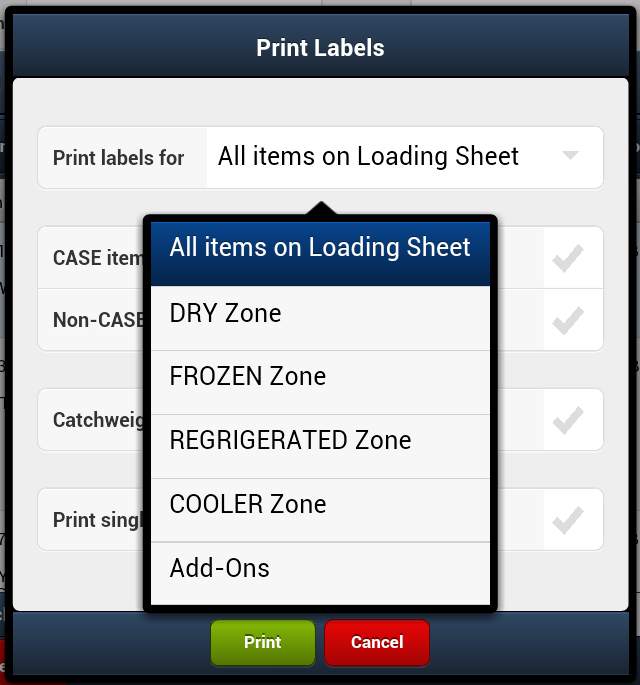
Options for Print Labels for:
▪Tap the arrow to view the print options menu. ▪Then tap the desired print option.
|
|
5. Tap the Print button to proceed with printing to the assigned printer.
 In entrée the Printers tab of System Preferences in where you can assign printers for this task.
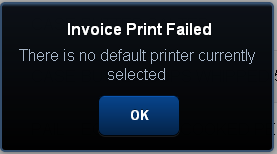
If there is a problem with printing you may see an error message like this one display.
Please check the Printers tab of System Preferences in entrée to be sure a default printer has been assigned. |
|
The next topic is an Item Substitutions in Loading Sheets.


 to print a label for