Create Order

Contents
When you tap the Create Order option in the menu a list of the your Customers will be displayed. The information in the Customers screen is populated by data entered in the Customer Maintenance utility in entrée. You must define your customers in entrée and run the entrée export to entrée.NET to see them listed in entrée.NET and Electronic Order Pad. See the Export to entrée.NET section for an overview.
If you are defined as a ‘Sales Manager’ in the system then you will have access to all your company's customers. If not, you will only see the customers assigned to you.
 If you select a customer who has pending orders that have not yet been completed, you will be able to chose one of these orders to complete or you can start a new order.
Bill-To-Master Customer Feature
In v3.5.2 support was implemented for the Bill-To-Master customer feature which gives you the ability to view and place orders for all linked Ship-To locations using the Bill-To-Master.
System Option #115 "Allow 'Bill To' customers to place orders for linked 'Ship To' customers has been added in entrée.NET to enable this feature.
Once enabled you sign into the system using the Bill-To-Master entrée.NET account to access Ship To locations for placing orders, viewing order status and history, and reporting on all the linked locations.
Create Order Menu Tabs on the right side:
•Home Tab - Returns you to the main menu.
•Catalog Tab - Search for and select items to add to your customer's order.
•Std. Order Tab - Displays all of the items that your customer has purchased from you in the past.
•Quick Entry Tab - Enter item numbers here to quickly create an order.
•Specials Tab - Shows you all the item's which have sale pricing or promotions
•Fall Off Tab - See the items that have 'fallen off' a customer's ordering history.
•Credits Tab - To enable this tab set the "Allow Salesperson to enter credits on orders" option to "Yes".
•Price Tab - Displays all of a specific item's defined Price Levels.
•History Tab - Shows a customer's sales history for a selected item.
•Lots Tab - Only appears when a item tracked by lot is selected in the order.
•GP Review Tab - Shows all items in the current order with gross profit values.
•Finish Tab - Get the order processed using the Complete Order, Hold Order and Cancel Order buttons and Email Order.
Create Order Process Overview
1.Click Create Order in the Home menu and the Customers screen will be displayed.
2.Find the desired customer by using the Tap to enter search terms for customers: search tool. Enter your search text and tap the customer line to select it.
3.The customer's standard order will display for you to begin a new order. If you select a customer who has pending orders that have not yet been completed, you will be able to chose one of these orders to complete, or start a new order.
4. Enter a Delivery Date or tap the drop down arrow and select a date from the calendar tool.
Tap Done Tap Cancel to stop the Delivery Date change process. |
|
 when your month and day are selected.
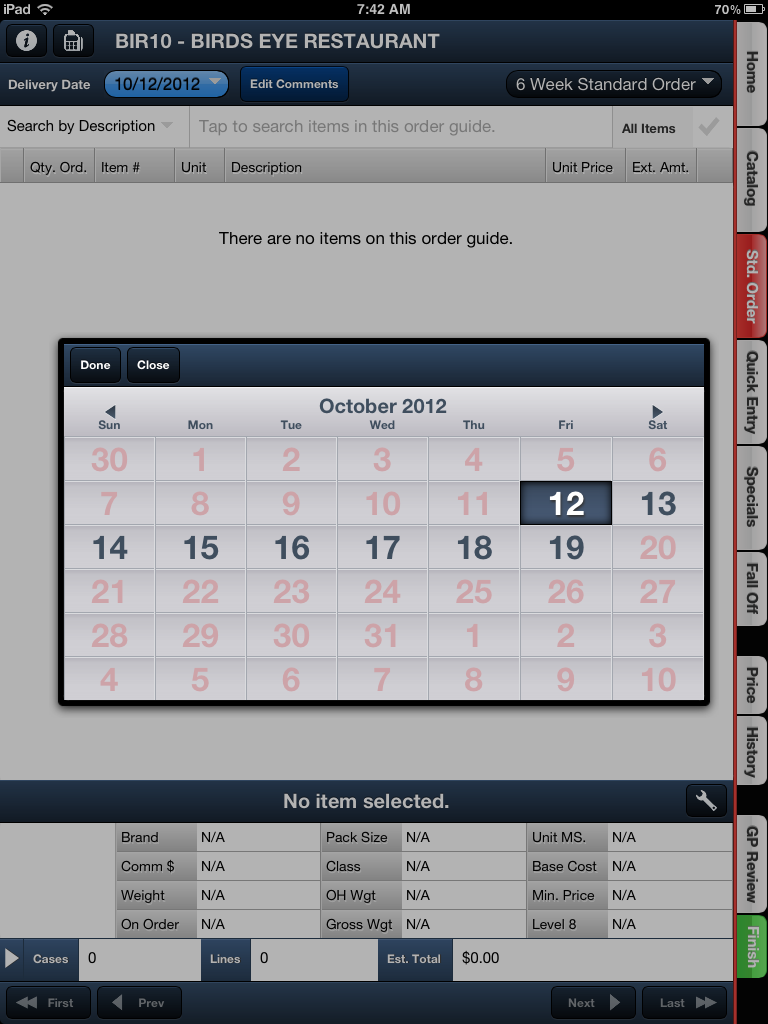
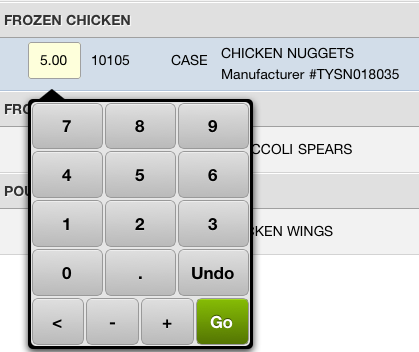
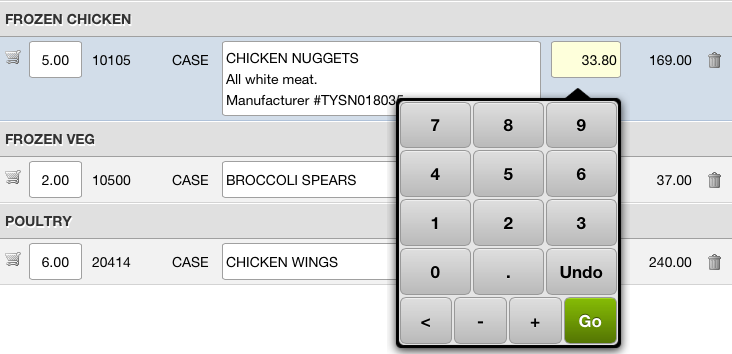
5. Adjust the quantity for items by tapping in the Qty text box. a.A number keypad will display. b.Enter the Qty number. c.Click Go in the keypad to save and move to the next Qty field. d.Click Undo in the keypad to set the last Qty value back to zero. e.To close the number keypad click off the keypad. |
|
6. Adjust the Unit Price by tapping in the Unit Price text box. a. When the keypad displays enter the new Unit Price. b.Tap the Go button and the cursor will make the change and move to the next Unit Price field to make another change. |
|
7. Use the Catalog, Quick Entry, Specials, Fall Off, Price, History and GP Review tabs in the menu on the right to complete the order. These menu options will be covered in detail later in this chapter.
8. Tap the Finish tab to complete and submit your order.
•Because the Electronic Order Pad application requires wireless access to your entrée.NET server, activity like creating a customer order, is saved on the server as the order is built. So, if the tablet looses wireless access or powers down suddenly, no data will be lost. Instead, the order status will immediately and automatically go into the 'On Hold' status. You will simply log back in, go to the Open Orders option in the main menu and complete the order exactly where they left off.
Create Order Messages
•Credit Hold Message: A Credit Hold message may display for the customer. This message is only a warning and will not prevent you from creating an order. Click OK to close the pop-up message box.
•Pending Orders Message: If a customer has a pending order a pop-up box will display with the following columns:
▪Dlv. Date - Delivery Date. ▪Est. Total - Estimated order total. ▪Est. GP$ - Estimated Gross Profit dollars. ▪Est. Comm$ - Estimated Commission dollars. ▪P.O. Number. - Purchase Order number. ▪Created - Date and time the order was created.
|
|
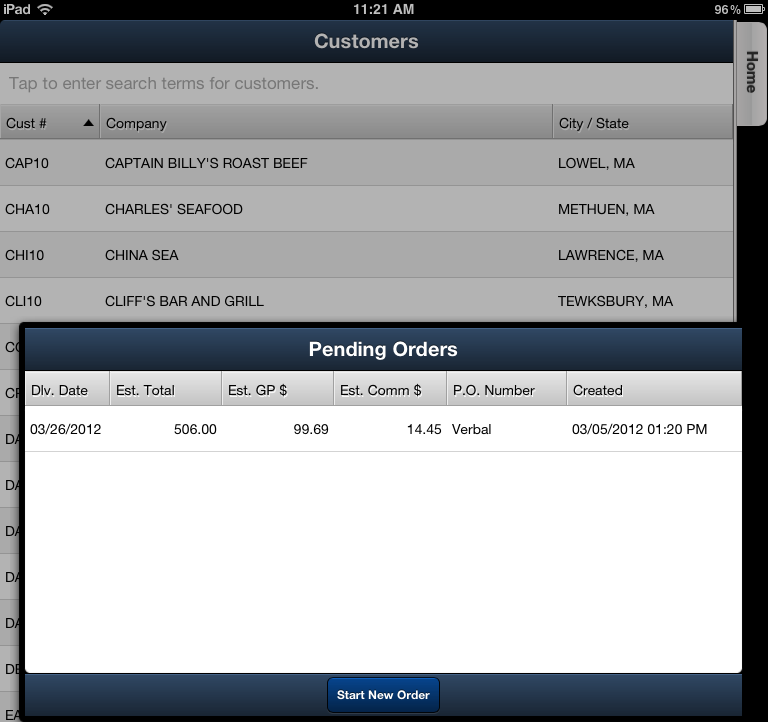
For Pending Orders you have two options
1. Click the Start New Order button.
2.Tap the pending order to open it and continue with that order.
When in Create Order there will be a series of tabs that run down the right side of the screen. The first of these tabs is titled Catalog.
When viewing the Catalog, your DSR will have full access to your complete inventory data file, with the ability view by item 'Class' or 'Brand Name' with advanced search capabilities. See the Catalog chapter presented earlier in this guide for detailed information.
Editing Description lines 1 - 4
You have the ability to Edit Description Lines 1 - 4 for items while creating an order. The system will remember these customer specific item description edits the next time this item is sold to the customer.
This feature must be enabled by setting the "Allow salespeople to edit item Description Lines 1-4" system option to "Yes" in the Settings tab Options in entrée.NET. See the entrée.NET Options chapter for more information.
At any point while creating an order tap the Edit Comments button, located at the top of the screen, to create or edit comments about the order.

At any point during the Create Order process, you can tap the calculator icon in the top left corner of the screen, to view the customer's Accounts Receivable (A / R) information.

During the Create Order process, you can tap the circled “i” icon in the top left corner of the screen, to view the Customer's Information.
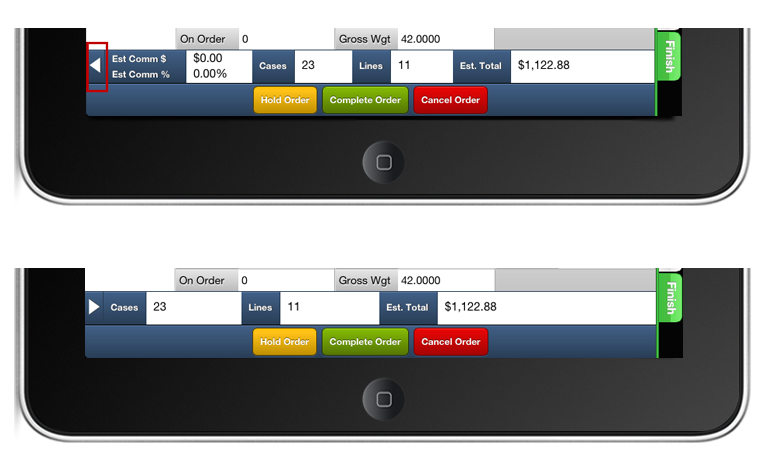
Quick Hide Gross Profit
When creating an order in the proximity of the customer (many will be intrigued and try to closely watch what the DSR does on their tablet) or someone you don't want to show GP and Commission information, the DSR has the option to quickly hide this information via the directional icon located to the left of the GP / Commission section.
Simply touch the arrow directional icon once to quickly hide the information from view. Touch the arrow again to bring it back into view.
You can also choose to not have the GP / Commission information show as a default when creating orders via the 'Settings' menu option on the main menu.
 In the top image you see the Gross Profit information clearly displayed. Once you tap the white hide / show toggle arrow your Gross Profit information is hidden (bottom image) until you decide to show it again.